Candy Swirl Wrapsody Blanket Free Pattern – Knit a Sweet Confection Cocoon
Candy Swirl Wrapsody Blanket Free Pattern – Knit a Sweet Confection Cocoon
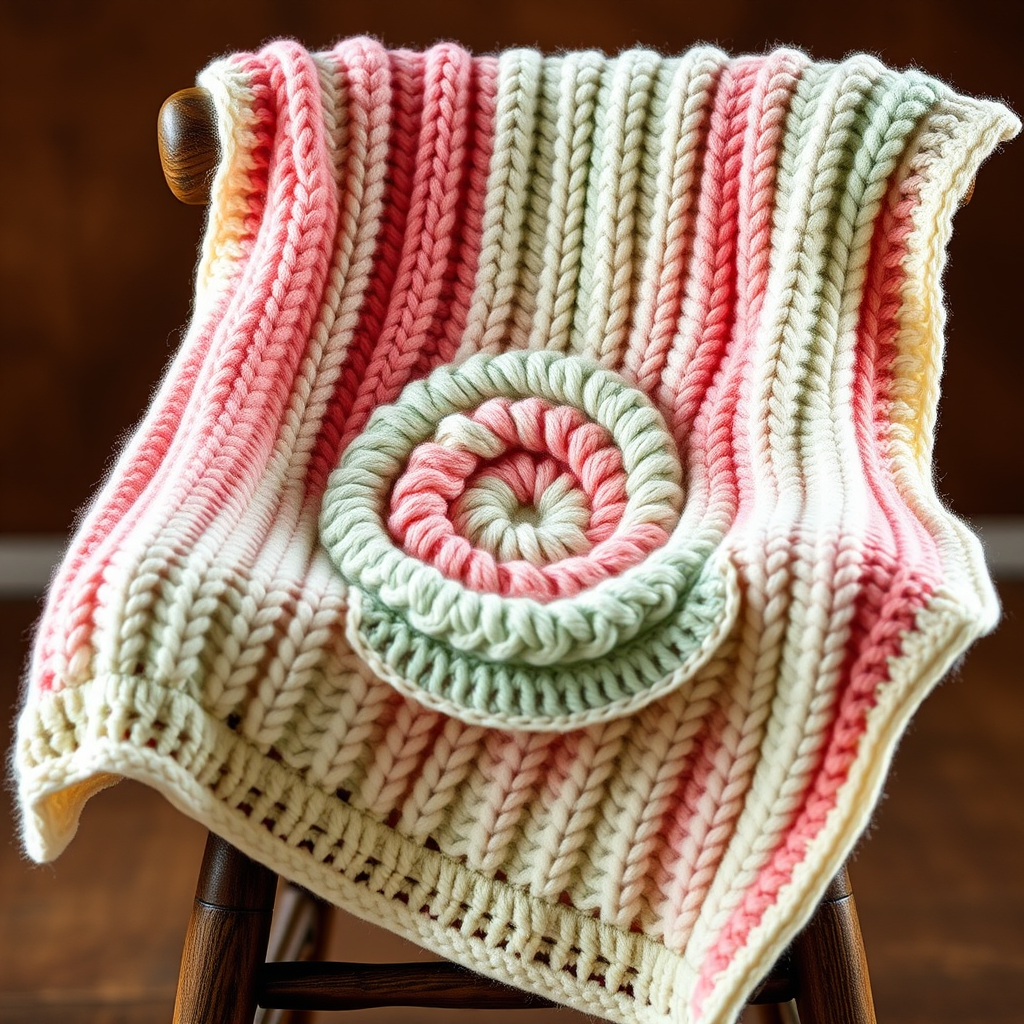
Wrap your little one in a cloud of spun sugar with this enchanting blanket that mimics the swirl of vintage hard candies. The clever use of slipped stitches and short rows creates a dimensional, peppermint-like texture that's as cozy as it is captivating. This heirloom-quality piece is surprisingly beginner-friendly, and the reversible design means it looks beautiful from every angle. Whether you're knitting for a new arrival or searching for a heartfelt handmade gift, this pattern delivers a sweet, nostalgic, and utterly cozy result.
Materials Needed
Before you begin, gather the following supplies. This pattern uses worsted weight yarn in three pastel shades to achieve that candy-shop aesthetic.
- Yarn: Worsted weight yarn in 3 colors: Candy Pink (A), Mint Green (B), and Vanilla Cream (C) – approx. 800 yds total (300 yds A, 300 yds B, 200 yds C)
- Needle: US Size 7 (4.5 mm) circular knitting needle, 32-inch cable (or size needed to obtain gauge)
- Gauge: 18 stitches and 24 rows = 4 inches in stockinette stitch (after blocking)
- Notions: Stitch markers (optional), tapestry needle for weaving in ends, blocking pins
Step-by-Step Instructions
This blanket is worked in one piece from the bottom up, using a combination of slipped stitches and short rows to create the candy swirl effect. The pattern is reversible, with a subtle texture on both sides. Follow along carefully, and you'll have a stunning confection cocoon in no time.
Abbreviations
- K = knit
- P = purl
- Sl = slip stitch purlwise with yarn in back (unless noted)
- W&T = wrap and turn (short row technique)
- K2tog = knit two together
- Yo = yarn over
- RS = right side
- WS = wrong side
Pattern Notes
- The blanket is worked in a multiple of 8 + 6 stitches.
- The slipped stitches create columns that mimic the stripes of a candy swirl.
- Short rows are used to create the curved, swirled shape.
Cast On
With Color A, cast on 86 stitches loosely. Take your time here—a loose cast-on ensures the bottom edge has the same stretchy, plush feel as the rest of the blanket.
Set-up Row (WS)
Purl all stitches. This row establishes the base for the pattern.
Main Pattern
Now we'll begin the main body of the blanket. This section creates the vertical candy stripes using slipped stitches. Repeat these 6 rows until the piece measures 30 inches from the cast-on edge, ending with a Row 6.
- Row 1 (RS): With Color A, K6, *Sl 2, K6; repeat from * to end.
- Row 2 (WS): With Color A, P6, *Sl 2, P6; repeat from * to end.
- Row 3 (RS): With Color B, K2, *Sl 2, K6; repeat from * to last 4 stitches, Sl 2, K2.
- Row 4 (WS): With Color B, P2, *Sl 2, P6; repeat from * to last 4 stitches, Sl 2, P2.
- Row 5 (RS): With Color C, K6, *Sl 2, K6; repeat from * to end.
- Row 6 (WS): With Color C, P6, *Sl 2, P6; repeat from * to end.
Tip: When slipping stitches, always slip them purlwise with the yarn in back on RS rows and yarn in front on WS rows. This keeps the floats tidy on the wrong side.
Short Row Swirl Section
This is where the magic happens! The short rows create the curved, swirled shape in the center of the blanket. This section is worked over the center 50 stitches. Don't worry if it looks a bit odd at first—the wraps will be closed later, and the swirl will emerge beautifully.
- Row 1 (RS): With Color A, K18, W&T.
- Row 2 (WS): Purl back to beginning (do not work wrapped stitch).
- Row 3 (RS): With Color B, K26, W&T.
- Row 4 (WS): Purl back to beginning.
- Row 5 (RS): With Color C, K34, W&T.
- Row 6 (WS): Purl back to beginning.
- Row 7 (RS): With Color A, K42, W&T.
- Row 8 (WS): Purl back to beginning.
- Row 9 (RS): With Color B, K50 (this is the center), W&T.
- Row 10 (WS): Purl back to beginning.
- Row 11 (RS): With Color C, K42, W&T.
- Row 12 (WS): Purl back to beginning.
- Row 13 (RS): With Color A, K34, W&T.
- Row 14 (WS): Purl back to beginning.
- Row 15 (RS): With Color B, K26, W&T.
- Row 16 (WS): Purl back to beginning.
- Row 17 (RS): With Color C, K18, W&T.
- Row 18 (WS): Purl back to beginning.
Now work the short row section in reverse to complete the swirl:
- Row 19 (RS): With Color A, K26, W&T.
- Row 20 (WS): Purl back to beginning.
- Row 21 (RS): With Color B, K34, W&T.
- Row 22 (WS): Purl back to beginning.
- Row 23 (RS): With Color C, K42, W&T.
- Row 24 (WS): Purl back to beginning.
- Row 25 (RS): With Color A, K50, W&T.
- Row 26 (WS): Purl back to beginning.
- Row 27 (RS): With Color B, K42, W&T.
- Row 28 (WS): Purl back to beginning.
- Row 29 (RS): With Color C, K34, W&T.
- Row 30 (WS): Purl back to beginning.
- Row 31 (RS): With Color A, K26, W&T.
- Row 32 (WS): Purl back to beginning.
Finishing the Swirl Section
Work one row across all stitches with Color A, knitting the wrapped stitches together with their wraps to close the short rows. This step is crucial—it hides the wraps and creates a smooth, seamless swirl. Take your time and make sure each wrapped stitch is worked together with its wrap.
Continue Main Pattern
Now that the swirl is complete, we'll return to the main pattern. Repeat Rows 1-6 of the main pattern (starting with Color A) until the blanket measures 40 inches from the cast-on edge, ending with a Row 6. This will create a balanced, symmetrical look with the swirl centered.
Edging
With Color C, work 6 rows of garter stitch (knit every row) across all stitches. This creates a clean, finished border that frames the blanket beautifully. Bind off loosely knitwise—this ensures the edge remains stretchy and doesn't pucker.
Finishing
Weave in all ends carefully, making sure to secure them well so they don't come loose with use. Block gently to shape, pinning out the swirl curves to emphasize the dimensional texture. Allow to dry completely before gifting or using.
And there you have it—a stunning Candy Swirl Wrapsody Blanket that looks like a confectionery dream! The combination of slipped stitches and short rows creates a texture that's both visually striking and wonderfully cozy. Whether you're a seasoned knitter or a beginner looking for a rewarding project, this pattern is sure to become a favorite. Happy knitting!


