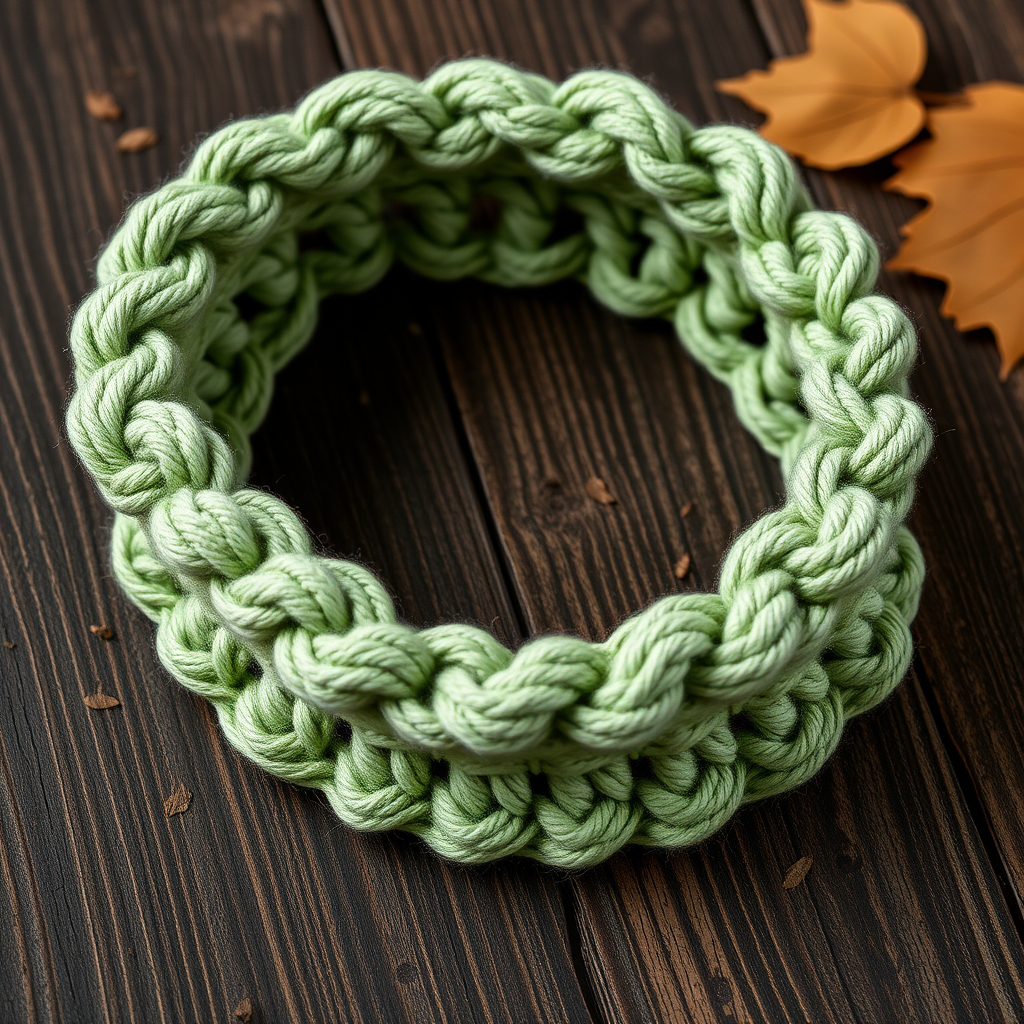
Frosted Lilac Eyelet Ear Warmer Headband Free Pattern

Frosted Lilac Eyelet Ear Warmer Headband - Free Crochet Pattern
Introduction
Welcome to your very first crochet project! This Frosted Lilac Eyelet Ear Warmer is the perfect starting point for anyone who has never held a crochet hook before. It is a narrow, cozy rectangle worked in simple stitches, decorated with a single column of pretty see-through eyelet ovals down the center and one soft white "frosted" accent row for a Nordic winter touch. When you finish, you will have a soft, stretchy, warm headband about 20 inches (51 cm) around and 3.25 inches (8 cm) wide that sits snugly over your ears. The lilac yarn feels gentle and plush, and the little eyelet openings give it a handmade, boutique look you will be proud to wear or give as a gift.
Materials Needed
- Yarn: Worsted weight (category 4) acrylic or wool-blend yarn, approximately 110–120 yards total. You need about 100 yards of lilac (main color, MC) and 10–15 yards of soft white (contrast color, CC).
- Crochet hook: 5.0 mm (US size H/8).
- Stitch markers: At least 2, to mark your first stitch and the center eyelet column.
- Tapestry needle (yarn needle): A large-eyed blunt needle for seaming and weaving in ends.
- Scissors: Sharp craft scissors for cutting yarn.
- Measuring tape: For checking gauge and finished size.
- Blocking supplies (optional but recommended): A spray bottle of water and a flat, pinnable surface (a towel or blocking mat).
Finished size: Flat rectangle before seaming is approximately 20 inches (51 cm) long x 3.25 inches (8 cm) wide. Finished loop circumference is approximately 20 inches (51 cm), fitting a head circumference of 20–23 inches (51–58 cm) with a snug, stretchy fit.
Abbreviations and Beginner Glossary
Every abbreviation used in this pattern is explained below in plain English. Read through this list once before you begin — you do not need to memorize it!
- ch – chain. Make a loop of yarn on your hook (a slip knot), then wrap the yarn over the hook and pull it through the loop on your hook. That is one chain.
- sc – single crochet. Insert your hook into the stitch, wrap yarn over the hook, pull up a loop (you now have 2 loops on the hook), wrap yarn over again, and pull through both loops. One loop remains.
- hdc – half double crochet. Wrap yarn over the hook first, insert hook into the stitch, wrap yarn over and pull up a loop (3 loops on hook), wrap yarn over again, and pull through all 3 loops at once.
- dc – double crochet. Wrap yarn over the hook, insert hook into the stitch, wrap yarn over and pull up a loop (3 loops on hook), wrap yarn over and pull through 2 loops, wrap yarn over again and pull through the last 2 loops.
- sl st – slip stitch. Insert your hook into the stitch, wrap yarn over, and pull that loop straight through the loop on your hook and through the stitch in one motion. It creates a very short, flat stitch.
- sk – skip. Do not work into that stitch; simply move past it to the next one.
- st(s) – stitch(es). One completed loop or "V" shape in your fabric.
- ch-2 sp – chain-2 space. The little gap created when you made 2 chains and skipped 2 stitches. You will work into this gap, not into a stitch.
- MC – main color (the lilac yarn).
- CC – contrast color (the soft white yarn).
- Right side – the front, prettier face of your work that will show on the outside of the headband.
- Turn – flip your work over so you can crochet back across the row you just finished.
- Eyelet oval – the special stitch used in this pattern: work (dc, ch 2, dc) all into the same ch-2 space. This makes an open oval with a see-through center.
Gauge
Gauge: 16 stitches x 9 rows = 4 inches (10 cm) in half double crochet (hdc) after light blocking. Each eyelet oval measures approximately 1 inch (2.5 cm) wide and 0.75 inch (2 cm) tall.
Why gauge matters: Gauge is how many stitches and rows fit into a set measurement. If your stitches are bigger than the pattern's, your headband will come out too large and loose; if they are smaller, it will be too tight. Checking first saves you from redoing the whole project.
How to make a gauge swatch: With your 5.0 mm hook and lilac yarn, chain 20. Work 12 rows of hdc (wrap yarn over, insert hook, pull up a loop, pull through all 3 loops). Lay the swatch flat, measure a 4-inch (10 cm) section in the middle, and count your stitches and rows. If you have more than 16 stitches in 4 inches, your tension is tight — try a larger hook. If you have fewer, your tension is loose — try a smaller hook. The swatch does not need to be perfect; it just needs to be close.
Beginner Tips Before You Start
- Count every row. Place a stitch marker in the first stitch of each row so you always know where the row begins and ends. It is the number-one way beginners avoid losing stitches.
- Do not pull the yarn too tight. Hold the yarn with a relaxed, even tension. Tight stitches make the fabric stiff and shrink the eyelet ovals so they close up.
- Mark the center eyelet column. Put a second stitch marker in the ch-2 space so you can find it easily on every row — the whole design depends on that column staying centered.
- Keep your turning chain small. This pattern uses a ch 1 at the start of every row. That single chain does not count as a stitch, so your first sc goes into the very first stitch.
- Change colors on the last pull-through. When switching to white for Row 7, complete the final loop of the last stitch with the new color so the change looks clean.
- Work a little looser than feels natural. A relaxed hand makes the eyelets open and the headband stretchy enough to pull over your head.
Step-by-Step Instructions
Note on construction: The headband is worked flat in rows as a narrow rectangle, then seamed short end to short end to form a loop. The eyelet ovals run in a single vertical column down the center. The white accent row is worked as one contrasting row near the center for a frosted Nordic detail. All stitches are US terms.
Setup and Body
Setup: With MC (lilac), ch 14.
Row 1 (right side): Sc in 2nd ch from hook and in each ch across. (13 sc)
Row 2: Ch 1, turn. Sc in first st, sc in next 5 sts, ch 2, sk 2 sts, sc in next 5 sts, sc in last st. (11 sc, 1 ch-2 sp)
Row 3: Ch 1, turn. Sc in first st, sc in next 5 sts, work EYELET OVAL [(dc, ch 2, dc) in ch-2 sp], sc in next 5 sts, sc in last st. (13 sc + 2 dc, 1 ch-2 sp)
Row 4: Ch 1, turn. Sc in first st, sc in next 5 sts, dc in next dc, ch 2, sk ch-2 sp, dc in next dc, sc in next 5 sts, sc in last st. (11 sc + 2 dc, 1 ch-2 sp)
Rows 5–6: Repeat Rows 3–4 once more. (Two eyelet ovals completed.)
Row 7 (WHITE ACCENT ROW): Change to CC. Ch 1, turn. Sc in first st, sc in next 5 sts, dc in next dc, ch 2, sk ch-2 sp, dc in next dc, sc in next 5 sts, sc in last st. (11 sc + 2 dc, 1 ch-2 sp)
Row 8: Change back to MC. Ch 1, turn. Sc in first st, sc in next 5 sts, work EYELET OVAL [(dc, ch 2, dc) in ch-2 sp], sc in next 5 sts, sc in last st. (13 sc + 2 dc, 1 ch-2 sp)
Rows 9–26: Repeat Rows 4 and 3 alternately nine more times (that is 18 rows total, ending on a Row 3 repeat). (13 sc + 2 dc, 1 ch-2 sp)
Row 27: Ch 1, turn. Sc in first st, sc in next 5 sts, dc in next dc, ch 2, sk ch-2 sp, dc in next dc, sc in next 5 sts, sc in last st. (11 sc + 2 dc, 1 ch-2 sp)
Row 28 (FINAL ROW): Ch 1, turn. Sc in each st across, working 2 sc in ch-2 sp. (13 sc)
Do not fasten off yet. Leave a long tail of approximately 20 inches (51 cm) for seaming.
Assembly and Finishing
Seaming: Fold the rectangle in half with right sides together, matching the short ends. Thread the long MC tail onto your yarn needle. Using a whipstitch (bring the needle through both layers from front to back, over the edge, and repeat) or a mattress stitch (slide the needle under the horizontal bar between the edge stitches on each side and pull gently), sew the short ends together to form a loop. Keep the seam flat and even so the eyelet column stays centered at the front. Fasten off and weave in all ends securely by threading each tail onto the needle and running it back and forth through several stitches on the wrong side.
Blocking: Lightly mist the headband with water and pin it flat to a towel or blocking mat, gently stretching it to the finished measurements (20 inches long x 3.25 inches wide). Allow it to dry completely. Blocking opens the eyelet ovals and evens out the fabric.
Finishing: Try on the headband. It should sit snugly over the ears without being tight. If a looser fit is desired, add 2 rows before seaming; if a snugger fit is desired, remove 2 rows before seaming.
Pro Tips and Variations
- Change the color story. Swap the lilac for dusty rose, sage green, or charcoal gray, and use cream instead of white for the accent row. You can also add a second white accent row for a bolder striped look.
- Adjust the size. The band is stretchy and fits 20–23 inch heads. To make it larger, add rows in pairs (one Row 4 plus one Row 3) before the final row; to make it smaller, remove rows in pairs. Each pair adds or removes about 1.5 inches (4 cm) of length.
- Substitute yarn. Any worsted weight (category 4) yarn works — acrylic is the most beginner-friendly and washable, while a wool blend is warmer and blocks beautifully. Just check your gauge again if you switch brands.
- Make it a matching set. Work the same rectangle in a thinner yarn with a 4.0 mm (G/6) hook to create a slim bracelet version, or widen the starting chain to 20 for a wider, slouchier ear warmer.