Harvest Moon Tissue Cozy Free Crochet Pattern
Harvest Moon Tissue Cozy Free Crochet Pattern
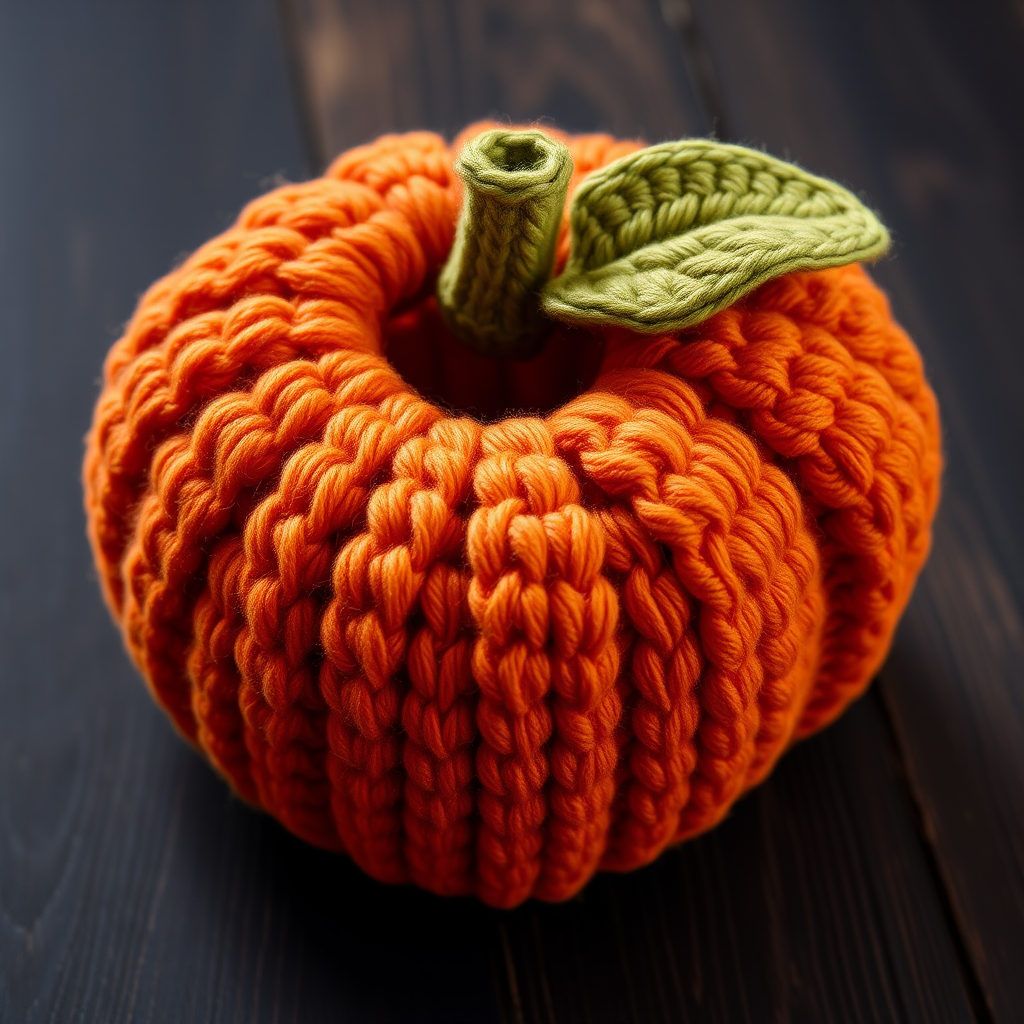
Bring a touch of rustic autumn charm to your living space with this cozy tissue box cover, designed to look like a plump pumpkin but with a modern, minimalist twist. This free pattern is perfect for intermediate crocheters looking to add a handmade, seasonal accent to their home. The rich burnt orange body, paired with a simple olive green stem and leaf, creates a warm, inviting piece that will brighten any room—no faces, no fuss, just clean lines and cozy vibes.
Whether you're crafting for yourself or searching for a thoughtful handmade gift, this tissue cozy is a delightful project that works up quickly and uses basic stitches. Let's dive into the pattern and create this harvest-inspired beauty together!
Materials Needed
Before you begin, gather the following supplies to ensure a smooth crafting experience:
- Yarn: Worsted weight yarn in three colors:
- Burnt orange (approx. 200g / 400 yards) – for the pumpkin body
- Cream (approx. 50g / 100 yards) – optional for accents or contrast (though the main pattern uses orange, cream can be used for a two-tone effect if desired)
- Olive green (approx. 20g / 40 yards) – for the stem and leaf
- Crochet Hook: 5.0 mm (H/8) crochet hook
- Stitch Markers: To keep track of rounds (essential for continuous spiral work)
- Yarn Needle: For sewing pieces together and weaving in ends
- Scissors: For cutting yarn
Gauge: 16 sc x 18 rows = 4 inches (10 cm) in single crochet. Always check your gauge to ensure the correct size—this cozy is designed to fit a standard rectangular tissue box (approx. 9.5" x 4.5" x 4.5").
Step-by-Step Instructions
This pattern is worked in continuous rounds unless otherwise stated. Use a stitch marker to keep track of rounds—place it in the first stitch of each round and move it up as you go. The pumpkin body is made in two identical pieces (front and back), which are then sewn together to create a rounded, plump shape.
Pumpkin Body (Make 2 Pieces – Front and Back)
Note: Each piece is worked from the center outward, creating a flat circle that is then shaped into a dome.
Round 1: With burnt orange yarn, make a magic ring. Work 6 single crochet (sc) into the ring. Pull the tail to close the ring tightly. (6 stitches)
Round 2: Work 2 sc in each stitch around. (12 stitches)
Round 3: *Sc in the next stitch, 2 sc in the next stitch* – repeat from * to * around. (18 stitches)
Round 4: *Sc in the next 2 stitches, 2 sc in the next stitch* – repeat from * to * around. (24 stitches)
Round 5: *Sc in the next 3 stitches, 2 sc in the next stitch* – repeat from * to * around. (30 stitches)
Round 6: *Sc in the next 4 stitches, 2 sc in the next stitch* – repeat from * to * around. (36 stitches)
Round 7: *Sc in the next 5 stitches, 2 sc in the next stitch* – repeat from * to * around. (42 stitches)
Round 8: *Sc in the next 6 stitches, 2 sc in the next stitch* – repeat from * to * around. (48 stitches)
Rounds 9–20: Sc in each stitch around. (48 stitches each round) – This creates the straight sides of the dome. Keep your tension even for a smooth, dense fabric.
Round 21: *Sc in the next 6 stitches, single crochet 2 together (sc2tog)* – repeat from * to * around. (42 stitches)
Round 22: *Sc in the next 5 stitches, sc2tog* – repeat from * to * around. (36 stitches)
Round 23: *Sc in the next 4 stitches, sc2tog* – repeat from * to * around. (30 stitches)
Round 24: *Sc in the next 3 stitches, sc2tog* – repeat from * to * around. (24 stitches)
Round 25: *Sc in the next 2 stitches, sc2tog* – repeat from * to * around. (18 stitches)
Fasten off, leaving a long tail (at least 18 inches) for sewing. Repeat the entire process to create the second identical piece.
Pro Tip: To make the sc2tog decrease, insert your hook into the next stitch, yarn over and pull up a loop (2 loops on hook), insert hook into the following stitch, yarn over and pull up a loop (3 loops on hook), yarn over and pull through all 3 loops. This creates a neat, invisible decrease.
Leaf and Stem
Leaf (Make 1):
With olive green yarn, chain (ch) 10.
Row 1: Sc in the 2nd chain from the hook, half double crochet (hdc) in the next chain, double crochet (dc) in the next 5 chains, hdc in the next chain, sc in the last chain. (You've worked across one side of the chain.)
Now, ch 1 and turn your work. Work 2 sc in each stitch across the other side of the original chain (this creates the leaf's second side). You should have 9 stitches on this side.
Fasten off, leaving a long tail (about 10 inches) for sewing. The leaf will have a natural, slightly curved shape with a subtle vein texture from the stitches.
Stem (Make 1):
With olive green yarn, ch 6. Join with a slip stitch (sl st) to form a ring.
Round 1: Work 6 sc into the ring. (6 stitches)
Rounds 2–5: Continue working sc in a spiral for 4 more rounds (do not join; just keep going around). (6 stitches each round)
Fasten off, leaving a long tail (about 8 inches). The stem will be a small, cylindrical tube.
Assembly
Now it's time to bring your pumpkin to life! Follow these steps carefully for a polished finish.
Step 1: Position the Pieces
Place the two pumpkin pieces together with wrong sides facing (the right sides—the outside of the pumpkin—should be facing out). Align the edges as evenly as possible. The pieces are domed, so they should naturally nest together.
Step 2: Sew the Pieces Together
Thread your yarn needle with the long tail from one of the pumpkin pieces. Starting at the bottom edge, whip stitch or mattress stitch the two pieces together along the edges. Important: Leave a 3-inch opening at the top (this will be the tissue slot) and a 2-inch opening at the bottom (this is where the tissue box will slide in). Sew the rest of the edges securely, making sure your stitches are tight and even.
Tip: To keep the openings neat, you can mark them with stitch markers before you start sewing. The top opening should be centered, and the bottom opening should be wide enough to accommodate the tissue box.
Step 3: Attach the Stem
Position the stem at the top center of the cover, directly over the 3-inch opening. Using the tail from the stem, sew it securely to the pumpkin body. Make sure the stem stands upright and is firmly attached. Weave the tail inside the cover to hide it.
Step 4: Attach the Leaf
Place the leaf at the base of the stem, on one side. Using the leaf's tail, sew it to the pumpkin body, stitching along the center of the leaf to secure it flat. Weave in the end.
Step 5: Weave in All Ends
Using your yarn needle, carefully weave in any remaining loose ends on the inside of the cover. Trim any excess yarn.
Step 6: Insert the Tissue Box
Slide your standard tissue box into the bottom opening. Gently pull the tissues through the top hole. The cozy should fit snugly, hugging the box like a plump pumpkin.
Final Thoughts
Your Harvest Moon Tissue Cozy is complete! This charming piece adds a warm, rustic touch to any bathroom, bedroom, or living area. The dense single crochet fabric is durable and holds its shape beautifully, while the minimalist design ensures it blends seamlessly with modern or farmhouse decor.
Feel free to experiment with different color combinations—cream for a ghostly white pumpkin, sage green for a fresh twist, or even a deep burgundy for a richer autumn palette. This pattern is wonderfully versatile and makes a fantastic gift for housewarmings, holidays, or just because.
Happy crocheting, and may your home be filled with handmade warmth this harvest season!


