Lily Pond Ripple Baby Blanket Free Pattern – Knit a Serene Water Garden
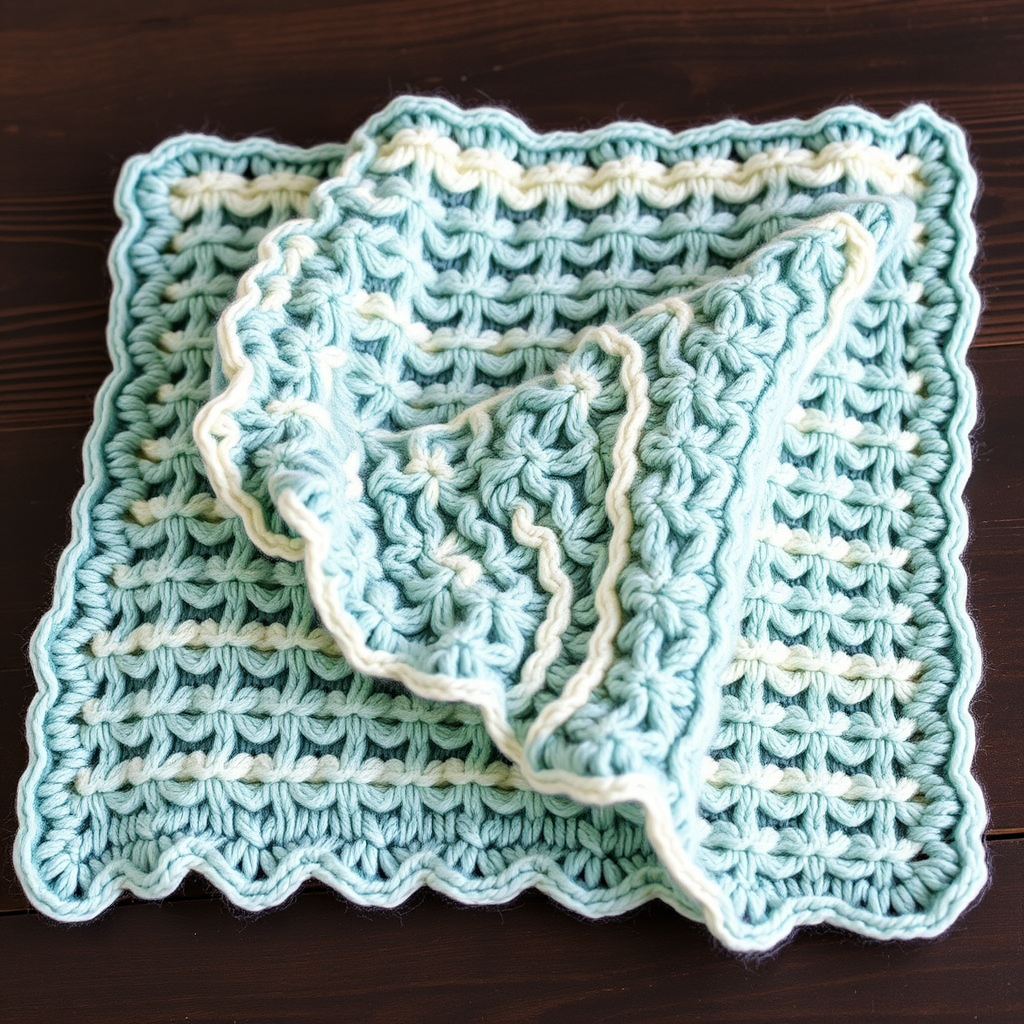
Introducing the Lily Pond Ripple Baby Blanket
Imagine wrapping your little one in the serene calm of a lily pond—gentle ripples of soft aqua, sage, and cream flowing together in a soothing, textured embrace. The Lily Pond Ripple Baby Blanket is more than just a cozy heirloom; it's a mindful knitting project that lets you create something truly special with your own hands. This ripple-stitch pattern is surprisingly simple once you get into the rhythm, making it perfect for confident beginners and experienced makers alike. The gentle wave pattern is both visually stunning and wonderfully tactile, creating a blanket that feels as peaceful as it looks.
Whether you're knitting for a new arrival, a baby shower gift, or simply to enjoy the meditative process, this pattern will guide you through every stitch. The result is a beautiful, textured throw that evokes a peaceful water garden—a gift of calm and comfort for years to come.
Materials Needed
Before you begin, gather these materials to ensure a smooth and enjoyable knitting experience:
- Yarn: Worsted weight cotton blend (e.g., Lion Brand Comfy Cotton Blend) in three colors:
- Color A (Aqua): Approx. 200g
- Color B (Sage): Approx. 200g
- Color C (Cream): Approx. 200g
- Needle: US 8 (5 mm) circular knitting needle, 32-inch or longer (to accommodate the wide stitch count)
- Other: Tapestry needle for weaving in ends, scissors, stitch markers (optional but helpful)
Gauge: 18 stitches and 24 rows = 4 inches in stockinette stitch (blocked). Gauge is important for achieving the correct finished size, so take a moment to knit a swatch and adjust your needle size if needed.
Step-by-Step Instructions
Pattern Overview
Finished Size: Approx. 30 x 36 inches (adjustable by adding or removing repeats of the 18-stitch pattern)
Abbreviations:
- CO: Cast on
- K: Knit
- P: Purl
- K2tog: Knit two together (right-leaning decrease)
- SSK: Slip, slip, knit (left-leaning decrease)
- YO: Yarn over
- Rep: Repeat
Pattern Notes:
- The blanket is worked flat in one piece. Use a circular needle to comfortably hold the wide stitch count.
- The ripple pattern is a multiple of 18 + 2 stitches. The cast-on of 146 stitches gives you 8 full repeats.
- Color sequence: A (aqua), B (sage), C (cream), repeat. Each stripe is 6 rows.
Getting Started: Cast On
With Color A, cast on 146 stitches using your preferred method (a long-tail cast-on works beautifully here). Take your time to ensure the cast-on edge is even but not too tight, as this will be the bottom edge of your blanket.
Stripe 1: Color A (Aqua) – Rows 1–6
Row 1 (Right Side): With Color A, K1, *K2tog, K2tog, (K1, YO) 4 times, K1, SSK, SSK; rep from * to last stitch, K1.
Let's break this down: The first and last stitches are edge stitches (knit them on every right-side row). Between them, you'll work the ripple pattern. Each repeat starts with two right-leaning decreases (K2tog), then a series of increases (K1, YO repeated 4 times creates 4 yarn overs with knit stitches between them), and ends with two left-leaning decreases (SSK). This combination of decreases and yarn overs creates the beautiful wave effect.
Row 2 (Wrong Side): With Color A, Purl all stitches.
Row 3: With Color A, repeat Row 1.
Row 4: With Color A, purl all stitches.
Row 5: With Color A, repeat Row 1.
Row 6: With Color A, purl all stitches.
After completing Row 6, you've finished your first aqua stripe. The purl rows on the wrong side create the textured "bumps" that give the blanket its cozy, handcrafted feel.
Stripe 2: Color B (Sage) – Rows 7–12
Switch to Color B. Do not cut Color A—you'll carry it up the side of the work, which creates a neat selvedge edge and reduces ends to weave in later.
Rows 7–12: Repeat Rows 1–6 with Color B. This means:
- Row 7 (RS): K1, *K2tog, K2tog, (K1, YO) 4 times, K1, SSK, SSK; rep from * to last stitch, K1.
- Row 8 (WS): Purl all stitches.
- Row 9 (RS): Repeat Row 7.
- Row 10 (WS): Purl all stitches.
- Row 11 (RS): Repeat Row 7.
- Row 12 (WS): Purl all stitches.
Stripe 3: Color C (Cream) – Rows 13–18
Switch to Color C, carrying Color B up the side.
Rows 13–18: Repeat Rows 1–6 with Color C, following the same pattern structure as above.
Continuing the Stripe Sequence
Continue in this stripe sequence—A, B, C, A, B, C—until the blanket measures approximately 34 inches from the cast-on edge. Be sure to end after completing a full 6-row stripe so that your color sequence remains consistent.
Pro tip: As you work, periodically count your stitches to ensure you haven't accidentally dropped or added any. Each row should have exactly 146 stitches. If you find a mistake, it's easier to fix it right away than to rip back several rows later.
Final Stripe and Binding Off
Work one final 6-row stripe in Color A (aqua) to frame the blanket symmetrically. After completing Row 6 of this final stripe, you're ready to bind off.
Bind Off Row (Right Side): Bind off loosely in pattern. This means:
- Knit the knit stitches as they appear.
- Purl the purl stitches as they appear (though in this pattern, the wrong-side rows are all purls, so you'll be binding off on a right-side row with the ripple pattern).
- For the decreases (K2tog and SSK), simply knit them together as you would in the pattern, then bind off as usual.
To bind off: Knit the first stitch, knit the second stitch, then pass the first stitch over the second. Continue this way across the row, working the pattern stitches as described. Take care to bind off loosely—if your bind-off is too tight, it will pull in the edge and distort the ripple effect. If needed, use a needle one size larger for the bind-off row.
Finishing Touches
Weave in all ends: Using your tapestry needle, carefully weave in any loose yarn ends on the wrong side of the blanket. If you carried your yarns up the side, you'll only have the cast-on tail and bind-off tail to weave in. Take your time to weave in securely so the ends don't work loose with use and washing.
Blocking: This step is essential for the Lily Pond Ripple Blanket. Blocking opens up the ripple pattern, evens out the stitches, and gives the blanket its beautiful, professional finish. To block:
- Fill a basin or sink with cool water and add a gentle wool wash or mild detergent.
- Submerge the blanket and let it soak for 15–20 minutes. Do not agitate or wring.
- Carefully drain the water and gently press out excess moisture (never twist or wring).
- Lay the blanket flat on a clean towel, roll it up to remove more water, then unroll.
- Place the blanket on a blocking mat or dry towel. Gently stretch it to the desired dimensions (approx. 30 x 36 inches), paying attention to the ripple points to ensure they're even and well-defined.
- Pin the edges if needed to hold the shape, and let it dry completely, usually 24–48 hours.
Once dry, your Lily Pond Ripple Baby Blanket is ready to gift or enjoy. The soft cotton blend will become even more supple with each wash, and the ripple pattern will remain a gentle, soothing texture that babies love to touch.
This pattern is a joy to knit—repetitive enough to be meditative, yet engaging enough to keep your interest. As you watch the ripples form row by row, you'll be creating not just a blanket, but a peaceful keepsake filled with love and intention. Happy knitting!


