The Aurora Borealis Drift Scarf Free Pattern – A Knitted Sky of Shifting Colors
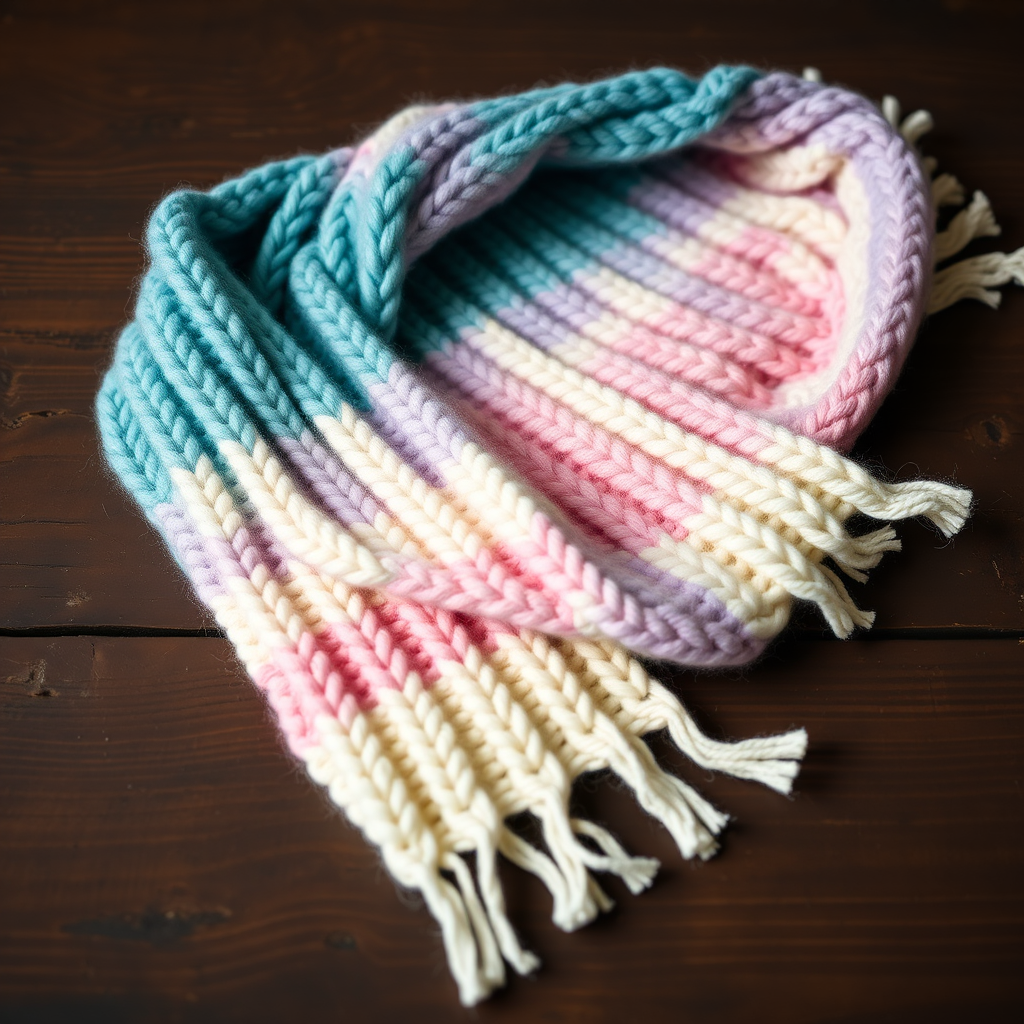
The Aurora Borealis Drift Scarf Free Pattern – A Knitted Sky of Shifting Colors
Wrap yourself in the ethereal dance of the northern lights with this breathtaking gradient scarf. The Aurora Borealis Drift Scarf is knitted in a soft, cloud-like worsted weight yarn, featuring a gentle drift of color transitions that mirror the shifting hues of the night sky. The plush, textured ribbing creates a cozy, statement piece perfect for any winter day. Whether you're a seasoned knitter or a confident beginner, this pattern is designed to be both relaxing and rewarding, resulting in a stunning accessory that evokes a sense of calm and wonder.
This free knitting pattern uses simple 2x2 ribbing and clean color changes to create a bold, modern aesthetic. The long, rectangular shape drapes beautifully, and the optional fringe adds a playful, finished touch. Let's dive into creating your own piece of wearable art.
Materials Needed
Before you begin, gather the following materials to ensure a smooth and enjoyable knitting experience. This project is perfect for using up worsted weight yarns from your stash or treating yourself to a new gradient set.
- Yarn: Worsted weight yarn in 4 colors (approx. 350g total). The pattern uses:
- Color A (Deep Teal): Approx. 100g
- Color B (Soft Lavender): Approx. 100g
- Color C (Pale Pink): Approx. 100g
- Color D (Cream): Approx. 50g
- Knitting Needles: US 8 (5mm) knitting needles. Straight or circular (for long projects, a circular needle can be easier on your wrists).
- Tapestry Needle: For weaving in ends and attaching fringe.
- Scissors: For cutting yarn.
- Measuring Tape: To check your gauge and finished length.
Gauge & Finished Size
- Gauge: 18 stitches and 24 rows = 4 inches in stockinette stitch. Getting the correct gauge is crucial for achieving the right width and drape. If your gauge is off, adjust your needle size accordingly.
- Finished Size: Approx. 8 inches wide x 70 inches long (excluding fringe). This is easily adjustable by working more or fewer repeats of the color sections.
Abbreviations
- CO: Cast on
- K: Knit
- P: Purl
- St(s): Stitch(es)
- Rep: Repeat
Step-by-Step Instructions
Follow these detailed instructions to create your Aurora Borealis Drift Scarf. The pattern is broken down into color sections, each worked in a simple 2x2 ribbing. Take your time, enjoy the rhythm of the stitches, and watch your scarf come to life.
Section 1: Color A (Deep Teal)
- Cast On: With Color A, CO 36 sts. Leave a 6-inch tail for weaving in later.
- Row 1: *K2, P2; rep from * to end of row.
- Row 2: *P2, K2; rep from * to end of row. (This creates the classic 2x2 ribbing pattern.)
- Repeat: Continue repeating Rows 1 and 2 until the piece measures 14 inches from the cast-on edge. Important: End this section having just completed a Row 2 (a purl-side row). This ensures your next color change starts on the right side of the work.
Section 2: Color B (Soft Lavender)
- Switch Yarn: Cut Color A, leaving a 6-inch tail. Join Color B, leaving a 6-inch tail.
- Continue Pattern: Continue working in the established rib pattern (Row 1: *K2, P2; Row 2: *P2, K2) for 14 inches. Important: End this section having just completed a Row 2.
Section 3: Color C (Pale Pink)
- Switch Yarn: Cut Color B, leaving a 6-inch tail. Join Color C, leaving a 6-inch tail.
- Continue Pattern: Work in the rib pattern for 14 inches. Important: End this section having just completed a Row 2.
Section 4: Color D (Cream)
- Switch Yarn: Cut Color C, leaving a 6-inch tail. Join Color D, leaving a 6-inch tail.
- Continue Pattern: Work in the rib pattern for 14 inches. Important: End this section having just completed a Row 2.
Section 5: Color C (Pale Pink)
- Switch Yarn: Cut Color D, leaving a 6-inch tail. Join Color C, leaving a 6-inch tail.
- Continue Pattern: Work in the rib pattern for 14 inches. Important: End this section having just completed a Row 2.
Section 6: Color B (Soft Lavender)
- Switch Yarn: Cut Color C, leaving a 6-inch tail. Join Color B, leaving a 6-inch tail.
- Continue Pattern: Work in the rib pattern for 14 inches. Important: End this section having just completed a Row 2.
Section 7: Color A (Deep Teal)
- Switch Yarn: Cut Color B, leaving a 6-inch tail. Join Color A, leaving a 6-inch tail.
- Continue Pattern: Work in the rib pattern for 14 inches. Important: End this section having just completed a Row 2.
Bind Off & Finishing
- Bind Off: Bind off all stitches loosely in pattern (K2, P2). To bind off in pattern, knit the first stitch, purl the second, then pass the first stitch over the second. Continue this way, knitting the knit stitches and purling the purl stitches as they appear. Binding off loosely is crucial to maintain the stretchy edge of the ribbing.
- Weave in Ends: Thread your tapestry needle with the yarn tails. Weave them in securely along the edge of the scarf, going back and forth through the stitches to hide them completely. Trim any excess yarn.
- Blocking: Gently block your scarf to even out the ribbing and enhance its drape. To wet block, soak the scarf in lukewarm water with a drop of mild soap, gently squeeze out excess water (do not wring), lay it flat on a towel, and roll it up to remove more water. Then, lay it flat to dry, gently shaping it to the desired dimensions. This step will make your stitches look crisp and professional.
Optional Fringe
Add a beautiful, bohemian fringe to the ends of your scarf for an extra touch of texture and color.
- Cut Strands: Cut 12-inch strands of yarn from each of your four colors. You will need approximately 18 fringe bundles (9 per end).
- Create Bundles: For each fringe, take 3 strands of yarn (you can mix colors or use a single color per fringe for a cleaner look). Fold them in half to create a loop.
- Attach Fringe: Insert your crochet hook (or tapestry needle) from the wrong side to the right side of the scarf through the edge stitch. Pull the folded loop through the fabric.
- Secure: Pull the loose ends of the strands through the loop and pull tight to secure the fringe to the scarf.
- Spacing: Space the fringe bundles evenly, approximately every 2 inches along both short ends of the scarf.
- Trim: Once all fringe is attached, trim the ends evenly with scissors for a polished look.
Your Aurora Borealis Drift Scarf is now complete! The rhythmic ribbing and the beautiful gradient of colors create a truly special piece. This scarf makes a wonderful gift or a luxurious treat for yourself. Enjoy the cozy warmth and the stunning visual effect of your handmade creation.


