The Enchanted Briar Patch Jumper: A Free Crochet Pattern for a Textured, Oversized Pullover
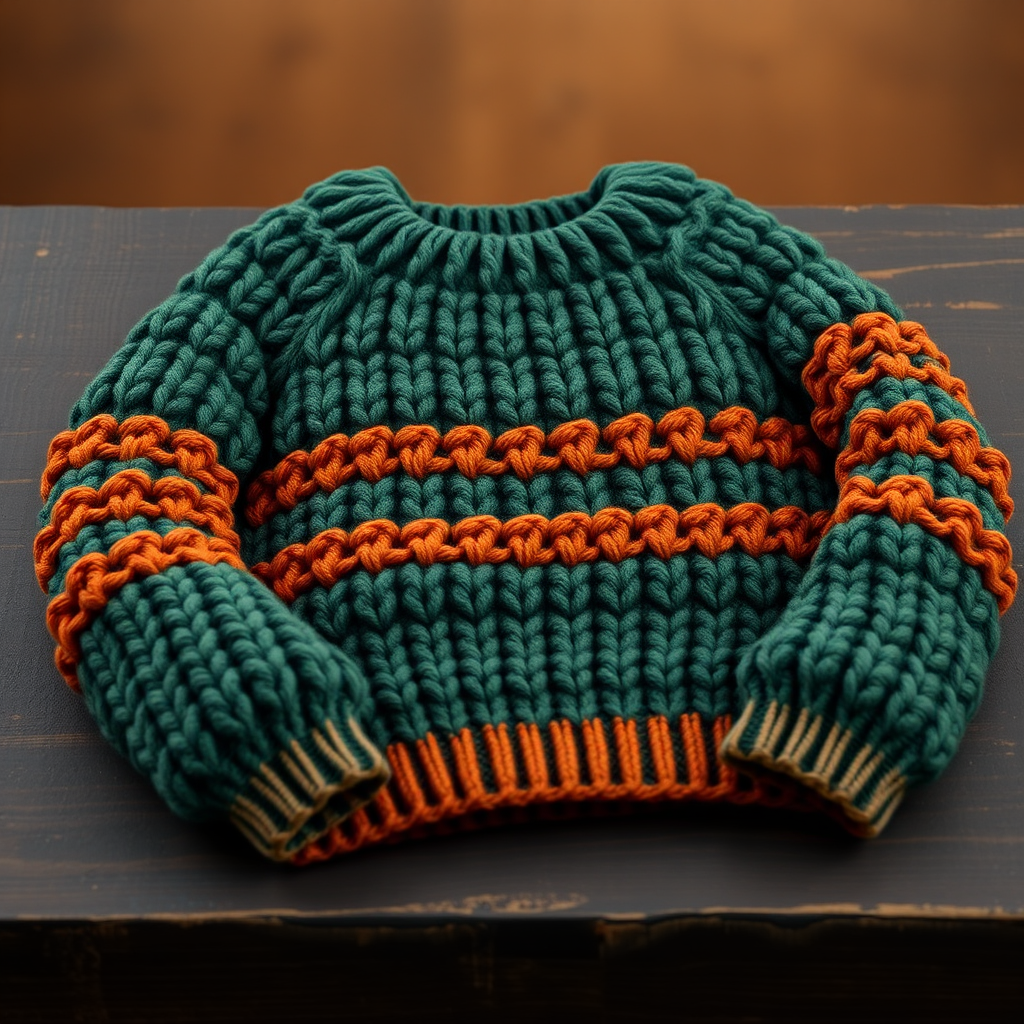
Wrap Yourself in Woodland Charm: The Enchanted Briar Patch Jumper
There's something magical about a sweater that feels like a warm hug from the forest itself. The Enchanted Briar Patch Jumper is exactly that—a free crochet pattern that transforms simple stitches into a deeply textured, oversized pullover reminiscent of autumn brambles and cozy woodland walks. Featuring an all-over Berry Stitch worked in two rich, earthy tones, this relaxed-fit jumper is as satisfying to create as it is to wear. Whether you're curled up by the fire or stepping out into crisp fall air, this handmade piece will become your new favorite layer.
Materials Needed
Before you begin, gather these supplies. Exact gauge is crucial for the perfect fit, so take the time to swatch!
- Yarn: Worsted weight (#4) yarn in two colors:
- Main Color (MC): 1200 (1350, 1500, 1650) yards of a deep forest green. Shown in Lion Brand Wool-Ease Thick & Quick 'Forest Green'.
- Contrast Color (CC): 400 (450, 500, 550) yards of a warm, rusty orange. Shown in Lion Brand Wool-Ease Thick & Quick 'Pumpkin'.
- Hook: US Size J/10 (6.0 mm) crochet hook, or size needed to obtain gauge.
- Notions: Tapestry needle for weaving ends, scissors, stitch markers (optional).
- Gauge: 14 stitches and 10 rows in Berry Stitch pattern = 4 inches (10 cm). Exact gauge is critical for fit.
Step-by-Step Instructions
Sizes & Finished Measurements
This pattern is written for sizes S (M, L, XL). Finished chest circumference: 40 (44, 48, 52) inches. Choose your size based on your bust/chest measurement plus 4-6 inches of positive ease for the oversized look.
Stitches & Abbreviations (US Terms)
- ch: chain
- sc: single crochet
- dc: double crochet
- st(s): stitch(es)
- sk: skip
- MC: Main Color (Forest Green)
- CC: Contrast Color (Rusty Orange)
- RS: Right Side
- WS: Wrong Side
Berry Stitch Pattern (Worked over a multiple of 2 sts + 1)
This is the heart of the jumper. Practice on a small swatch first. The pattern creates a dense, bumpy texture.
- Row 1 (RS): With MC, ch 1, sc in first st, *ch 1, sk 1 st, sc in next st; repeat from * across. Turn.
- Row 2: With MC, ch 1, sc in first sc, *sc in next ch-1 space, ch 1, sk next sc; repeat from * across, ending with sc in last ch-1 space, sc in last sc. Turn.
- Row 3: With CC, ch 1, sc in first sc, *ch 1, sk next sc, sc in next ch-1 space; repeat from * across, ending with ch 1, sk last sc, sc in last sc. Turn.
- Row 4: With CC, ch 1, sc in first sc, *sc in next ch-1 space, ch 1, sk next sc; repeat from * across, ending with sc in last ch-1 space, sc in last sc. Turn.
- Repeat Rows 1-4 for pattern. Note: Rows 1-2 use MC, Rows 3-4 use CC. This creates the beautiful color-blocked berry texture.
BACK PANEL
- Foundation: With MC, ch 71 (77, 83, 89).
- Body: Work in Berry Stitch pattern (Rows 1-4) until piece measures 18 (19, 20, 21) inches from beginning, ending after a Row 2 or Row 4 (a WS row).
- Shape Shoulders:
- At beginning of next 2 rows, slip stitch across first 6 (7, 8, 9) sts, then work pattern across remaining sts.
- At beginning of next 2 rows, slip stitch across first 7 (8, 9, 10) sts.
- Fasten off. Leave remaining 39 (39, 39, 39) sts unworked for back neck.
FRONT PANEL
- Foundation & Body: Work same as Back until piece measures 16 (17, 18, 19) inches from beginning, ending after a WS row.
- Shape Neck:
- Work pattern across first 26 (28, 30, 32) sts. Turn, leaving remaining sts unworked.
- Decrease 1 st at neck edge every row 5 times. To decrease: work the first 2 sts together (sc2tog) at the neck edge.
- Work even on remaining 21 (23, 25, 27) sts until front measures same as back to shoulder shaping.
- Shape shoulders as for back.
- Repeat for other side of neck: join yarn at center, work across remaining sts, then decrease at neck edge.
SLEEVES (Make 2)
- Foundation: With MC, ch 35 (37, 39, 41).
- Body: Work in Berry Stitch pattern, increasing 1 st at each end of every 4th row 10 (11, 12, 13) times. To increase: work 2 sc in the first and last st of the row. You will have 55 (59, 63, 67) sts.
- Finish: Work even until sleeve measures 18 (19, 20, 21) inches from beginning. Fasten off.
ASSEMBLY
- Sew Shoulder Seams: Using tapestry needle and MC yarn, whip stitch or mattress stitch the shoulder seams together.
- Set in Sleeves: Pin the center of the sleeve top to the shoulder seam. Sew sleeves into armholes using a whip stitch.
- Sew Side and Sleeve Seams: With RS together, sew from underarm down to hem, then continue down the sleeve seam. Repeat for both sides.
NECKBAND
- With RS facing and MC, join yarn at left shoulder seam.
- Work 1 round of sc evenly around neck opening. Aim for about 1 sc per stitch and 2 sc per row along the shaped edges. Join with sl st to first sc.
- Fasten off. Weave in all ends using tapestry needle.
Your Enchanted Briar Patch Jumper is complete! Block gently if desired to even out stitches. Enjoy the cozy, textured warmth of your handmade woodland treasure.


