The Meadowlark Market Tote Free Pattern
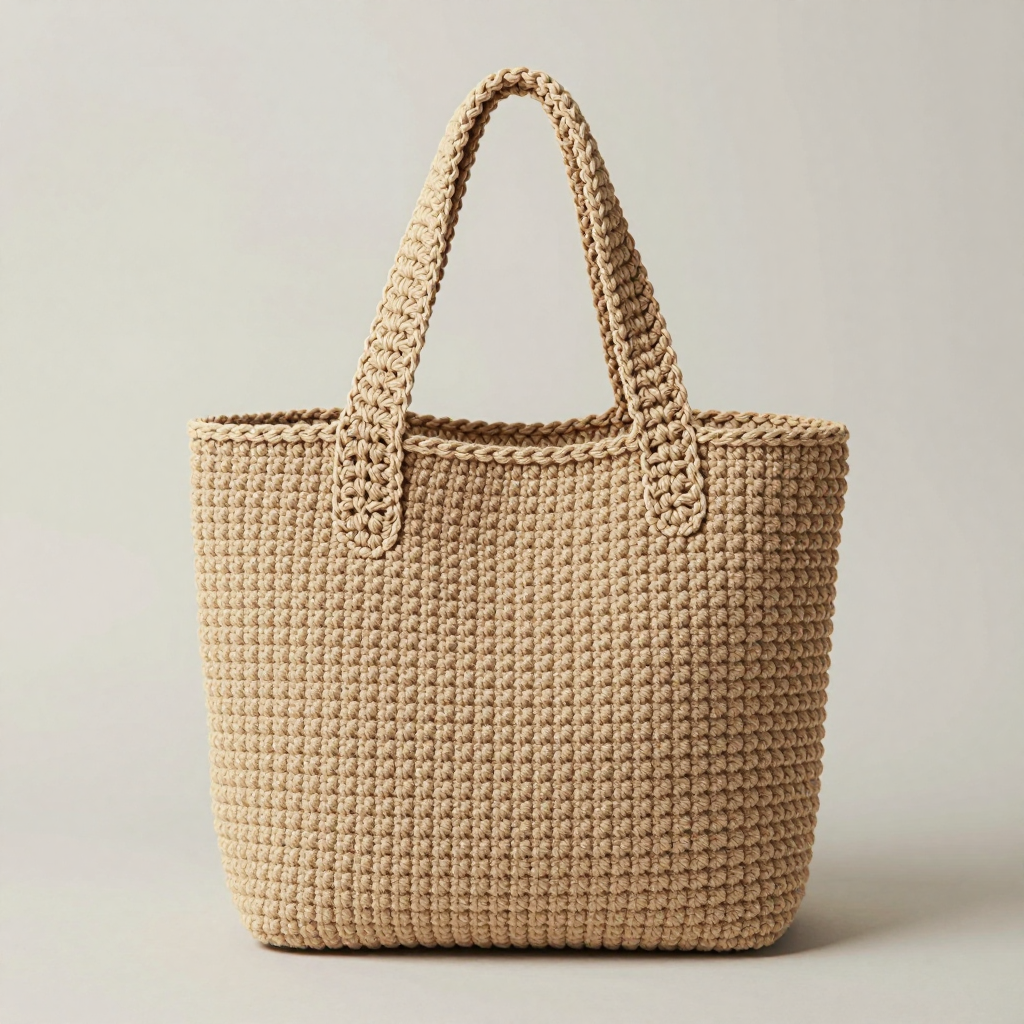
The Meadowlark Market Tote: A Free Beginner Crochet Pattern
Introduction
Welcome to the Meadowlark Market Tote, a wonderfully forgiving project that is absolutely perfect for anyone who has just learned to crochet and wants to make something they will actually use every single day. This sturdy, multipurpose tote is worked in a dense single-crochet fabric with a reinforced flat base and a roomy open top, so it holds its shape beautifully whether you fill it with groceries, beach towels, or your latest yarn project. The finished bag looks rustic and handmade in the best possible way, with crisp, even stitches and a firm body that stands upright on its own. It feels substantial and strong in your hands, yet soft and flexible enough to fold up and tuck away when you are not using it. If you can make a single crochet stitch, you can make this bag, and you will finish it feeling proud and ready to carry it everywhere.
Materials Needed
- Yarn: Worsted weight (category 4) cotton or cotton-blend yarn, approximately 300–350 yards total. Lily Sugar'n Cream or a similar cotton yarn works beautifully. Cotton is recommended because it is strong, does not stretch much, and holds the bag's shape well.
- Crochet hook: Size H/8 (5.0 mm).
- Stitch marker: At least one, to mark the first stitch of each round. A removable stitch marker, a safety pin, or even a short scrap of contrasting yarn all work.
- Tapestry needle: A blunt-tipped needle with a large eye for weaving in your yarn ends.
- Scissors: Any sharp pair for cutting yarn.
- Measuring tape: Helpful for checking your gauge and the finished dimensions.
Finished size: Approximately 8.5 inches long × 3 inches wide at the base, and about 9 inches tall from the base to the top edge, with two crocheted handles. The finished bag is a roomy everyday carryall.
Abbreviations and Beginner Glossary
Every abbreviation used in this pattern is listed below and explained in plain English. If you have never crocheted before, read through this whole list once before you begin. You do not need to memorize it; just refer back whenever you see a term you do not recognize.
- ch – chain. Make a loop with your yarn, then pull a new loop of yarn through that loop with your hook. Each loop you pull through counts as one chain stitch. Chains are the foundation you build on.
- sc – single crochet. Insert your hook into the next stitch, wrap the yarn over the hook, pull up a loop (you now have two loops on your hook), wrap the yarn over again, and pull it through both loops on your hook. One single crochet made.
- sl st – slip stitch. Insert your hook into the next stitch, wrap the yarn over the hook, and pull that loop through both the stitch and the loop already on your hook in one motion. It creates a nearly flat, tight stitch used here for a neat border.
- st / sts – stitch / stitches. A "stitch" is one completed unit of crochet work. "Sts" is simply the plural.
- sk – skip. Do not work into that stitch or chain; leave it empty and move on to the next one.
- ch-sp – chain space. The open gap created when you chained and skipped stitches. When you work "in the ch-sp," you put your stitch into that gap rather than into a stitch.
- row – a line of stitches worked flat, back and forth, turning your work at the end of each row.
- round – a line of stitches worked in a circle, going around and around without turning.
- turn – flip your work over so the back faces you, ready to work the next row in the opposite direction.
- fasten off – cut your yarn a few inches from your work, then pull the tail all the way through the last loop on your hook to lock it. This secures your work so it will not unravel.
- weave in ends – thread a yarn tail onto a tapestry needle and sew it back and forth through the inside of your work so it is hidden and secure.
- row-end – the side edge of a flat piece, where each row ends. When you work along the row-ends, you put one stitch into the side of each row.
- foundation ch – the starting chain of a flat piece. When you work along the foundation chain, you put one stitch into the bottom of each starting chain.
- continuous rounds – working in a spiral without joining at the end of each round. You simply keep going into the next stitch, which is why a stitch marker is needed to remember where each round begins.
- gauge – how many stitches and rows fit into a set measurement. Explained fully in the next section.
Gauge
Gauge: 14 single crochet stitches × 16 rows = 4 inches (10 cm) in single crochet.
Why gauge matters: Gauge is simply a measure of how big your stitches are. If your stitches are larger than the pattern expects, your bag will come out bigger than listed; if they are smaller, the bag will be smaller. Because this bag has a specific base size and handle placement, matching gauge helps everything line up as written. Do not worry if you are a little off, though; a bag is very forgiving, and a small difference will not ruin it.
How to make a gauge swatch: With your H/8 (5.0 mm) hook and your chosen yarn, chain 22. Work 1 single crochet in the second chain from the hook and in each chain across (21 stitches). Then work 18 more rows of single crochet, chaining 1 and turning at the start of each row. Lay the swatch flat and use your measuring tape to count how many stitches fit across 4 inches and how many rows fit across 4 inches. If you have about 14 stitches and 16 rows in 4 inches, you are right on target. If you have more stitches than that, your stitches are tight; try a hook one size larger. If you have fewer, your stitches are loose; try a hook one size smaller. Then begin the bag.
Beginner Tips Before You Start
- Use a stitch marker every single round. Because the sides are worked in continuous rounds, there is no seam to tell you where a round begins. Place your marker in the very first stitch of each round and move it up as you go. This one habit prevents almost every beginner mistake.
- Do not pull your yarn too tight. Tension is how firmly you hold and pull the yarn. If you tug hard after every stitch, your fabric becomes stiff and your hands tire quickly. Aim for an even, relaxed pull so the stitches sit snugly side by side without gaps.
- Count your stitches at the end of every round. The pattern tells you the exact count in parentheses after each round. Take ten seconds to count. If you are off by one or two, it is far easier to fix right away than ten rounds later.
- Keep your first stitch honest. The chain-1 at the start of a flat row does not count as a stitch. Your first single crochet of the row goes into the very first stitch, not into the chain. Missing that first stitch is the most common reason a row shrinks.
- Work the base corners carefully. When you go around the perimeter of the base, you will be working into the sides of rows and into the bottoms of chains. Go slowly here, keep your stitches evenly spaced, and do not add extra stitches at the corners.
- Relax and enjoy the repetition. The body of this bag is the same round over and over. Put on something to listen to, settle in, and let your hands find a rhythm. This is the perfect project for that.
Step-by-Step Instructions
Important note before you begin: The bag is worked in continuous rounds unless otherwise stated. Do not join rounds; use a stitch marker to mark the first stitch of each round. The base is worked flat in rows first, then you will work around its entire perimeter to build the sides.
Base (worked flat in rows)
Row 1: Ch 31. Sc in the 2nd ch from hook and in each ch across. (30 sc)
Row 2: Ch 1, turn. Sc in each st across. (30 sc)
Row 3: Ch 1, turn. Sc in each st across. (30 sc)
Row 4: Ch 1, turn. Sc in each st across. (30 sc)
Row 5: Ch 1, turn. Sc in each st across. (30 sc)
Row 6: Ch 1, turn. Sc in each st across. (30 sc)
Row 7: Ch 1, turn. Sc in each st across. (30 sc)
Row 8: Ch 1, turn. Sc in each st across. (30 sc)
Row 9: Ch 1, turn. Sc in each st across. (30 sc)
Row 10: Ch 1, turn. Sc in each st across. (30 sc)
Row 11: Ch 1, turn. Sc in each st across. (30 sc)
Row 12: Ch 1, turn. Sc in each st across. (30 sc)
Do not fasten off. Your base now measures approximately 8.5 inches long × 3 inches wide. Begin working around the perimeter of the base to create the sides.
Sides (worked in continuous rounds)
Round 1: Ch 1, do not turn. Work 1 sc in each row-end along the short side (12 sc), 1 sc in each foundation ch along the long side (30 sc), 1 sc in each row-end along the other short side (12 sc), and 1 sc in each st along the remaining long side (30 sc). Place a marker in the first st. (84 sc)
Round 2: Sc in each st around. (84 sc)
Round 3: Sc in each st around. (84 sc)
Round 4: Sc in each st around. (84 sc)
Round 5: Sc in each st around. (84 sc)
Round 6: Sc in each st around. (84 sc)
Round 7: Sc in each st around. (84 sc)
Round 8: Sc in each st around. (84 sc)
Round 9: Sc in each st around. (84 sc)
Round 10: Sc in each st around. (84 sc)
Round 11: Sc in each st around. (84 sc)
Round 12: Sc in each st around. (84 sc)
Round 13: Sc in each st around. (84 sc)
Round 14: Sc in each st around. (84 sc)
Round 15: Sc in each st around. (84 sc)
Round 16: Sc in each st around. (84 sc)
Round 17: Sc in each st around. (84 sc)
Round 18: Sc in each st around. (84 sc)
Round 19: Sc in each st around. (84 sc)
Round 20: Sc in each st around. (84 sc)
Round 21: Sc in each st around. (84 sc)
Round 22: Sc in each st around. (84 sc)
Round 23: Sc in each st around. (84 sc)
Round 24: Sc in each st around. (84 sc)
Round 25: Sc in each st around. (84 sc)
Round 26: Sc in each st around. (84 sc)
Round 27: Sc in each st around. (84 sc)
Round 28: Sc in each st around. (84 sc)
Round 29: Sc in each st around. (84 sc)
Round 30: Sc in each st around. (84 sc)
Your body now measures approximately 9 inches tall from the base.
Top Edge and Handles
Round 31: Sc in each st around. (84 sc)
Round 32: Sc in the first 12 sts, ch 20, skip the next 18 sts, sc in the next 24 sts, ch 20, skip the next 18 sts, sc in the last 12 sts. (48 sc + 2 ch-20 spaces)
Round 33: Sc in each sc and in each ch across. (88 sc)
Round 34: Sc in each st around. (88 sc)
Round 35: Sl st in each st around. Fasten off and weave in ends. (88 sl sts)
Assembly and Finishing
Weaving in ends: Thread each yarn tail onto your tapestry needle. Turn the bag inside out and sew the tail back and forth through the inside of the fabric for about 2 inches, passing through the middle of stitches rather than over the edge. Then change direction and sew back the other way for another inch. This locks the tail in place so it will never work loose. Trim the yarn close to the fabric. Do this for every tail, including the starting tail and the final tail.
Shaping the handles: Turn the bag right side out. Gently pull each handle loop into a smooth, even curve with your fingers so the chain and the single crochet round sit flat together and do not twist. Because the handles were reinforced with a round of single crochet, they should feel firm and comfortable in your hand.
Blocking: Blocking means dampening the bag and shaping it to dry so the stitches settle evenly. Lightly mist the bag with clean water from a spray bottle until it is damp but not dripping. Stuff the bag loosely with a folded towel or a plastic bag so the sides stand straight, and lay it flat on a dry towel. Smooth the base flat and arrange the handles neatly. Leave it to dry completely, away from direct heat. Cotton dries fairly quickly, usually overnight. This step is optional but makes a lovely difference to the finished look.
Optional finishing touches: Add a fabric lining sewn inside the bag for extra security, or sew a small button closure at the top center with a short crocheted loop on the opposite side.
Pro Tips and Variations
- Change colors for stripes: Work the base in one color, then switch to a second color at Round 1 of the sides. To change color, finish the last stitch of a round by pulling the new color through the final two loops, then continue with the new color. Carry the old color loosely up the inside, or cut it and weave in the ends. You can add a stripe every 5 rounds for a cheerful look.
- Make it bigger or smaller: To change the size, add or remove rows from the flat base. Each extra row adds 2 stitches to the perimeter count, so add 2 stitches to your Round 1 total for every row you add. To make the bag taller, simply work more repeats of the plain single crochet round before the top edge.
- Substitute your yarn: Any worsted weight (category 4) yarn will work, but cotton or a cotton blend is best because it is strong and holds shape. Acrylic yarn makes a softer, stretchier bag that may sag when loaded. If you use a different fiber, check your gauge again first.
- Add a pocket or a drawstring: Before the top edge, work a small flat rectangle of single crochet and sew it to the inside of the bag as a pocket. Or, at Round 31, work a round of chain spaces (sc 2, ch 1, skip 1) to create eyelets, then thread a crocheted chain through them as a drawstring.