The Tidal Drift Infinity Scarf Free Pattern – A Knitted Ode to Ocean Currents
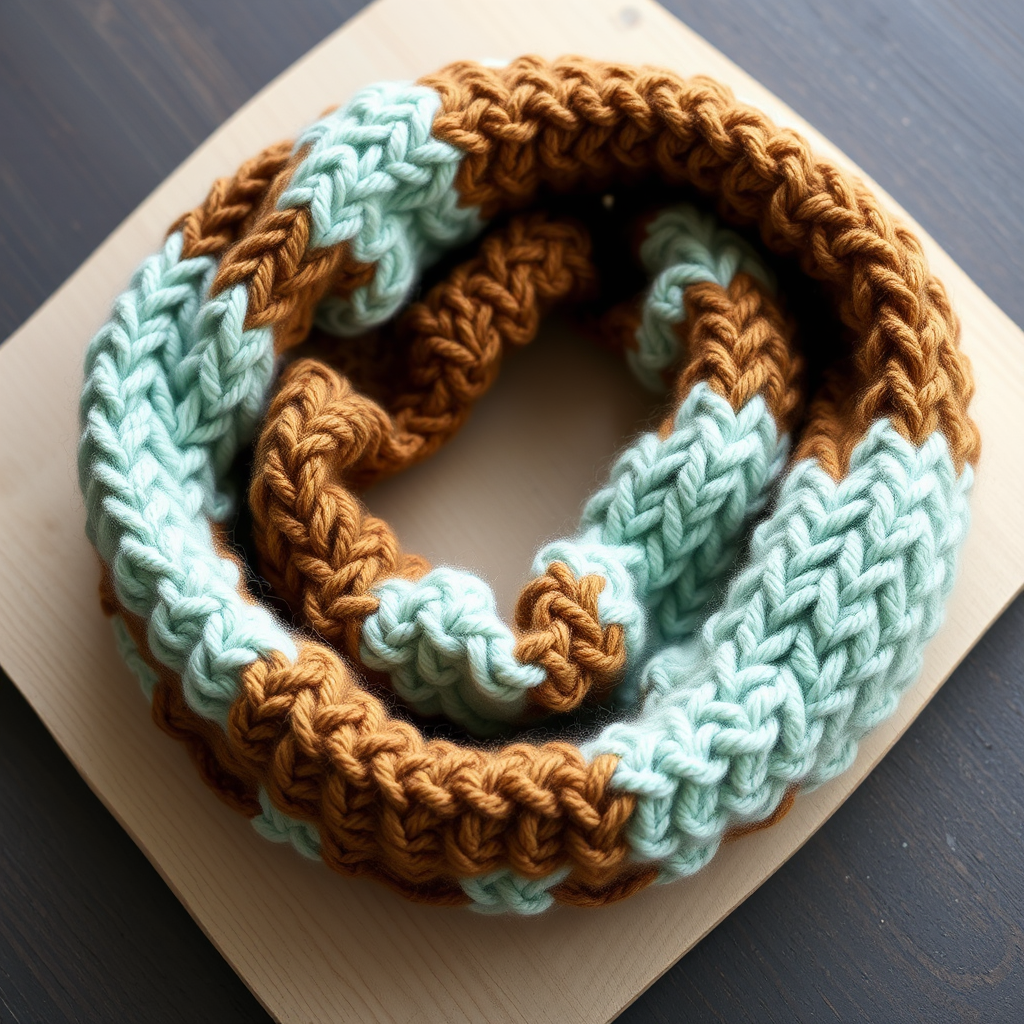
The Tidal Drift Infinity Scarf: A Knitted Ode to Ocean Currents
Wrap yourself in the soothing rhythm of the sea with this uniquely textured infinity scarf. Featuring undulating waves of soft, chunky yarn, this cozy knit is perfect for adding a touch of coastal calm to any winter outfit. The pattern combines simple knits, purls, and yarn overs to create a beautiful, wavy texture reminiscent of ocean currents. Best of all, this is a beginner-friendly project that works up quickly with super bulky yarn, making it an ideal weekend knit.
Materials Needed
Before you begin, gather the following supplies to ensure a smooth knitting experience:
- Yarn: 2 skeins of Lion Brand Wool-Ease Thick & Quick (or any super bulky weight yarn, approx. 250g/180m per skein) in colors: 'Seafoam' (main color) and 'Driftwood' (contrast color)
- Needle: US 13 (9mm) circular knitting needle, 24-inch cable
- Notions: Stitch marker, tapestry needle for weaving in ends, scissors
- Gauge: 10 stitches and 14 rows = 4 inches in stockinette stitch (after blocking)
Step-by-Step Instructions
This infinity scarf is knit in the round, creating a seamless, cozy tube. The pattern uses a simple combination of knits, purls, and yarn overs to create a beautiful, wavy texture reminiscent of ocean currents. Follow along carefully, and you'll have a stunning coastal accessory in no time.
Abbreviations
- CO: Cast on
- K: Knit
- P: Purl
- YO: Yarn over
- K2tog: Knit two stitches together
- SSK: Slip, slip, knit (slip two stitches knitwise, one at a time, then knit them together through the back loop)
- PM: Place marker
- SM: Slip marker
- Rep: Repeat
Setup
Step 1: With main color (Seafoam), CO 120 stitches. Place a marker at the beginning of the round and join in the round, being careful not to twist the stitches. This is crucial—if your stitches are twisted, the entire scarf will be twisted, so take a moment to ensure they lie flat before joining.
Main Color Wave Pattern (Rounds 1-12)
Round 1: Knit all stitches. This creates the base row for the wave pattern.
Round 2: Purl all stitches. The purl row adds texture and helps define the wave ridges.
Round 3 (Wave pattern start): *K2, YO, K2tog, K4, SSK, YO, K2*; rep from * to * around (15 reps). The yarn overs create the eyelet holes that mimic sea foam, while the decreases (K2tog and SSK) form the wave peaks.
Round 4: Knit all stitches. This plain knit row allows the wave pattern to breathe and keeps the fabric from becoming too dense.
Round 5: *K1, YO, K2tog, K1, K2tog, YO, K3, YO, SSK, K1*; rep from * to * around. Notice how the pattern shifts slightly—this creates the undulating effect of ocean currents.
Round 6: Knit all stitches.
Round 7: *K2, YO, SSK, K3, K2tog, YO, K3*; rep from * to * around. The combination of SSK and K2tog on either side of the yarn overs creates a balanced, symmetrical wave.
Round 8: Knit all stitches.
Round 9: *K3, YO, SSK, K1, K2tog, YO, K4*; rep from * to * around. The wave peaks are becoming more pronounced now.
Round 10: Knit all stitches.
Round 11: *K4, YO, K2tog, SSK, YO, K4*; rep from * to * around. This round creates the widest part of the wave.
Round 12: Knit all stitches. This completes one full wave repeat.
Repeat Main Color Pattern
Rounds 13-24: Repeat Rounds 1-12 once more. This gives you two full wave repeats in the main color, establishing the rhythm of the pattern.
First Color Change (Contrast Color)
Round 25: With contrast color (Driftwood), knit all stitches. When changing colors, simply drop the old yarn and pick up the new one, leaving a tail to weave in later. Don't cut the main color yarn—you'll need it again.
Round 26: Purl all stitches.
Rounds 27-38: Repeat Rounds 3-12 with contrast color. This creates a full wave repeat in the driftwood color, adding beautiful contrast to the seafoam.
Alternating Color Blocks
Rounds 39-50: Switch back to main color (Seafoam) and repeat Rounds 1-12. Carry the unused yarn loosely up the inside of the tube, or cut and rejoin as preferred.
Rounds 51-62: Switch to contrast color (Driftwood) and repeat Rounds 1-12. The alternating bands create a beautiful, rhythmic pattern that mimics the ebb and flow of tides.
Rounds 63-74: Switch back to main color (Seafoam) and repeat Rounds 1-12. This completes the final wave block.
Finishing
Step 1: Bind off all stitches loosely in knit. To ensure a stretchy bind-off that matches the flexibility of the scarf, use a larger needle (like US 15) or use the "knit two together" bind-off method: K2tog, slip the stitch back to the left needle, repeat until all stitches are bound off.
Step 2: Weave in all ends with a tapestry needle. Take your time here—secure ends properly by weaving them through the wrong side of the fabric for at least 2-3 inches to prevent unraveling.
Step 3: Block the scarf gently: soak in lukewarm water with a little wool wash, squeeze out excess water (don't wring!), and lay flat to dry, shaping the waves slightly. This step is essential for evening out the stitches and enhancing the wave definition.
Step 4: Once dry, twist the scarf once and sew the two ends together (using the mattress stitch or a simple whip stitch) to form an infinity loop. The twist adds a stylish, modern touch. Alternatively, you can leave it as a long scarf and tie it.
Tips for Success
- Longer scarf? If you prefer a longer scarf, simply repeat the color blocks as desired. Each block adds approximately 4 inches to the length.
- Understanding the pattern: The yarn overs create the 'holes' that mimic sea foam, while the decreases form the wave peaks. Once you understand this, you can easily read your knitting and catch mistakes early.
- Reversible design: This pattern is reversible, so both sides look beautiful. Don't worry about which side is "right"—just enjoy wearing it either way!
- Counting stitches: Each round should maintain 120 stitches. If you find yourself off-count, check your yarn overs and decreases—each YO should be paired with a corresponding decrease.
This pattern is perfect for beginners who want to try something a little more interesting than plain stockinette, yet still approachable. The combination of chunky yarn and simple stitch techniques means you'll have a beautiful, cozy scarf in just a few evenings of knitting. The coastal aesthetic and soft, plush drape make it a versatile accessory that pairs beautifully with everything from casual sweaters to dressy coats.
Happy knitting, and may your stitches flow as gently as the tide!


