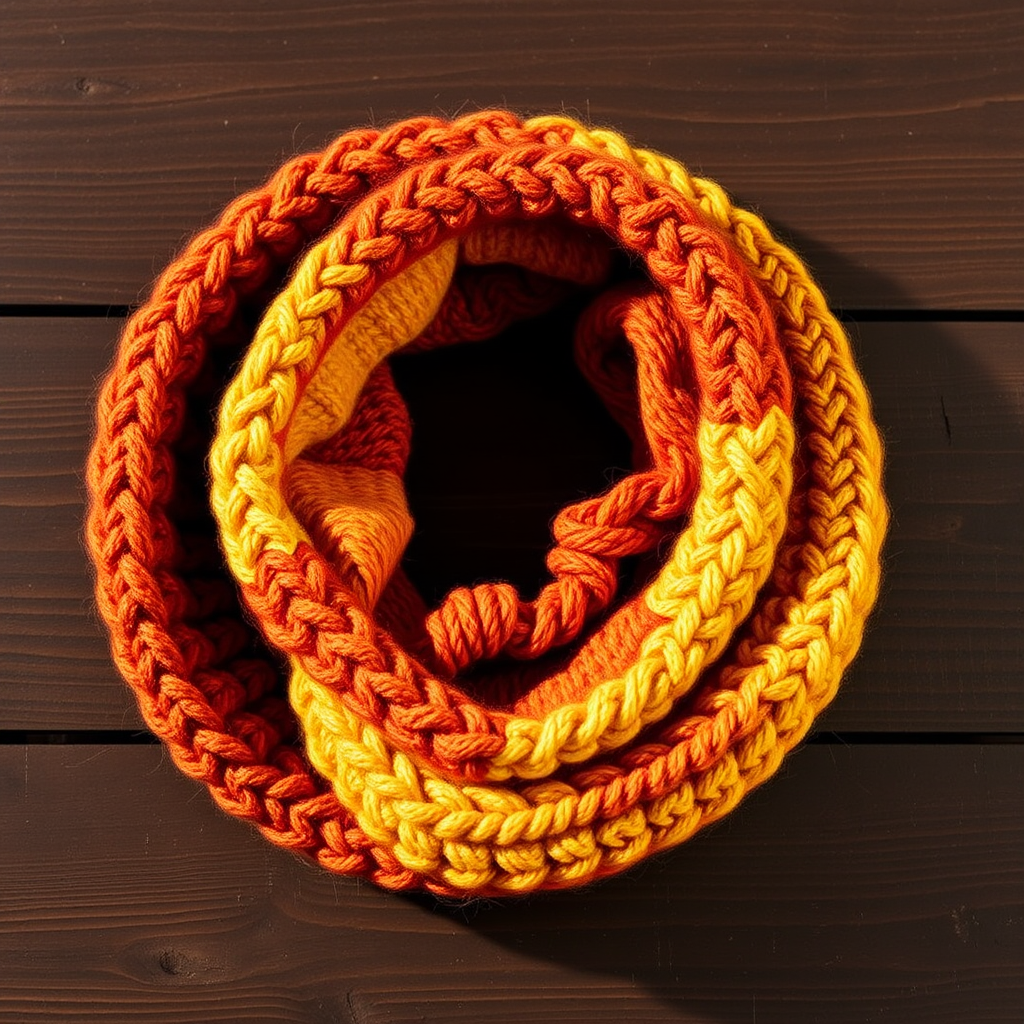
The Woven Willow Cowl: A Free Knitting Pattern for a Textured, Asymmetrical Neck Warmer

Wrap Yourself in Texture: The Woven Willow Cowl
Are you ready to knit a project that looks far more complex than it actually is? The Woven Willow Cowl is a stunning, asymmetrical neck warmer that uses a clever slipped-stitch technique to create a fabric that mimics interwoven branches. This modern, sculptural design drapes beautifully over your shoulders, offering a cozy yet sophisticated accessory for fall and winter. Best of all, this is a free knitting pattern that is perfect for adventurous beginners looking to expand their skills. Let's dive into creating this textured masterpiece.
Materials Needed
Before you begin, gather the following supplies. The pattern is designed for a specific weight and needle size to achieve the perfect drape and texture.
- Yarn: Worsted weight yarn (Category 4). The sample uses Malabrigo Rios in 'Diana' (approx 210 yds / 192 m). You will need approximately 210 yards of any worsted weight yarn.
- Needles: US 8 (5 mm) 16-inch circular needle. (Note: You will be working flat, so a circular needle is used to accommodate the number of stitches, but you will not be joining in the round.)
- Notions: Tapestry needle for weaving in ends and seaming, stitch markers (optional), scissors.
Gauge
Getting the correct gauge is crucial for the final size and drape of your cowl.
18 stitches and 28 rows = 4 inches in Woven Willow pattern (after blocking).
Always knit a swatch and block it before measuring to ensure your tension matches.
Step-by-Step Instructions
Follow these detailed instructions carefully. The pattern is worked flat in one piece and then seamed to create the asymmetrical shape.
Abbreviations
- CO: Cast on
- K: Knit
- P: Purl
- Sl: Slip stitch purlwise with yarn in back (wyib)
- St(s): Stitch(es)
- Rep: Repeat
- BO: Bind off
- K2tog: Knit two stitches together (decrease)
- P2tog: Purl two stitches together (decrease)
Pattern Notes
- The cowl is worked flat in one piece, then seamed to create an asymmetrical wrap.
- The slipped-stitch pattern creates a dense, warm fabric that is reversible.
- The pattern is a multiple of 2 + 1. We will cast on 41 stitches.
Instructions
Cast On: CO 41 sts.
Row 1 (Right Side - RS): K1, *Sl1, K1; rep from * to end. (You will end with a K1 after the last Sl1.)
Row 2 (Wrong Side - WS): P1, *Sl1, P1; rep from * to end.
Row 3: K1, *K1, Sl1; rep from * to last 2 sts, K2.
Row 4: P1, *P1, Sl1; rep from * to last 2 sts, P2.
Repeat Rows 1-4 until piece measures approximately 24 inches (61 cm) from the cast-on edge, ending with a WS row (Row 2 or Row 4).
Shape the Asymmetry
Now we will begin decreasing on one side to create the slanted edge. Work the following rows in order:
Next Row (RS): K1, *Sl1, K1; rep from * to last 3 sts, Sl1, K2tog. (40 sts)
Next Row (WS): P1, *Sl1, P1; rep from * to last 3 sts, Sl1, P2tog. (39 sts)
Next Row: K1, *K1, Sl1; rep from * to last 2 sts, K2tog. (38 sts)
Next Row: P1, *P1, Sl1; rep from * to last 2 sts, P2tog. (37 sts)
Continue decreasing: Continue in the established pattern (repeating Rows 1-4 as written above), but always decrease 1 stitch at the end of every row (on the same side) by working a K2tog on RS rows and a P2tog on WS rows. Continue this until only 1 stitch remains.
Fasten off: Cut the yarn, leaving a 6-inch tail. Pull the tail through the last stitch to secure.
Finishing
- Weave in ends: Use your tapestry needle to weave in all loose ends securely on the wrong side of the fabric.
- Block: Soak the piece in lukewarm water with a gentle wool wash for 15-20 minutes. Gently squeeze out excess water (do not wring). Lay flat on a towel, roll up to remove more water, then lay flat to dry, gently shaping to the measurements. Blocking will open up the stitch pattern and even out the tension.
- Seaming: Once dry, you will have a long, asymmetrical trapezoid. Fold the straight edge (the cast-on edge) over to meet the slanted edge (the bind-off edge), creating a loop. The longer side will wrap around the front. Sew the straight edge to the slanted edge using a mattress stitch or whip stitch, leaving a small opening if you wish to turn the cowl inside out for a cleaner finish. The cowl will naturally have a twisted, draped effect.
Your Woven Willow Cowl is complete! Wear it wrapped once or twice for a cozy, textured look that is sure to draw compliments.