Whimsical Woodland Fawn Cardigan Free Pattern – Knit a Baby Deer Dream
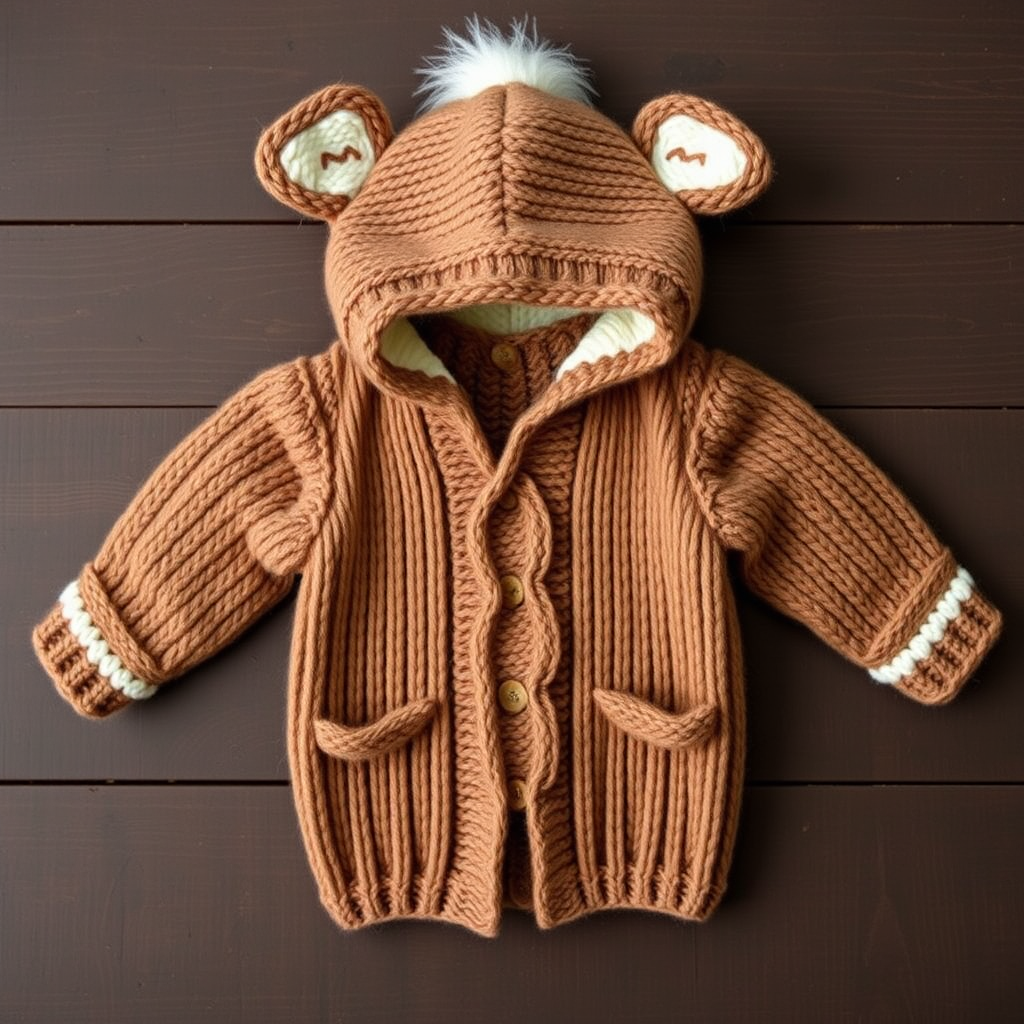
Whimsical Woodland Fawn Cardigan Free Pattern – Knit a Baby Deer Dream
Wrap your little one in the softest forest fantasy with this adorable fawn-inspired cardigan, complete with tiny ears and a fluffy tail. This cozy knit is perfect for snuggly adventures and heirloom-quality gifting. The combination of warm brown, cream, and soft white yarns creates a woodland charm that both babies and parents will adore. Whether you're a seasoned knitter or just starting your journey, this pattern is designed to be approachable, rewarding, and utterly delightful to create.
Materials Needed
Before you begin, gather the following materials to ensure a smooth knitting experience:
- Yarn: Worsted weight yarn in warm brown (MC), cream (CC1), and soft white (CC2) – approximately 300g MC, 50g CC1, 50g CC2
- Needles: US 7 (4.5mm) knitting needles
- Notions: Tapestry needle for weaving in ends, stitch markers, and buttons or snaps for the front closure
- Gauge: 20 stitches and 26 rows = 4 inches in stockinette stitch (knit on right side, purl on wrong side)
Step-by-Step Instructions
This pattern is available in three sizes: 0-3 (3-6, 6-12) months. Finished chest measurements are 16 (18, 20) inches. Follow the instructions carefully, and you'll have a beautiful fawn cardigan in no time.
Back Panel
- With MC, cast on 40 (44, 48) stitches.
- Work in stockinette stitch (knit on RS, purl on WS) until the piece measures 6 (7, 8) inches from the cast-on edge.
- Shape armholes: Bind off 3 stitches at the beginning of the next 2 rows. Continue in stockinette until the armhole measures 3.5 (4, 4.5) inches.
- Bind off all stitches.
Left Front Panel
- With MC, cast on 20 (22, 24) stitches.
- Work in stockinette until the piece measures 6 (7, 8) inches.
- Shape armhole: Bind off 3 stitches at the beginning of the next RS row. Continue until the armhole measures 2.5 (3, 3.5) inches.
- Shape neck: At the beginning of the next WS row, bind off 4 stitches. Then decrease 1 stitch at the neck edge every RS row 3 times.
- Continue until the armhole measures 3.5 (4, 4.5) inches. Bind off the remaining 10 (12, 14) stitches.
Right Front Panel
- Work as for the left front, reversing all shaping. Bind off for the armhole at the beginning of a WS row, and shape the neck at the beginning of a RS row.
Sleeves (Make 2)
- With MC, cast on 24 (26, 28) stitches.
- Work in stockinette, increasing 1 stitch at each edge every 4th row until you have 32 (36, 40) stitches.
- Continue until the sleeve measures 5 (6, 7) inches. Bind off all stitches.
Hood
- With MC, cast on 40 (44, 48) stitches.
- Work in stockinette until the piece measures 5 (5.5, 6) inches.
- Shape top: Place a marker at the center. Work decreases: K2tog before the marker, SSK after the marker every other row until 20 (22, 24) stitches remain.
- Bind off.
Ears (Make 2)
- With CC1, cast on 6 stitches.
- Work in stockinette for 2 inches.
- Decrease: K2tog across the row (3 stitches). Bind off.
- Fold the ear in half lengthwise and sew the edges together to form a pointed ear shape.
Tail
- With CC2, cast on 8 stitches.
- Work in stockinette for 1 inch.
- Decrease: K2tog across the row (4 stitches). Bind off.
- Gather the cast-on edge and pull tight to form a fluffy ball. Sew to the back of the cardigan at the lower edge.
Assembly
- Sew the shoulder seams, side seams, and sleeve seams.
- Set in the sleeves, matching the armhole edges.
- Sew the hood to the neck edge, matching the center back of the hood to the center back of the cardigan.
- Sew the ears to the top of the hood, about 1 inch from the center front edge.
Finishing
- With CC1, pick up and knit 60 (66, 72) stitches along the front edges and hood opening.
- Work in garter stitch (knit every row) for 4 rows. Bind off.
- Sew buttons or snaps to the front bands, placing them evenly.
- Weave in all ends with a tapestry needle.
Your Whimsical Woodland Fawn Cardigan is now complete! This charming piece is sure to become a treasured keepsake, perfect for baby showers, woodland-themed photos, or simply keeping your little one cozy and adorable. Happy knitting!


