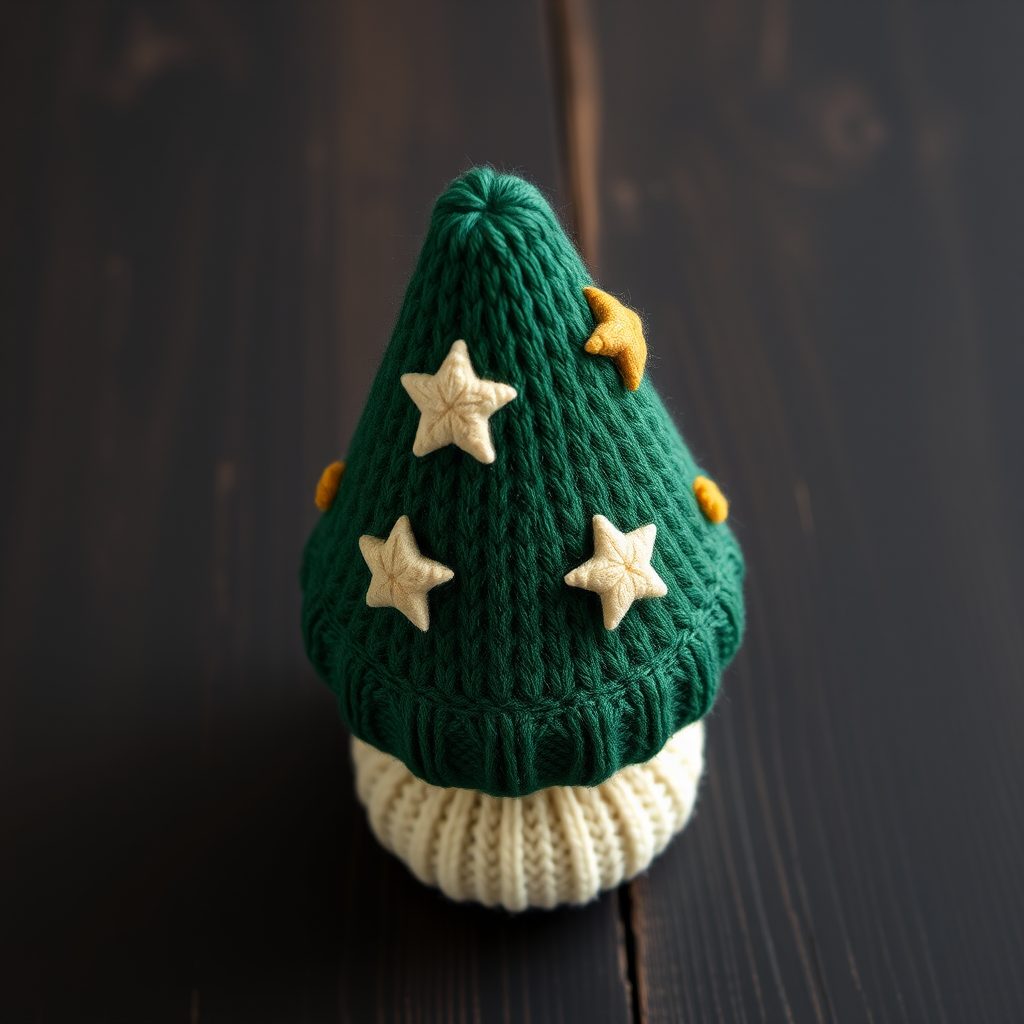
Whimsical Woodland Gnome Hat Free Pattern – Knit a Cozy Curved-Tip Elf Hat

Whimsical Woodland Gnome Hat Free Pattern – Knit a Cozy Curved-Tip Elf Hat
Step into a storybook this winter with our Whimsical Woodland Gnome Hat! This charming elf hat features a gracefully curved tip that flops to the side, inspired by woodland gnomes and storybook sprites. Knit in a rich forest green with a cream faux-fur trim, it's the perfect cozy accessory for winter festivities, holiday markets, or simply curling up by the fire. Whether you're crafting for a child or treating yourself, this free knitting pattern is designed to be approachable for beginners while still offering a fun, unique construction technique.
This hat is knit in the round from the bottom up, with a unique curved tip created by short rows and a side seam. The result is a soft, unstructured silhouette with gentle folds and a natural drape that captures the magic of a woodland gnome. Let's gather our supplies and get started on this delightful project!
Materials Needed
Before you begin, ensure you have all the necessary materials on hand. This pattern uses simple, readily available supplies:
- Yarn: Worsted weight yarn in forest green (MC) and cream (CC), approx 250g total. A smooth, plied yarn works best to show off the stockinette stitch texture.
- Needles: US 7 (4.5mm) circular needles 16-inch for the main body, and US 7 (4.5mm) double-pointed needles for the crown decreases.
- Notions: Stitch markers, tapestry needle for weaving in ends, scissors, and optional fiberfill for stuffing the tip.
- Gauge: 20 stitches and 26 rows = 4 inches in stockinette stitch. Always check your gauge to ensure the correct finished size.
Step-by-Step Instructions
This hat is knit in the round from the bottom up, with a unique curved tip created by short rows and a side seam. Follow these detailed instructions carefully to create your own whimsical gnome hat.
Sizes and Measurements
- Sizes: Child (Adult)
- Finished Circumference: 18 (21) inches
- Finished Height: 12 (14) inches including tip
Abbreviations
- k = knit
- p = purl
- k2tog = knit two together (decrease)
- ssk = slip slip knit (decrease)
- pm = place marker
- sm = slip marker
- wyif = with yarn in front
- CO = cast on
- BO = bind off
Ribbing
CO 90 (105) stitches with MC. Join in the round, being careful not to twist. Place marker for beginning of round.
Rounds 1-8: *K1, p1* repeat to end. This creates a stretchy, snug ribbed brim that will hold the hat comfortably in place.
Body
Switch to stockinette (knit every round) and work straight for 6 (7) inches from cast-on edge. This creates the slouchy, elongated body of the hat that tapers gently toward the crown.
Crown Decreases
Now we'll shape the top of the hat. Work the following decrease rounds, knitting all stitches on even-numbered rounds:
- Round 1: *K8 (9), k2tog* repeat to end. (81, 95 sts)
- Round 2 and all even rounds: Knit all stitches.
- Round 3: *K7 (8), k2tog* repeat to end. (72, 85 sts)
- Round 5: *K6 (7), k2tog* repeat to end. (63, 75 sts)
- Round 7: *K5 (6), k2tog* repeat to end. (54, 65 sts)
- Round 9: *K4 (5), k2tog* repeat to end. (45, 55 sts)
- Round 11: *K3 (4), k2tog* repeat to end. (36, 45 sts)
- Round 13: *K2 (3), k2tog* repeat to end. (27, 35 sts)
- Round 15: *K1 (2), k2tog* repeat to end. (18, 25 sts)
- Round 17: *K0 (1), k2tog* repeat to end. (9, 15 sts)
Cut yarn, leaving a long tail. Thread tail through remaining stitches, pull tight, and secure. This gathers the crown neatly into a point.
Curved Tip
The curved tip is created by knitting a separate piece and attaching it to the top of the hat. This is what gives the hat its signature whimsical flop.
With MC, CO 20 (24) sts.
- Row 1 (RS): Knit all.
- Row 2: Purl all.
Repeat these two rows until piece measures 4 (5) inches from cast-on. This forms the base of the cone-shaped tip.
Short Row Shaping
Short rows create the graceful curve. Follow these steps carefully, wrapping stitches as indicated to avoid holes:
- Row 1 (RS): K16 (20), wrap next stitch, turn.
- Row 2: P12 (16), wrap next stitch, turn.
- Row 3: K8 (12), wrap next stitch, turn.
- Row 4: P4 (8), wrap next stitch, turn.
- Row 5: Knit all stitches, picking up wraps and knitting them together with the wrapped stitch. This closes the gaps and creates a smooth curve.
- Row 6: Purl all.
Finish Tip
Fold the tip piece in half lengthwise (right sides together) and sew the long edge to create a cone shape. Turn right side out. Stuff lightly with fiberfill if desired to give it a bit of body and help it hold its shape.
Attach Tip
Position the tip at the top of the hat, slightly off-center (about 1 inch from the center). This off-center placement is key to achieving the floppy, storybook look. Sew the tip securely to the hat using the yarn tail, making sure it's well-anchored.
Faux Fur Trim
With CC, CO 90 (105) sts. Work in stockinette for 3 inches. BO loosely. Sew the trim strip around the brim of the hat, folding it slightly to create a fluffy, rolled edge. The cream trim contrasts beautifully with the forest green and adds a cozy, luxurious finish.
Finishing
Weave in all ends carefully with a tapestry needle. Block lightly if desired to even out the stitches and give the hat a professional finish. Your Whimsical Woodland Gnome Hat is now ready to wear!
This pattern is perfect for holiday gifting, winter photo shoots, or adding a touch of magic to your cold-weather wardrobe. The combination of the rich green, creamy trim, and unique curved tip makes it a standout piece that's sure to spark joy. Happy knitting!