Geometric Harmony Minimalist Clutch Free Pattern
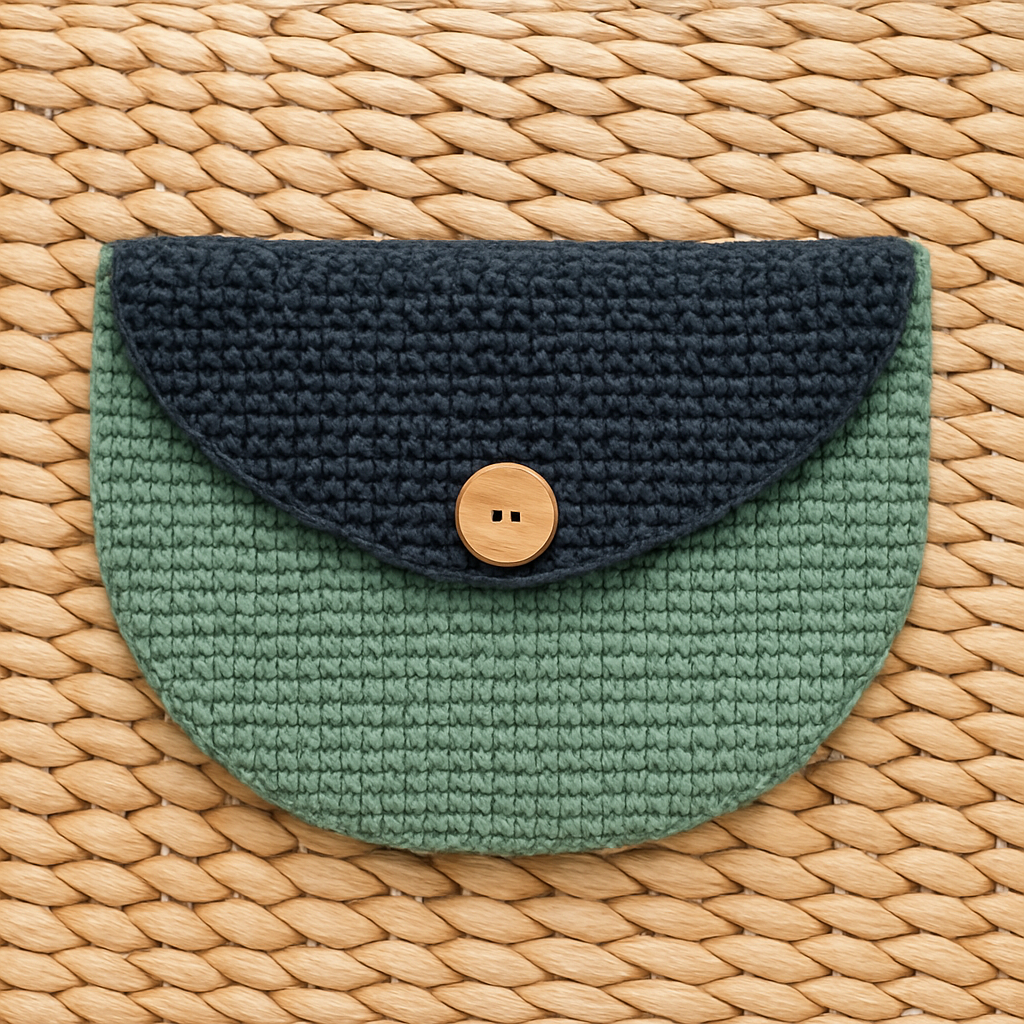
Geometric Harmony Minimalist Clutch Free Pattern
Introduction
Discover the elegance of simplicity with the Geometric Harmony Minimalist Clutch. This design combines clean lines and subtle textures to create a sophisticated accessory perfect for any occasion. Whether you're heading out for a night on the town or just need a stylish way to carry your essentials, this clutch is a must-have addition to your wardrobe. Plus, it’s a fun and rewarding project for beginners!
Materials Needed
- Yarn: DK weight cotton yarn (suggested colors: soft muted sage green for the body and deep charcoal gray for the flap)
- Crochet Hook: 4.0 mm crochet hook
- Gauge: 16 stitches x 20 rows = 4 inches in single crochet
- Notions: Scissors, yarn needle for weaving in ends, and a button (natural wood tone recommended)
Step-by-Step Instructions
Follow these detailed steps to create your very own Geometric Harmony Minimalist Clutch:
Starting the Clutch
- Magic Ring: Begin by creating a magic ring. This will be the foundation of your clutch.
- Round 1: Chain 1, then work 6 single crochets (sc) into the magic ring. Join with a slip stitch (sl st) to the first single crochet to close the round.
- Round 2: Chain 1, then work 2 single crochets in each single crochet around. Join (you should have 12 single crochets).
- Round 3: Chain 1, then (sc in the next sc, 2 sc in the next sc) around. Join (you should have 18 single crochets).
- Continue Increasing: Continue this pattern of increasing until you reach a total of 60 single crochets. You can do this by adding an additional single crochet between increases as needed.
Working Even
- Rounds 4-20: Work even in single crochet for 20 rounds. This will form the body of your clutch.
Creating the Flap
- Row 1: Chain 1, then single crochet in the next 40 single crochets. Turn your work.
- Rows 2-10: For each row, chain 1, then single crochet across. Turn your work at the end of each row.
- Finishing: After completing Row 10, fasten off your yarn and weave in any loose ends with a yarn needle.
Assembling the Clutch
- Fold the Circle: Fold the circular body of the clutch in half.
- Sewing the Sides: Using a yarn needle and a length of yarn, sew the sides of the clutch together, leaving the flap open.
- Button Closure: Attach a button to the body of the clutch, ensuring it aligns with the flap for closure.
- Button Loop: Create a button loop by making a chain stitch on the flap that is long enough to fit around the button.
Conclusion
Congratulations on completing your Geometric Harmony Minimalist Clutch! This chic accessory is not only a testament to your newfound crochet skills but also a stylish addition to your collection. Enjoy showcasing your handmade creation, and don’t forget to share your finished clutch with friends and family!


