Golden Hour Granny Square Blanket Free Pattern – A Sunset-Inspired Heirloom Throw

Golden Hour Granny Square Blanket Free Pattern – A Sunset-Inspired Heirloom Throw
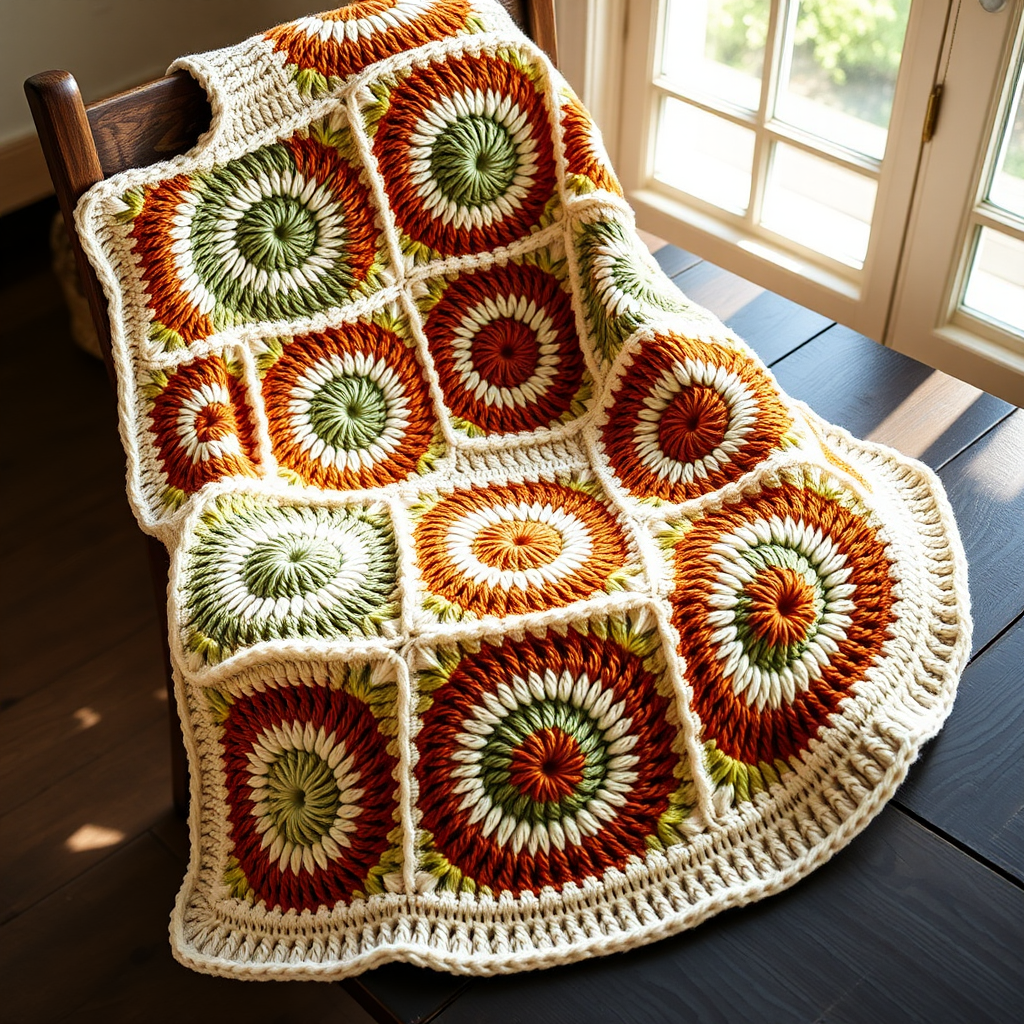
There's something deeply comforting about wrapping yourself in a handmade blanket that captures the warmth of a setting sun. The Golden Hour Granny Square Blanket is a modern take on the classic granny square pattern, featuring a rich palette of amber, burnt orange, soft gold, and cream. Each square is a medley of sunset hues, creating a cozy, nostalgic piece that feels like an heirloom from the very first stitch.
Whether you're crafting for a quiet evening on the porch, a gift for a loved one, or simply to add a touch of golden warmth to your home, this pattern is perfect for crocheters of all skill levels. The repetitive nature of granny squares makes it a relaxing project, while the color transitions keep it visually engaging. Let's dive into this beautiful, sunset-inspired throw!
Materials Needed
Before you begin, gather the following materials. All items are readily available at your local craft store or online.
- Yarn: Worsted weight yarn in 4 colors:
- Color A: Amber (approx. 400 yards)
- Color B: Burnt Orange (approx. 400 yards)
- Color C: Soft Gold (approx. 400 yards)
- Color D: Cream (approx. 500 yards – used for assembly and border)
- Hook: 5.5 mm (I-9) crochet hook
- Other Tools: Yarn needle for weaving in ends, scissors, blocking mats and pins (optional but recommended)
Gauge: One granny square = 6 inches x 6 inches (after blocking). This gauge is crucial for ensuring your final blanket measures approximately 48 x 48 inches. If your squares are smaller or larger, adjust your hook size accordingly.
Step-by-Step Instructions
This pattern is worked in the round, and each square is made separately before being assembled. Follow these detailed instructions carefully, and you'll have 16 beautiful squares in no time.
Square Pattern (Make 16 Total)
Round 1: With color A (Amber), make a magic ring. Ch 3 (counts as first dc), 2 dc into ring, ch 2, (3 dc, ch 2) 3 times. Join with a sl st to the top of the ch-3. Fasten off. You should have 12 dc and 4 ch-2 spaces.
Pro Tip: If you're new to magic rings, you can alternatively ch 4 and join with a sl st to form a ring. Work the same stitches into the center of the ring.
Round 2: Join color B (Burnt Orange) in any ch-2 space. Ch 3, (2 dc, ch 2, 3 dc) in the same space – this creates your first corner. *Ch 1, (3 dc, ch 2, 3 dc) in the next ch-2 space.* Repeat from * around, ending with ch 1. Join with a sl st to the top of the ch-3. Fasten off. You should have 24 dc, 4 corners, and 4 ch-1 spaces.
Round 3: Join color C (Soft Gold) in any corner ch-2 space. Ch 3, (2 dc, ch 2, 3 dc) in the same space. *Ch 1, 3 dc in the next ch-1 space, ch 1, (3 dc, ch 2, 3 dc) in the next corner.* Repeat from * around, ending with ch 1, 3 dc in the last ch-1 space, ch 1. Join with a sl st to the top of the ch-3. Fasten off. You should have 36 dc, 4 corners, and 8 ch-1 spaces.
Round 4: Join color D (Cream) in any corner ch-2 space. Ch 3, (2 dc, ch 2, 3 dc) in the same space. *Ch 1, 3 dc in the next ch-1 space, ch 1, 3 dc in the next ch-1 space, ch 1, (3 dc, ch 2, 3 dc) in the next corner.* Repeat from * around, ending with ch 1, 3 dc in each of the last two ch-1 spaces, ch 1. Join with a sl st to the top of the ch-3. Fasten off. You should have 48 dc, 4 corners, and 12 ch-1 spaces.
Repeat this pattern until you have 16 complete squares. As you finish each square, weave in the loose ends or leave them for the final finishing step – just make sure they don't get tangled.
Assembly: Joining Your Squares
Now comes the fun part – bringing your blanket together! Lay out your 16 squares in a 4x4 grid. Arrange them so that no two squares of the same color are touching. This creates a balanced, harmonious look that mimics the natural gradient of a sunset.
Once you're happy with the arrangement, use color D (Cream) and a yarn needle to whip stitch the squares together. Here's how:
- Place two squares with right sides facing each other.
- Thread your yarn needle with a length of cream yarn.
- Insert the needle through the back loops only of the corresponding stitches on both squares.
- Pull the yarn through, creating a secure stitch. Continue along the edge, matching stitch for stitch.
- Repeat for all horizontal and vertical seams until all 16 squares are joined into one large rectangle.
Pro Tip: Working through the back loops only creates a nearly invisible seam on the front, giving your blanket a professional, polished finish.
Border: Adding the Finishing Touch
The border frames your beautiful squares and adds structure to the blanket. It's worked in four rounds, each in a different sunset color.
Round 1: With the right side facing, join color D (Cream) in any corner of the assembled blanket. Ch 3, (2 dc, ch 2, 3 dc) in the same space. *Ch 1, skip the next dc, 3 dc in the next ch-1 space.* Repeat from * across the side, working (3 dc, ch 2, 3 dc) in each corner. Join with a sl st to the top of the ch-3. Fasten off.
Round 2: Join color A (Amber) in any corner. Ch 3, (2 dc, ch 2, 3 dc) in the same space. *Ch 1, 3 dc in the next ch-1 space.* Repeat from * across the side, working (3 dc, ch 2, 3 dc) in each corner. Join with a sl st to the top of the ch-3. Fasten off.
Round 3: Join color B (Burnt Orange) in any corner. Repeat the same pattern as Round 2, working (3 dc, ch 2, 3 dc) in each corner and 3 dc in each ch-1 space across. Join with a sl st. Fasten off.
Round 4: Join color C (Soft Gold) in any corner. Repeat the same pattern as Rounds 2 and 3. Join with a sl st. Fasten off.
Finishing and Blocking
Weave in all remaining ends with your yarn needle, being careful to hide them securely within the stitches. Once all ends are woven in, it's time to block your blanket.
Blocking is essential for granny square projects – it evens out the stitches, opens up the lace-like spaces, and ensures your blanket lies perfectly flat. Here's how:
- Fill a basin with lukewarm water and a small amount of mild wool wash or gentle detergent.
- Submerge your blanket and let it soak for 15-20 minutes.
- Gently press out excess water – do not wring or twist.
- Lay the blanket flat on a clean towel and roll it up to remove more water.
- Place the blanket on blocking mats and pin it to the desired dimensions (approximately 48 x 48 inches).
- Allow it to dry completely before unpinning.
Once dry, your Golden Hour Granny Square Blanket is ready to be enjoyed! Whether draped over a couch, folded at the foot of a bed, or wrapped around your shoulders on a cool evening, this heirloom-quality throw will bring warmth and beauty to any space for years to come.
Happy crocheting, and may your stitches always be golden!