Knitting Cozy Textured Cabled Beanie Free Pattern
Introduction
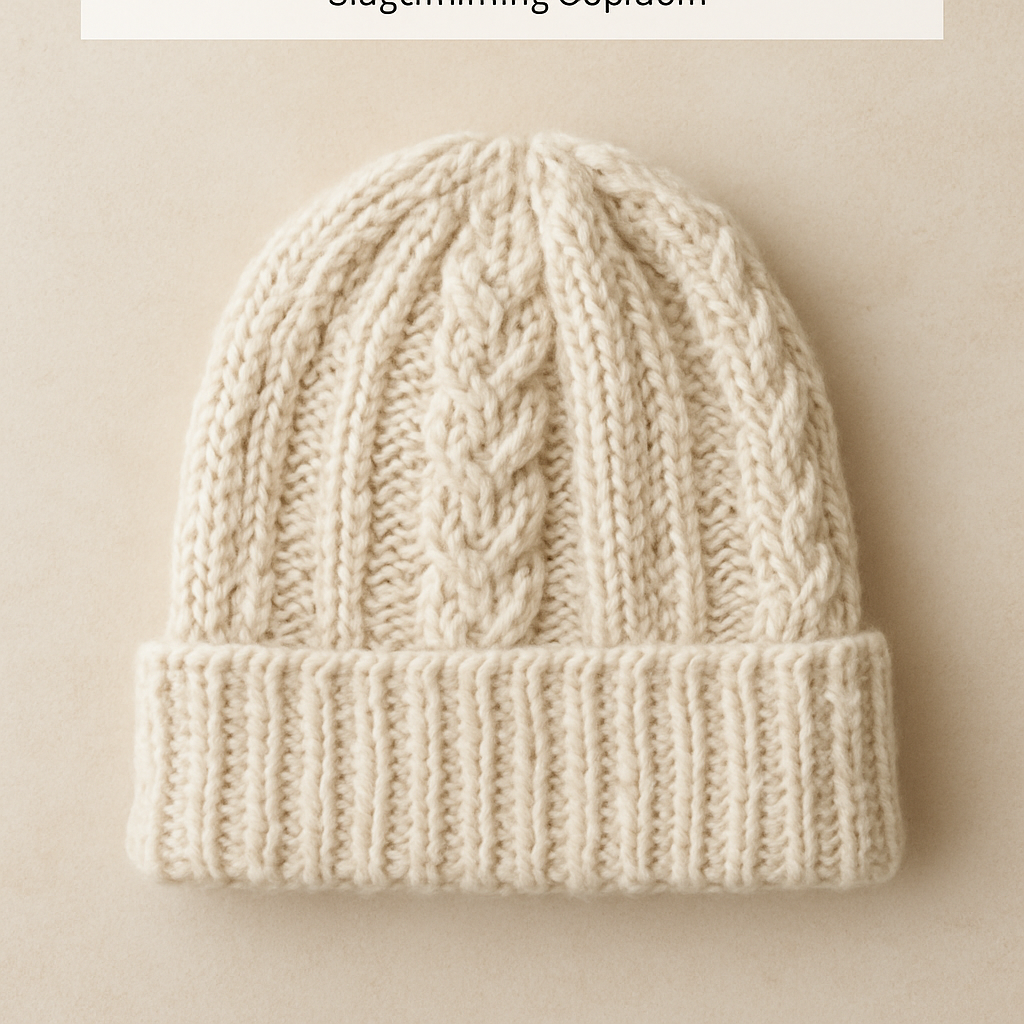
Welcome to our cozy knitted beanie pattern! This beautiful beanie features an intricate cable design and a snug ribbed brim, making it the perfect accessory to keep you warm during the colder months. Designed for intermediate knitters, this pattern will help you enhance your skills with textured stitches while creating a stylish and functional piece. Let’s get started on crafting your very own cozy cabled beanie!
Materials Needed
- Yarn: Bulky weight yarn (approx. 100g)
- Needles: US Size 10 (6.0 mm) circular needles
- Gauge: 12 stitches and 16 rows = 4 inches in stockinette stitch
Step-by-Step Instructions
1. Cast On
Begin by casting on 60 stitches using the long tail cast on method. Ensure that your stitches are not twisted as you join to work in the round.
2. Ribbing
Work in K2, P2 ribbing for 2 inches. This will create a stretchy brim that fits snugly around your head.
3. Stockinette Stitch
After completing the ribbing, switch to stockinette stitch by knitting every round. Continue this until your piece measures 6 inches from the cast-on edge.
4. Cable Pattern
Now it's time to add the cable design! Begin the cable pattern by knitting as follows: *K4, cable 4 (C4B), repeat from * around. The cable 4 (C4B) involves crossing 4 stitches behind the next 4 stitches. This creates the beautiful texture of the cable.
5. Continue Cable Pattern
Continue the cable pattern for 4 more rounds, maintaining the same repeat.
6. Stockinette Rounds
After completing the cable section, knit 4 rounds in stockinette stitch to create a smooth transition before starting the decreases.
7. Decreasing
Now we will start decreasing the stitches to shape the top of the beanie:
- Round 1: *K8, K2tog, repeat from * around.
- Round 2: Knit all stitches.
- Round 3: *K7, K2tog, repeat from * around.
- Round 4: Knit all stitches.
8. Continue Decreasing
Continue this decreasing pattern until you have 12 stitches left on your needles.
9. Closing the Top
Once you have 12 stitches remaining, cut the yarn, leaving a long tail. Thread this tail through the remaining stitches and pull tight to close the top of the hat.
10. Finishing Touches
Finally, weave in all ends using a tapestry needle. If desired, block your beanie to enhance its shape and texture.
Congratulations! You’ve successfully knitted a cozy textured cabled beanie. Wear it proudly or gift it to someone special!