Home Decor Crochet Patterns
Neon Chunky 3D Textured Pillow Free Pattern
Anonymous
•
June 29, 2026
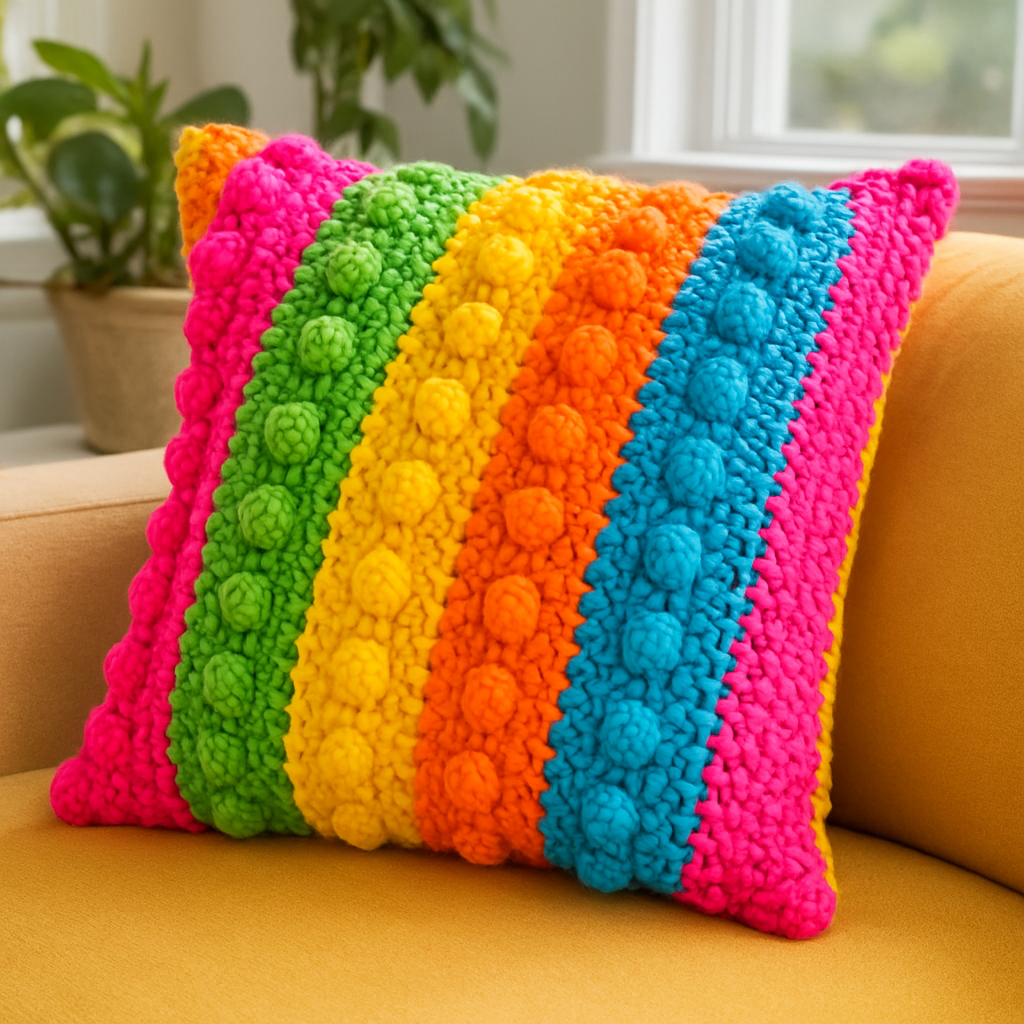
Neon Chunky 3D Textured Pillow Free Pattern
Introduction
Welcome to the world of vibrant crochet! This Neon Chunky 3D Textured Pillow is not just a pillow; it’s a statement piece that will add a bold touch to any room. With its avant-garde design and striking neon hues, this pattern is perfect for both beginners and experienced crocheters looking to create something unique. Let’s dive into the materials you’ll need and the step-by-step instructions to bring this eye-catching pillow to life!
Materials Needed
- Yarn: Super bulky weight yarn in the following colors:
- Neon Pink
- Neon Green
- Neon Yellow
- Neon Blue
- Hook: Size N/P (10 mm) crochet hook
- Pillow Insert: 18x18 inches
Step-by-Step Instructions
- Start with Neon Pink Yarn: Create a magic ring. This will be the center of your pillow.
- Round 1: Chain 1 (Ch 1), then work 8 single crochets (sc) into the magic ring. Join with a slip stitch (sl st) to the first sc. (Total: 8 stitches)
- Round 2: Ch 1, then work 2 sc in each stitch around. Join with sl st. (Total: 16 stitches)
- Round 3: Ch 1, *sc in the next stitch, 2 sc in the next stitch*; repeat this pattern around. Join with sl st. (Total: 24 stitches)
- Continue Increasing: Keep increasing in this manner until the piece measures 18 inches in diameter. You may need to add more rounds, increasing evenly until you reach the desired size.
- Switch to Neon Green Yarn: Work 1 round of sc around the entire piece. This will create a solid base for your 3D texture.
- Begin 3D Bobble Stitch Round: *Sc in the next 2 stitches, bobble stitch in the next stitch*; repeat this pattern around. Join with sl st. This creates the unique 3D texture.
- Switch to Neon Yellow Yarn: Work 1 round of sc around.
- Repeat the 3D Bobble Stitch Round: Follow the same pattern as before to add another layer of texture.
- Switch to Neon Blue Yarn: Work 1 round of sc around.
- Repeat the 3D Bobble Stitch Round: Add the final layer of bobble stitches for depth and dimension.
- Finish Off: Fasten off your work and weave in all ends securely to prevent unraveling.
- Make a Second Identical Piece: Repeat all the steps above to create a second pillow piece.
- Assemble the Pillow: Place both pieces together with the wrong sides facing each other. Using neon pink yarn, join the pieces with sc around three sides.
- Insert Pillow Form: Carefully insert the 18x18 inch pillow insert into the opening.
- Close the Fourth Side: Continue to sc around the last side to secure the pillow insert inside.
- Final Touch: Fasten off and weave in any remaining ends. Your Neon Chunky 3D Textured Pillow is now complete!
Enjoy your new pillow and the vibrant splash of color it brings to your home decor!
Also Check Out: We think you'd love this beautiful pattern on our sister site: Knitting Textured Balaclava Free Pattern