Whispering Pines Forest Floor Throw Free Pattern – A Crocheted Woodland Tapestry
Whispering Pines Forest Floor Throw Free Pattern – A Crocheted Woodland Tapestry
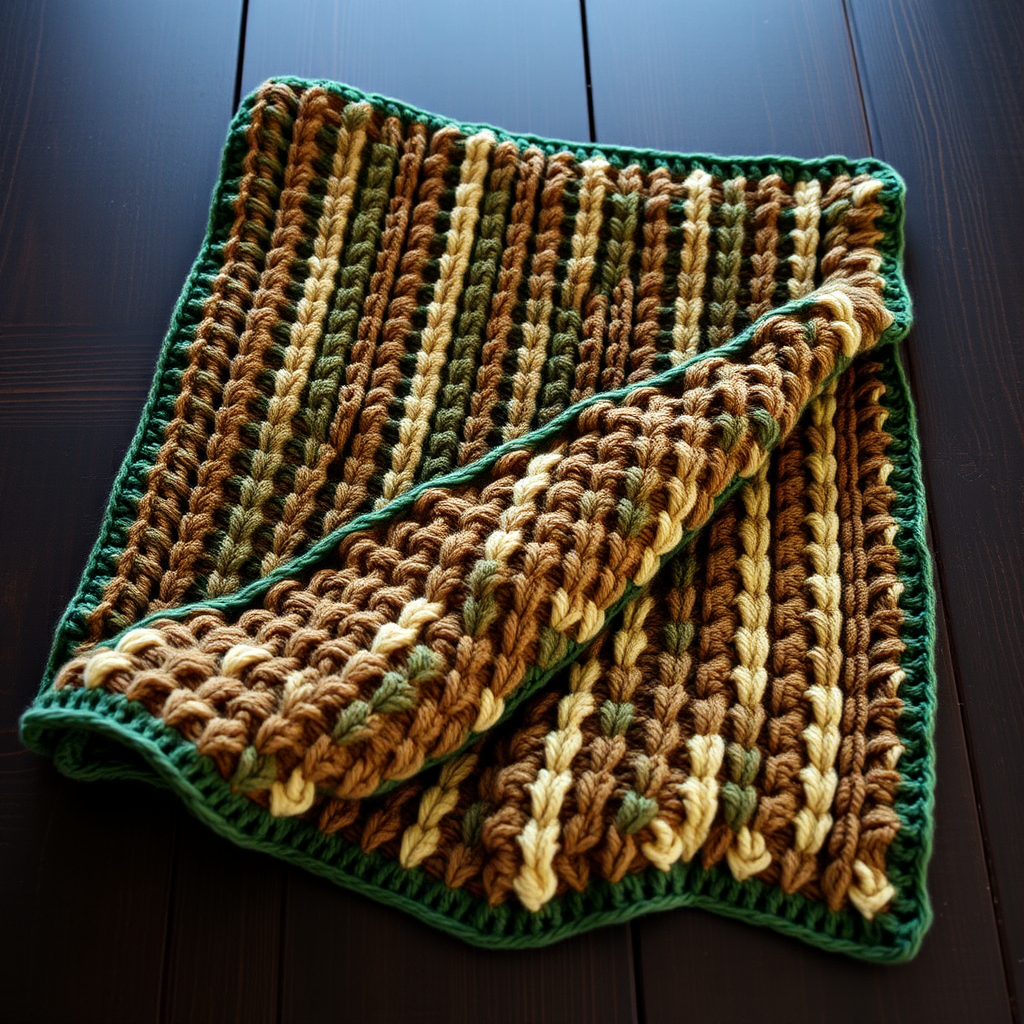
Wrap yourself in the serene beauty of a mossy forest floor with this richly textured crochet throw. The interplay of deep greens, earthy browns, and soft cream creates a cozy, nature-inspired centerpiece for any room. This pattern uses a simple combination of front post and back post double crochet stitches to create a dense, ribbed texture that mimics the layers of a forest floor—perfect for snuggling up on cool evenings or adding a touch of woodland charm to your living space.
This free crochet blanket pattern is designed with beginners in mind, using only basic stitches and a repeating pattern that's easy to memorize. The finished throw measures approximately 50 inches wide by 60 inches long, making it ideal for draping over a couch, bed, or favorite reading chair. The substantial, cozy drape and flat lay make it a practical and beautiful addition to any home.
Materials Needed
Before you begin, gather the following supplies:
- Yarn: Worsted weight yarn in 4 colors (approximately 1800 yards total):
- Color A: Forest Green – approximately 500 yards
- Color B: Moss Green – approximately 450 yards
- Color C: Earth Brown – approximately 450 yards
- Color D: Cream – approximately 400 yards
- Hook: 5.5 mm (I-9) crochet hook
- Other: Yarn needle for weaving in ends, scissors
Gauge: 14 double crochet stitches x 8 rows = 4 inches in pattern stitch. Be sure to check your gauge to ensure your finished throw matches the intended dimensions.
Step-by-Step Instructions
Getting Started: Foundation Chain
Chain 121 loosely (multiple of 12 + 1). The loose foundation chain is important to prevent the bottom edge from pulling or curling. If you tend to crochet tightly, consider using a larger hook for the foundation chain only, then switch to your 5.5 mm hook for the rest of the pattern.
Row 1: Foundation Row
Double crochet (dc) in the 4th chain from the hook (the skipped chains count as your first double crochet). Continue double crocheting in each chain across the row. Turn your work. You should have 119 double crochet stitches total, including the initial chain-3 that counts as a stitch.
Row 2: Establishing the Ribbed Pattern
Chain 3 (this counts as your first double crochet). Now you'll work the post stitches:
- Front post double crochet (fpdc) around the next 3 stitches
- Back post double crochet (bpdc) around the next 3 stitches
- Front post double crochet (fpdc) around the next 3 stitches
- Back post double crochet (bpdc) around the next 3 stitches
Repeat this sequence (fpdc 3, bpdc 3, fpdc 3, bpdc 3) across the row until you reach the last stitch. Work a double crochet in the top of the turning chain from the previous row. Turn your work.
Pro tip: To work a front post double crochet, insert your hook from front to back to front around the post of the stitch in the row below. For a back post double crochet, insert your hook from back to front to back around the post.
Row 3: Reversing the Pattern
Chain 3 (counts as first dc). Now you'll reverse the post stitch sequence:
- Back post double crochet (bpdc) around the next 3 stitches
- Front post double crochet (fpdc) around the next 3 stitches
- Back post double crochet (bpdc) around the next 3 stitches
- Front post double crochet (fpdc) around the next 3 stitches
Repeat this sequence across the row, ending with a double crochet in the top of the turning chain. Turn your work.
This reversal creates the subtle vertical wave pattern that gives the blanket its forest floor texture. The alternating front and back post stitches cause the fabric to ripple gently, mimicking the layered look of moss and earth.
Color Sequence: Building the Woodland Palette
Now you'll work in color blocks, each consisting of two rows (one Row 2 repeat and one Row 3 repeat). Follow this sequence:
Rows 4-5: Repeat Rows 2-3 using Color B (Moss Green).
Rows 6-7: Repeat Rows 2-3 using Color C (Earth Brown).
Rows 8-9: Repeat Rows 2-3 using Color D (Cream).
Rows 10-11: Repeat Rows 2-3 using Color A (Forest Green).
When changing colors, do so at the end of the row. Work the last double crochet of the row with the new color, pulling the new yarn through the final two loops of the stitch. This creates a clean color change without gaps.
Continuing the Pattern
Repeat Rows 2-11 (the full color sequence) until your piece measures approximately 60 inches from the starting edge. The pattern will naturally grow in stripes of color, each with the beautiful ribbed texture.
End with a Row 11 repeat (the last row of a color block) to ensure your final edge matches the starting edge. Fasten off and weave in all loose ends as you go to keep your work tidy.
Adding the Border
With Color A (Forest Green), attach your yarn to any corner of the blanket. Work a single crochet (sc) evenly around all four edges, placing 3 single crochet stitches in each corner to help the border lay flat and turn corners smoothly.
When you return to your starting corner, join with a slip stitch to the first single crochet. Fasten off and weave in all remaining ends with your yarn needle.
Finishing Touches
Lay your finished throw flat and gently block it if desired. This helps even out the stitches and gives the blanket a polished, professional look. Simply mist with water and smooth with your hands, then allow to dry completely.
Your Whispering Pines Forest Floor Throw is now complete! The dense, ribbed texture creates a warm, substantial fabric that's perfect for cozy evenings. The earthy color palette brings a touch of the peaceful woodland into your home, making this throw a cherished handmade treasure for years to come.
This pattern works up beautifully as a gift for nature lovers, housewarmings, or simply as a treat for yourself. The repeating stitch pattern is meditative once you get into the rhythm, and the color changes keep the project interesting throughout. Happy crocheting!