Whispering Pines Hexagon Blanket Free Pattern – Crochet a Cozy Forest Mosaic

Whispering Pines Hexagon Blanket Free Pattern – Crochet a Cozy Forest Mosaic
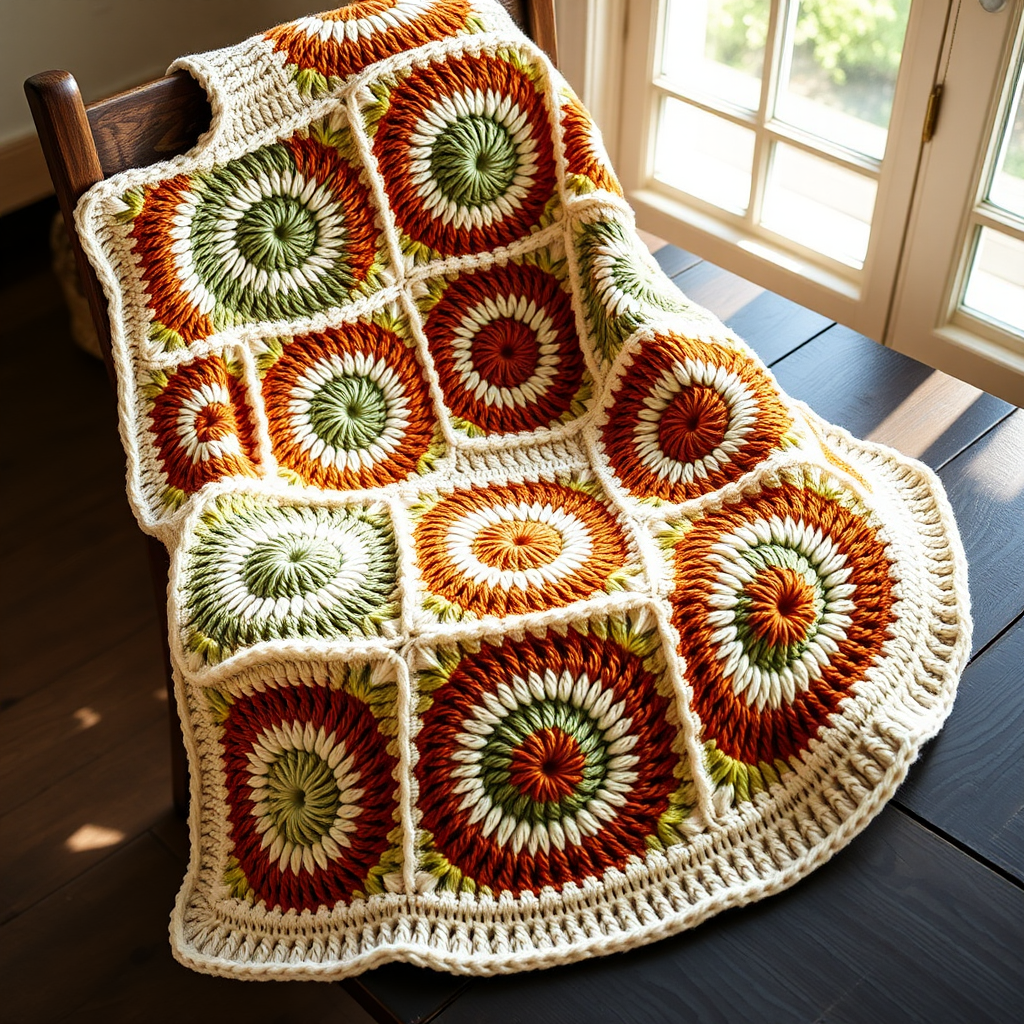
Wrap yourself in the serene beauty of a pine forest with this stunning hexagon blanket. Featuring a mosaic of textured stitches and earthy tones, this free crochet pattern creates a warm, textured throw that brings woodland charm to any room. The Whispering Pines Hexagon Blanket is the perfect weekend project for crocheters looking to create a statement piece that's both functional and beautiful.
This pattern uses a clever join-as-you-go technique, meaning you'll never have to sew pieces together at the end. The result is a seamless, professional-looking blanket that drapes beautifully over a couch, armchair, or bed. With its rich palette of forest green, moss, cream, rust, and mustard, this blanket will become a cherished heirloom piece in your home.
Materials Needed
Before you begin, gather the following materials to ensure a smooth crocheting experience:
- Yarn: Worsted weight yarn in 5 colors:
- Color A: Forest Green (approximately 500-600 yards)
- Color B: Moss Green (approximately 400-500 yards)
- Color C: Cream (approximately 400-500 yards)
- Color D: Rust (approximately 300-400 yards)
- Color E: Mustard (approximately 200-300 yards)
- Hook: 5.5 mm (I-9) crochet hook
- Other: Yarn needle for weaving in ends, scissors, stitch markers (optional but helpful)
Gauge: 4 inches = 14 stitches and 10 rows in single crochet. Be sure to check your gauge before starting to ensure your blanket comes out the correct size.
Pattern Notes
This blanket is worked in hexagon motifs that are joined as you go. Each full hexagon measures approximately 8 inches across. You will need to make 19 full hexagons and 6 half-hexagons for the edges to create a rectangular shape.
Abbreviations:
- ch = chain
- sc = single crochet
- st(s) = stitch(es)
- sl st = slip stitch
- magic ring = adjustable ring technique
Step-by-Step Instructions
Full Hexagon Motif (Make 19)
Each full hexagon is worked in continuous rounds, increasing evenly to create a flat hexagonal shape. The color changes create the beautiful mosaic effect.
Round 1: With color A (Forest Green), make a magic ring. Work 6 sc into the ring. Pull the tail to tighten the ring closed. Sl st to the first sc to close the round. (6 sts)
Round 2: Ch 1 (does not count as a stitch), 2 sc in each st around. Sl st to the first sc. (12 sts)
Round 3: Ch 1, *sc in the next st, 2 sc in the next st* repeat from * to * around. Sl st to the first sc. (18 sts)
Round 4: Ch 1, *sc in the next 2 sts, 2 sc in the next st* repeat from * to * around. Sl st to the first sc. (24 sts)
Round 5: Ch 1, *sc in the next 3 sts, 2 sc in the next st* repeat from * to * around. Sl st to the first sc. (30 sts)
Round 6: Change to color B (Moss Green). Ch 1, *sc in the next 4 sts, 2 sc in the next st* repeat from * to * around. Sl st to the first sc. (36 sts)
Round 7: Ch 1, *sc in the next 5 sts, 2 sc in the next st* repeat from * to * around. Sl st to the first sc. (42 sts)
Round 8: Change to color C (Cream). Ch 1, *sc in the next 6 sts, 2 sc in the next st* repeat from * to * around. Sl st to the first sc. (48 sts)
Round 9: Ch 1, *sc in the next 7 sts, 2 sc in the next st* repeat from * to * around. Sl st to the first sc. (54 sts)
Round 10: Change to color D (Rust). Ch 1, *sc in the next 8 sts, 2 sc in the next st* repeat from * to * around. Sl st to the first sc. (60 sts)
Round 11: Ch 1, *sc in the next 9 sts, 2 sc in the next st* repeat from * to * around. Sl st to the first sc. (66 sts)
Round 12: Change to color E (Mustard). Ch 1, *sc in the next 10 sts, 2 sc in the next st* repeat from * to * around. Sl st to the first sc. (72 sts)
Round 13: Ch 1, *sc in the next 11 sts, 2 sc in the next st* repeat from * to * around. Sl st to the first sc. (78 sts)
Round 14: Change to color A (Forest Green). Ch 1, *sc in the next 12 sts, 2 sc in the next st* repeat from * to * around. Sl st to the first sc. (84 sts)
Round 15: Ch 1, *sc in the next 13 sts, 2 sc in the next st* repeat from * to * around. Sl st to the first sc. (90 sts)
Round 16: Change to color B (Moss Green). Ch 1, *sc in the next 14 sts, 2 sc in the next st* repeat from * to * around. Sl st to the first sc. (96 sts)
Round 17: Change to color C (Cream). Ch 1, *sc in the next 15 sts, 2 sc in the next st* repeat from * to * around. Sl st to the first sc. (102 sts)
Round 18: Change to color D (Rust). Ch 1, *sc in the next 16 sts, 2 sc in the next st* repeat from * to * around. Sl st to the first sc. (108 sts)
Round 19: Change to color E (Mustard). Ch 1, *sc in the next 17 sts, 2 sc in the next st* repeat from * to * around. Sl st to the first sc. (114 sts)
Round 20: Change to color A (Forest Green). Ch 1, *sc in the next 18 sts, 2 sc in the next st* repeat from * to * around. Sl st to the first sc. (120 sts)
Fasten off and weave in all ends securely. Repeat this process to create 19 full hexagons total.
Half-Hexagon Motif (Make 6)
Half-hexagons are worked in rows rather than rounds. They fill in the edges of the blanket to create a straight rectangular shape.
Row 1: With color A (Forest Green), ch 4. Sc in the 2nd ch from the hook and in the next 2 ch. (3 sts)
Row 2: Ch 1, turn. 2 sc in the first st, sc in the next st, 2 sc in the last st. (5 sts)
Row 3: Ch 1, turn. 2 sc in the first st, sc in the next 3 sts, 2 sc in the last st. (7 sts)
Row 4: Ch 1, turn. 2 sc in the first st, sc in the next 5 sts, 2 sc in the last st. (9 sts)
Row 5: Ch 1, turn. 2 sc in the first st, sc in the next 7 sts, 2 sc in the last st. (11 sts)
Row 6: Change to color B (Moss Green). Ch 1, turn. 2 sc in the first st, sc in the next 9 sts, 2 sc in the last st. (13 sts)
Row 7: Ch 1, turn. 2 sc in the first st, sc in the next 11 sts, 2 sc in the last st. (15 sts)
Row 8: Change to color C (Cream). Ch 1, turn. 2 sc in the first st, sc in the next 13 sts, 2 sc in the last st. (17 sts)
Row 9: Ch 1, turn. 2 sc in the first st, sc in the next 15 sts, 2 sc in the last st. (19 sts)
Row 10: Change to color D (Rust). Ch 1, turn. 2 sc in the first st, sc in the next 17 sts, 2 sc in the last st. (21 sts)
Row 11: Ch 1, turn. 2 sc in the first st, sc in the next 19 sts, 2 sc in the last st. (23 sts)
Row 12: Change to color E (Mustard). Ch 1, turn. 2 sc in the first st, sc in the next 21 sts, 2 sc in the last st. (25 sts)
Row 13: Ch 1, turn. 2 sc in the first st, sc in the next 23 sts, 2 sc in the last st. (27 sts)
Row 14: Change to color A (Forest Green). Ch 1, turn. 2 sc in the first st, sc in the next 25 sts, 2 sc in the last st. (29 sts)
Row 15: Ch 1, turn. 2 sc in the first st, sc in the next 27 sts, 2 sc in the last st. (31 sts)
Row 16: Change to color B (Moss Green). Ch 1, turn. 2 sc in the first st, sc in the next 29 sts, 2 sc in the last st. (33 sts)
Row 17: Change to color C (Cream). Ch 1, turn. 2 sc in the first st, sc in the next 31 sts, 2 sc in the last st. (35 sts)
Row 18: Change to color D (Rust). Ch 1, turn. 2 sc in the first st, sc in the next 33 sts, 2 sc in the last st. (37 sts)
Row 19: Change to color E (Mustard). Ch 1, turn. 2 sc in the first st, sc in the next 35 sts, 2 sc in the last st. (39 sts)
Row 20: Change to color A (Forest Green). Ch 1, turn. 2 sc in the first st, sc in the next 37 sts, 2 sc in the last st. (41 sts)
Fasten off and weave in all ends. Repeat to create 6 half-hexagons total.
Joining the Motifs
Now comes the exciting part – assembling your blanket! Arrange the hexagons in a honeycomb pattern: 4 rows of 4 full hexagons, with half-hexagons along the top and bottom edges to create a rectangular shape. The layout should look like this:
Row 1: Half, Full, Full, Full, Half (5 pieces)
Row 2: Full, Full, Full, Full (4 pieces)
Row 3: Full, Full, Full, Full (4 pieces)
Row 4: Full, Full, Full, Full (4 pieces)
Row 5: Half, Full, Full, Full, Half (5 pieces)
Use the join-as-you-go method with color A (Forest Green). Place two hexagons with right sides together. Starting at one corner, insert your hook through the back loops of the corresponding stitches along one edge. Slip stitch through both loops to join the pieces. Continue slip stitching along the entire edge until you reach the next corner. Repeat this process to join all pieces together.
Pro tip: Join the pieces in a logical order – first join the hexagons within each row, then join the rows together. This will make the process much more manageable.
Border
The border adds a clean, finished look to your blanket while also helping to stabilize the edges.
Round 1: With color A (Forest Green), work sc evenly around the entire outer edge of the blanket, working 3 sc in each corner to help the border lay flat. Sl st to the first sc to close the round.
Round 2: Ch 1, sc in each st around, working 3 sc in each corner. Sl st to the first sc.
Round 3: Change to color C (Cream). Ch 1, sc in each st around, working 3 sc in each corner. Sl st to the first sc.
Round 4: Ch 1, sc in each st around, working 3 sc in each corner. Sl st to the first sc. Fasten off and weave in all ends.
Finishing Touches
Once you've completed the border, take a moment to weave in any remaining loose ends with your yarn needle. Blocking your blanket (gently wetting it and laying it flat to dry) will help even out the stitches and give your blanket a professional, polished look.
Your Whispering Pines Hexagon Blanket is now complete! Measuring approximately 50 inches by 60 inches, it's the perfect size for draping over a couch or curling up with on a chilly evening. The earthy color palette and textured mosaic pattern will bring a touch of forest serenity to any room in your home.
We'd love to see your finished creation! Share your Whispering Pines blanket on social media using the hashtag #WhisperingPinesBlanket and tag us so we can admire your beautiful work. Happy crocheting!