Whispering Wildflower Granny Square Blanket Free Pattern – A Cottagecore Meadow Throw

Whispering Wildflower Granny Square Blanket: A Cottagecore Meadow Throw
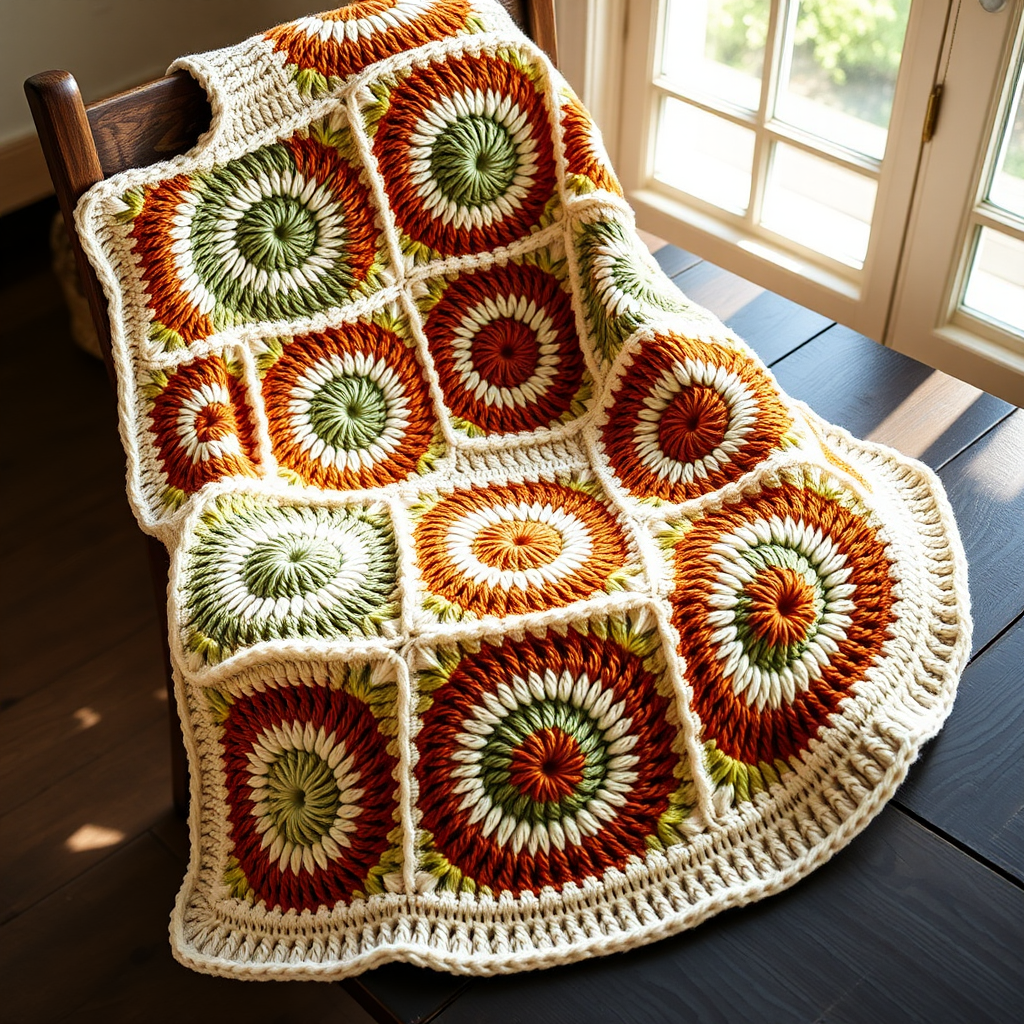
Imagine wrapping yourself in a handcrafted meadow, where each stitch blooms with dimensional petals and earthy, romantic hues. The Whispering Wildflower Granny Square Blanket is more than just a crochet project—it's an heirloom-quality throw that brings the serene beauty of a cottagecore garden into your living space. This pattern features 36 individual floral granny squares, each a tiny garden of textured petals, joined together to create a cozy, romantic afghan perfect for lazy afternoons, quiet reading nooks, or as a stunning handmade gift.
Whether you're a seasoned crocheter looking for a meditative project or a confident beginner ready to expand your skills, this pattern offers a rewarding journey. The dimensional floral motifs pop beautifully against the smooth cream background, while the sage green joining seams and scalloped border tie the entire piece together into a cohesive, tactile work of art. Let's dive into creating your very own meadow throw.
Materials Needed
Before you begin, gather the following materials to ensure a smooth and enjoyable crochet experience. This project uses worsted weight yarn, which is perfect for creating a durable yet soft blanket.
Yarn & Colors
You will need worsted weight cotton or cotton-blend yarn in five harmonious colors. The approximate total yardage is 1800-2200 yards, depending on your tension and final size.
- Color A (Cream): For the square backgrounds and main body. Approx. 900-1000 yards.
- Color B (Sage Green): For joining seams and the border. Approx. 400-500 yards.
- Color C (Dusty Rose): For flower centers. Approx. 150-200 yards.
- Color D (Butter Yellow): For flower centers. Approx. 150-200 yards.
- Color E (Soft Terracotta): For flower centers. Approx. 150-200 yards.
Tools & Notions
- Crochet Hook: 5.0 mm (H-8) crochet hook.
- Yarn Needle: For weaving in ends and joining squares.
- Scissors: For cutting yarn.
- Stitch Markers (optional): To help keep track of rounds.
Gauge & Size
One completed square measures 6 inches x 6 inches (15 cm x 15 cm) after blocking. While gauge is not critical for this project, maintaining consistency ensures your squares align perfectly for easy joining. The final blanket will be approximately 36 inches x 36 inches (91 cm x 91 cm), a perfect throw size.
Step-by-Step Instructions
This blanket is constructed from 36 individual granny squares arranged in a 6x6 grid. Each square features a beautiful central flower motif. Work each square in the round, then join them using a flat slip stitch seam. Finally, add a delicate scalloped border to finish. Let's begin with the heart of the project—the floral square.
The Floral Granny Square (Make 36)
Each square is worked in six rounds. For a varied, organic look, you will make 12 squares with Dusty Rose centers, 12 with Butter Yellow, and 12 with Soft Terracotta. You can also mix them randomly for a more spontaneous meadow feel.
Round 1: The Center
With color C (Dusty Rose), make a magic ring. Ch 3 (this counts as your first double crochet), then work 11 dc into the ring. Slip stitch to the top of the beginning ch-3 to join. You should now have 12 dc in total. Pull the magic ring tight to close the center hole.
Round 2: Creating Petal Spaces
Ch 1, then *sc in the next stitch, ch 2, skip the next stitch*. Repeat from * to * around. You will end with a ch 2 after your last sc. Slip stitch to the first sc to join. You should now have 6 ch-2 spaces which will form the base for your petals.
Round 3: The Dimensional Petals
Slip stitch into the first ch-2 space. Ch 1, then in the same space work (sc, hdc, dc, hdc, sc). This cluster creates one petal. *In the next ch-2 space, work another (sc, hdc, dc, hdc, sc) cluster*. Repeat from * to * in each of the remaining ch-2 spaces. Slip stitch to the first sc to join. You will have 6 beautiful, raised petals. Fasten off color C and weave in the end.
Round 4: The Cream Background
Join color A (Cream) with a slip stitch in the center dc of any petal (the tallest point). Ch 3 (counts as dc), then work 2 dc in the same stitch. *Ch 1, skip to the center dc of the next petal, work 3 dc in that center dc*. Repeat from * to * around, ending with a ch 1. Slip stitch to the top of the beginning ch-3 to join. You will now have 6 groups of 3 dc, separated by ch-1 spaces.
Round 5: Forming the Corners
Slip stitch to the next dc (the middle dc of the first group). Ch 3 (counts as dc), dc in the same stitch, ch 2, then 2 dc in the same stitch. This creates your first corner. *Dc in the next dc, ch 1, skip the ch-1 space, dc in the next dc (this forms a side). In the middle dc of the next group, work (2 dc, ch 2, 2 dc) as a corner*. Repeat from * to * around. For the last side, after the last corner, dc in the next dc, ch 1, then slip stitch to the top of the beginning ch-3 to join. You should now have 4 corners and 2 dc on each side between the corners.
Round 6: Completing the Square
Slip stitch into the corner space. Ch 3 (counts as dc), then work (dc, ch 2, 2 dc) in the same corner space. *Dc in each of the next 2 dc, dc in the ch-1 space, dc in each of the next 2 dc. In the next corner space, work (2 dc, ch 2, 2 dc)*. Repeat from * to * around. For the last side, after the last corner, dc in each of the next 2 dc, dc in the ch-1 space, dc in the next 2 dc. Slip stitch to the top of the beginning ch-3 to join. Fasten off and weave in all ends. Repeat this entire process to create all 36 squares.
Joining the Squares
Now that you have all 36 squares, it's time to assemble your blanket. Lay out your squares in a 6x6 grid, alternating the flower colors to create a balanced, pleasing arrangement. You can alternate them systematically or randomly for a wildflower look.
Using color B (Sage Green) and a tapestry needle, you will join the squares with a flat slip stitch seam through the back loops only. This creates a beautiful, visible seam that adds to the design.
- Join Rows: First, join the squares into rows. Place two squares with right sides together. Insert your hook through the back loop of the corner stitch on the square facing you, and the back loop of the corresponding corner stitch on the other square. Pull up a loop of sage green yarn and slip stitch. Continue slip stitching through the back loops of each corresponding stitch across the edge. Fasten off at the end. Repeat to create 6 rows of 6 squares each.
- Join Rows Together: Once your rows are complete, join the rows to each other in the same manner. Ensure that the corners align neatly to form a perfect grid. Weave in all ends as you go.
Adding the Scalloped Border
With the blanket assembled, it's time to add the finishing touch—a delicate scalloped border in sage green. With the right side facing you, join color B (Sage Green) in any corner of the blanket.
Round 1: Ch 1, then work single crochets evenly around the entire blanket, working 3 sc in each corner to keep the corners flat. Slip stitch to the first sc to join.
Round 2: Ch 1, then *sc in the next stitch, skip 1 stitch, work 5 dc in the next stitch, skip 1 stitch*. Repeat from * to * around the entire blanket. When you reach a corner, work 7 dc in the corner stitch instead of 5 to help the border lay flat and turn the corner beautifully. Slip stitch to the first sc to join. Fasten off and weave in all remaining ends.
Finally, block your blanket gently to shape. This will help the floral motifs pop and ensure your edges are perfectly straight. Lay it flat to dry, and soon you'll have a stunning, heirloom-quality throw that captures the essence of a peaceful meadow. Enjoy your handmade treasure!