Aurora Cascade Chevron Pouch Free Pattern – A Luminous Knit Carryall
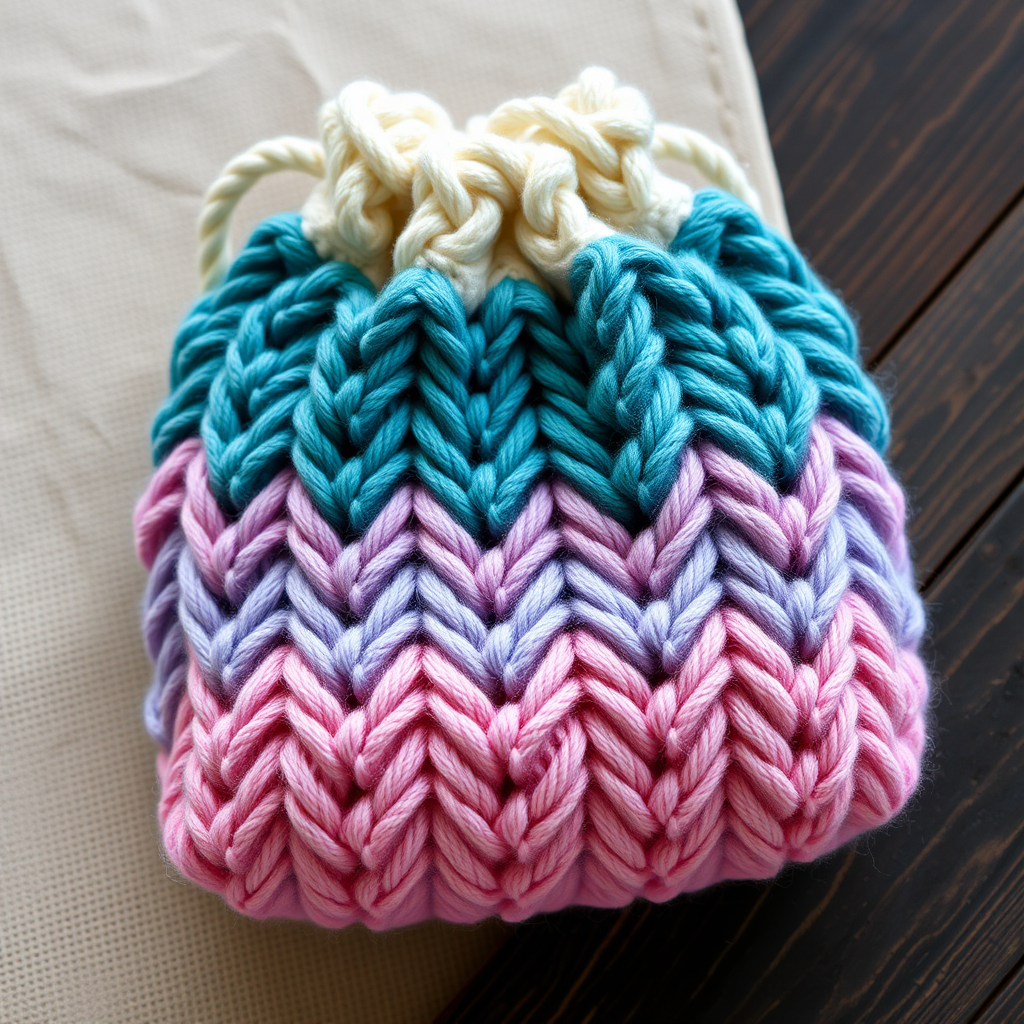
Aurora Cascade Chevron Pouch Free Pattern – A Luminous Knit Carryall
There are some knitting projects that feel less like crafting and more like capturing a moment in time. The Aurora Cascade Chevron Pouch is exactly that—a stunning, textured carryall that mirrors the shifting, ethereal colors of the northern lights. With its bold chevron ridges and a soft gradient of deep teal, lavender, pale pink, and cream, this pouch is a modern heirloom piece. It’s perfect for holding your treasures, gifting to a loved one, or simply displaying as a cozy piece of art in your home.
This pattern is designed with the beginner in mind, yet it offers a satisfying rhythm that experienced knitters will love. The chevron stitch pattern is created with simple increases and decreases, and the color changes are worked in a repeating sequence that builds the luminous gradient. The result is a geometric, textured fabric that catches light and shadow beautifully. Let’s dive into this free pattern and create something truly magical.
Materials Needed
Before you begin, gather your supplies. This project uses worsted weight yarn, which is perfect for creating a soft yet sturdy fabric. Here’s what you’ll need:
- Yarn: Worsted weight yarn in 4 colors:
- Color A: Deep Teal (approximately 100g)
- Color B: Soft Lavender (approximately 100g)
- Color C: Pale Pink (approximately 100g)
- Color D: Cream (approximately 100g)
- Needles: US Size 7 (4.5 mm) knitting needles
- Notions: Tapestry needle for finishing and weaving in ends
- Gauge: 20 stitches and 26 rows = 4 inches in stockinette stitch (it’s always a good idea to check your gauge to ensure your pouch comes out the right size)
Once you have your materials ready, you’re all set to start knitting this beautiful chevron pouch.
Step-by-Step Instructions
This pouch is knit flat in one piece, then seamed. The chevron pattern is created with increases (YO) and decreases (K2tog, SSK), and the stripes are worked in a repeating sequence. Follow along carefully, and you’ll have a gorgeous pouch in no time.
Abbreviations
- K = knit
- P = purl
- K2tog = knit two stitches together (a right-leaning decrease)
- SSK = slip, slip, knit (a left-leaning decrease)
- YO = yarn over (an increase that creates a small hole)
- St(s) = stitch(es)
- Rep = repeat
Getting Started: Cast On
With Color A (deep teal), cast on 61 stitches using your preferred method (long-tail cast on works well). This will be the bottom edge of your pouch.
Knitting the Chevron Pattern
You will now work the chevron pattern in a repeating sequence of 8 rows. Each color is worked for two rows (one right side, one wrong side) before switching to the next color. This creates the beautiful gradient stripes.
Row 1 (Right Side): With Color A, K1, *K2tog, K1, YO, K1, YO, K1, SSK, K1; rep from * across to last 2 sts, K2. (This creates the chevron points.)
Tip: The repeat is 8 stitches. You’ll work the pattern 7 times across, with 1 stitch at the beginning and 2 stitches at the end for a neat edge.
Row 2 (Wrong Side): With Color A, Purl all stitches.
Row 3: Switch to Color B (soft lavender). K1, *K2tog, K1, YO, K1, YO, K1, SSK, K1; rep from * across to last 2 sts, K2.
Row 4: With Color B, Purl all stitches.
Row 5: Switch to Color C (pale pink). K1, *K2tog, K1, YO, K1, YO, K1, SSK, K1; rep from * across to last 2 sts, K2.
Row 6: With Color C, Purl all stitches.
Row 7: Switch to Color D (cream). K1, *K2tog, K1, YO, K1, YO, K1, SSK, K1; rep from * across to last 2 sts, K2.
Row 8: With Color D, Purl all stitches.
Repeat Rows 1-8 until the piece measures approximately 10 inches from the cast-on edge, ending with a wrong-side row (a purl row). This will give you a nice, tall pouch. You can adjust the length if you prefer a shorter or taller bag.
Once you’ve reached your desired length, bind off all stitches loosely in pattern. To do this, knit the first stitch, knit the next stitch, then pass the first stitch over the second. Continue this across the row. Binding off loosely ensures the top edge remains stretchy for the drawstring.
Finishing: Seaming and Assembly
Now it’s time to turn your flat rectangle into a beautiful pouch.
- Fold the knitted rectangle in half with right sides together, aligning the cast-on and bind-off edges. The cast-on edge will be the bottom of the pouch, and the bind-off edge will be the top.
- Sew the side seams: Using a tapestry needle and a length of Color A yarn, sew the side seams together using a mattress stitch or whip stitch. Start at the bottom (cast-on edge) and work your way up, leaving the top open. Make sure your stitches are neat and secure.
- Turn the pouch right side out. Gently push the corners out to shape the bottom nicely.
Creating the Drawstring
The final touch is a simple, elegant drawstring to gather the top of your pouch.
- Make an i-cord: With Color D (cream), cast on 3 stitches onto a double-pointed needle (or use the magic loop method on your circular needle). Knit these 3 stitches. *Slide the stitches to the other end of the needle, pull the yarn tightly across the back, and knit them again.* Repeat from * until the cord measures approximately 20 inches. Bind off.
- Thread the cord: Using a tapestry needle, thread the i-cord through the top edge of the pouch. Weave it in and out of the stitches, about 1 inch down from the top edge. Start and end at the same point.
- Tie the ends: Once the cord is threaded all the way around, tie the two ends together in a secure knot. You can also add a small bead or tassel to the ends for extra flair.
Weaving in Ends
Finally, weave in all loose ends securely using your tapestry needle. Make sure to weave them in on the wrong side of the fabric so they’re hidden. Trim any excess yarn.
And there you have it—your very own Aurora Cascade Chevron Pouch! This beautiful, textured carryall is perfect for holding knitting notions, cosmetics, or as a lovely gift bag. The gradient colors and crisp chevron pattern make it a standout piece that you’ll be proud to say you made by hand.
Happy knitting, and may your stitches always be even and your colors always inspire!



