Biscuit Bliss Crochet Baby Blanket Free Pattern – A Chunky Textured Heirloom
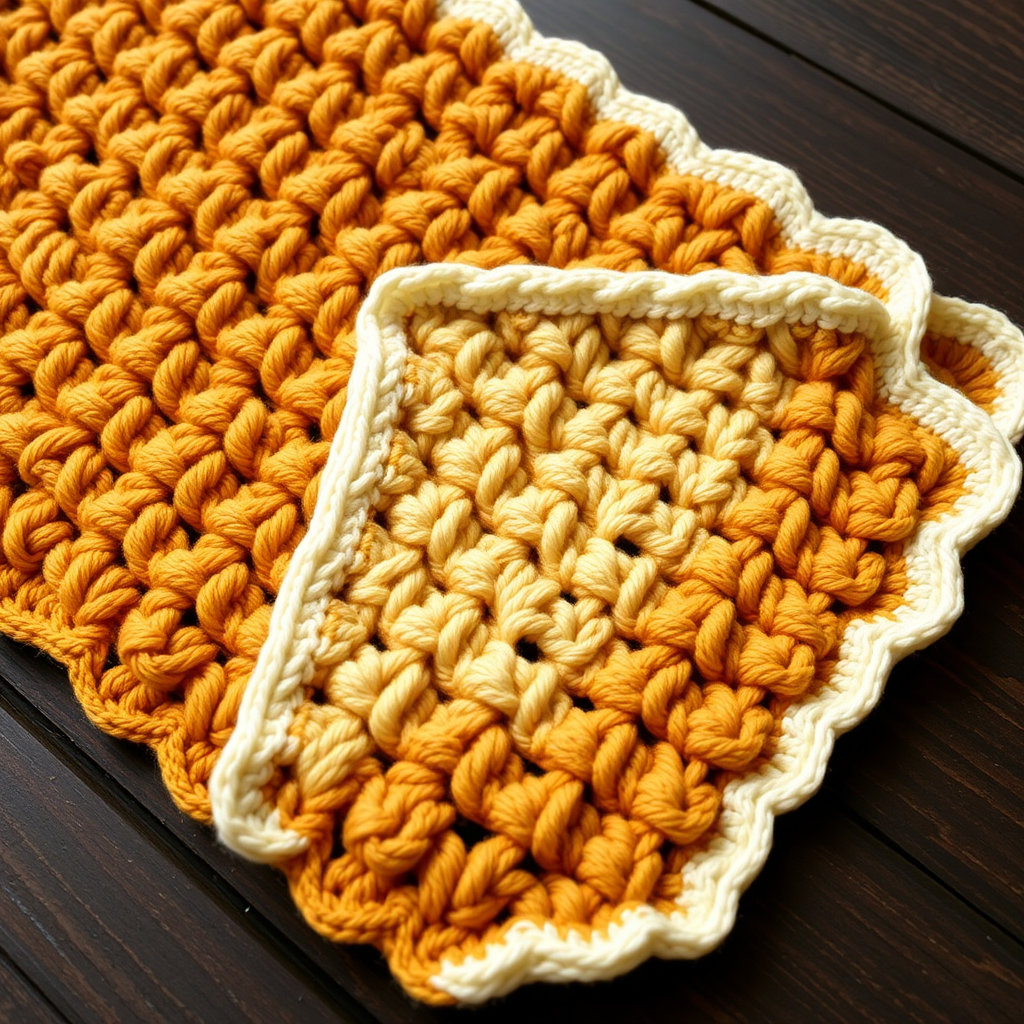
Biscuit Bliss Crochet Baby Blanket Free Pattern – A Chunky Textured Heirloom
Wrap your little one in the cozy, buttery-soft warmth of the Biscuit Bliss blanket, featuring a unique waffle-stitch texture that mimics golden baked biscuits. This heirloom-quality pattern uses a modern chunky yarn to create a squishy, cloud-like layer perfect for tummy time or stroller snuggles. The raised squares and deep crevices of the waffle stitch not only look stunning but also provide gentle sensory stimulation for baby. Whether you're a seasoned crocheter or a confident beginner looking for a rewarding project, this pattern is designed to be both achievable and deeply satisfying. Let's dive into creating a cherished keepsake that will be passed down for generations.
Materials Needed
Before you begin, gather the following supplies to ensure a smooth and enjoyable crocheting experience:
- Yarn: Lion Brand Wool-Ease Thick & Quick (super bulky weight, 6) in 'Butterscotch' (MC) and 'Cream' (CC) – 3 skeins MC, 1 skein CC
- Hook: Size L/8.0 mm crochet hook
- Gauge: 8 stitches x 6 rows = 4 inches in waffle stitch pattern (after blocking)
- Extras: Yarn needle for weaving in ends, scissors, blocking mats (optional but recommended)
Step-by-Step Instructions
Finished Size & Abbreviations
Finished Size: Approx. 30" x 36" (adjustable by changing foundation chain length)
Stitches & Abbreviations:
- ch = chain
- sc = single crochet
- dc = double crochet
- fpdc = front post double crochet
- bpdc = back post double crochet
- sk = skip
- st(s) = stitch(es)
Pattern Notes
- Worked in rows, back and forth.
- Ch 2 at beginning of row counts as first dc.
- The waffle stitch creates a grid of squares with raised bumps – this is achieved by alternating front post and back post double crochet stitches.
- Keep your tension consistent for even, squishy texture.
Foundation & First Rows
Foundation: With MC, ch 76 loosely. This loose foundation is crucial for maintaining the stretch and drape of the blanket.
Row 1: Dc in 4th ch from hook (skipped chs count as first dc), dc in each ch across. Turn. (74 dc)
Row 2: Ch 2 (counts as dc), *fpdc around next st, dc in next st; repeat from * across, ending with fpdc around last st. Turn.
Row 3: Ch 2, *bpdc around next st, dc in next st; repeat from * across, ending with bpdc around last st. Turn.
Building the Waffle Texture
Rows 4-5: Repeat Row 2. This creates the raised "biscuit" bumps on the front of the work.
Rows 6-7: Repeat Row 3. This creates the recessed "crevices" between the bumps, giving the waffle effect its depth.
Continue alternating 2 rows of fpdc/dc and 2 rows of bpdc/dc until piece measures approx. 34" from foundation, ending with a Row 2 repeat. This alternating pattern is the heart of the waffle stitch – the front post stitches push forward to create the puffy squares, while the back post stitches recede to form the grid lines.
Adding the Border
Border (optional but recommended): With CC, work a round of sc evenly around the entire blanket, working 3 sc in each corner. This creates a clean, finished edge and adds a beautiful contrast. Join with sl st to first sc. Fasten off.
Pro tip: When working the border, make sure to distribute your single crochets evenly along the sides – aim for approximately 1 sc per row of crochet to keep the border flat and even.
Finishing Touches
Weave in all ends carefully using a yarn needle. Block gently to size – this helps even out the stitches and enhances the waffle texture. Lay the blanket flat on blocking mats, pin to the desired dimensions, and mist with water. Allow to dry completely before removing pins.
Your Biscuit Bliss blanket is now ready to wrap your little one in warmth and love. The butterscotch and cream color combination evokes cozy kitchen memories, while the chunky, textured stitches create a heirloom-quality piece that will be treasured for years. Happy crocheting!


