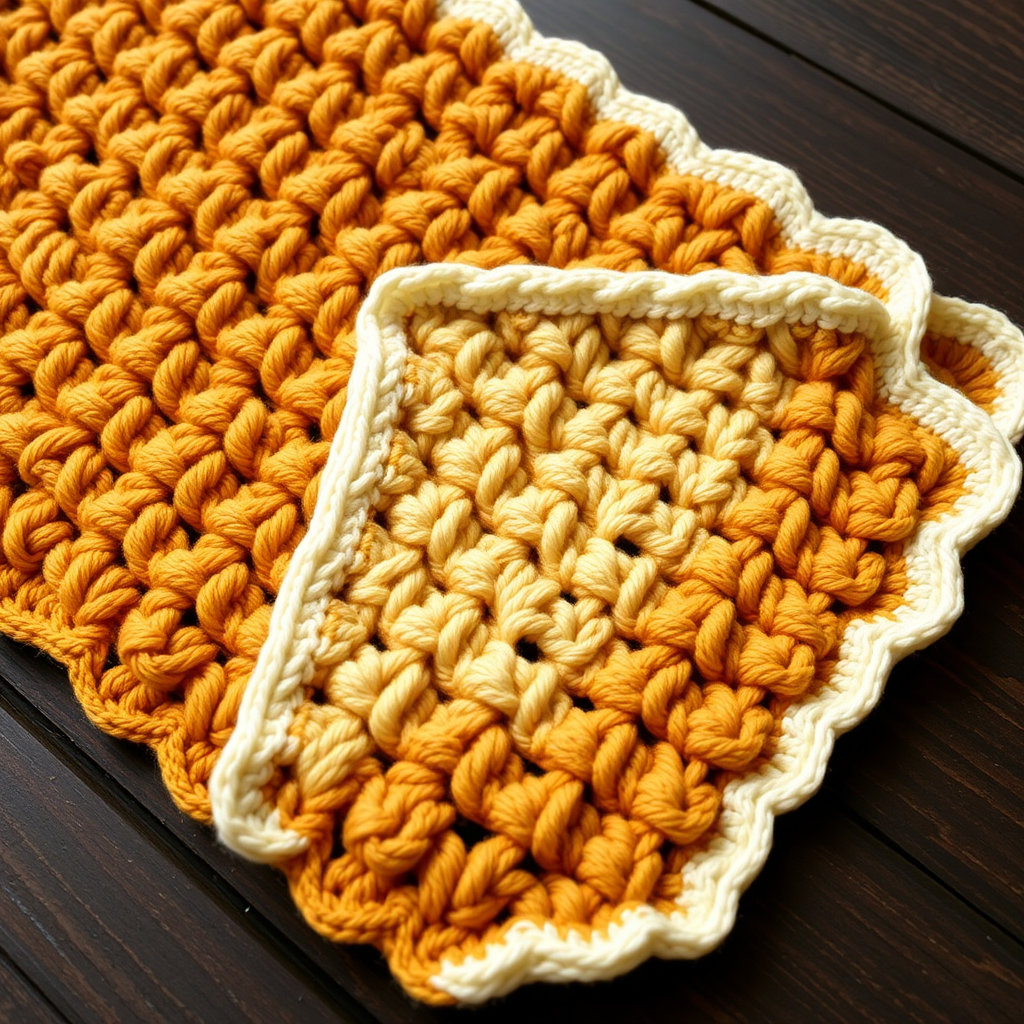
Duo Diamond Crochet Baby Blanket Free Pattern – A Heirloom Textured Wrap

Duo Diamond Crochet Baby Blanket Free Pattern – A Heirloom Textured Wrap
Wrap your little one in the timeless elegance of the Duo Diamond blanket, featuring a mesmerizing play of raised diamonds and soft, breathable cotton. This heirloom-quality pattern is a joy to crochet, creating a snuggly, textured heirloom that will be treasured for generations. Whether you're crafting a baby shower gift or adding a touch of nursery decor, this pattern is designed to impress with its modern, minimalist aesthetic and dimensional basketweave-like effect.
Materials Needed
Before you begin, gather the following supplies to ensure a smooth and enjoyable crochet experience:
- Yarn: Worsted weight cotton yarn (e.g., Lion Brand 24/7 Cotton) in two colors:
- Color A (Soft Cream) – 1200 yds
- Color B (Dusty Sage) – 800 yds
- Hook: Size H/8 (5.0 mm) crochet hook
- Notions: Tapestry needle for weaving in ends, scissors
- Gauge: 14 dc x 8 rows = 4 inches in double crochet (adjust hook size if needed to match gauge)
Step-by-Step Instructions
Finished Size: Approx. 36" x 36" (adjustable by adding multiples of 12 + 2 to starting chain)
Special Stitches
- Front Post Double Crochet (fpdc): Yarn over, insert hook from front to back around the post of the next stitch, yarn over, pull up a loop, yarn over, pull through two loops, yarn over, pull through two loops.
- Back Post Double Crochet (bpdc): Yarn over, insert hook from back to front around the post of the next stitch, yarn over, pull up a loop, yarn over, pull through two loops, yarn over, pull through two loops.
- Diamond Cluster (DC): Work 3 dc together in the same stitch (dc3tog).
Foundation
With Color A, chain 122 loosely. This foundation chain should be relaxed to prevent the bottom edge from curling.
Rows 1-2: Base Rows
Row 1: Dc in 4th ch from hook (the skipped chains count as your first dc) and in each ch across. (120 dc) Turn.
Row 2: Ch 3 (counts as dc), dc in each dc across. Turn. (120 dc)
Row 3: Set-Up Row (Diamond Bases)
Ch 3, *skip next 2 dc, fpdc around next dc, ch 1, fpdc around same dc, skip next 2 dc, dc in next dc; repeat from * across, ending with dc in last dc. Turn. (You will have 24 diamond bases)
Pro Tip: The "skip next 2 dc" creates the negative space that will frame your diamonds. Ensure your tension is even here to maintain the pattern's rhythm.
Rows 4-7: Building the Diamond
Repeat the following row for Rows 4, 5, 6, and 7:
Ch 3, *fpdc around next fpdc, ch 1, fpdc around same fpdc, dc in next dc; repeat from * across, ending with dc in last dc. Turn.
Note: You are now working into the posts of the previous row's fpdc stitches, not into the tops. This is what creates the raised, dimensional diamond shape. The ch 1 between the two fpdc stitches forms the center "eye" of the diamond.
Row 8: Diamond Closure
Ch 3, *skip next fpdc, dc in next ch-1 space, skip next fpdc, dc in next dc; repeat from * across, ending with dc in last dc. Turn. (120 dc)
Explanation: This row closes the top of the diamond by working into the ch-1 space and skipping the post stitches. You should now have a complete diamond shape and be back to a flat row of 120 dc.
Row 9: Plain Row
Ch 3, dc in each dc across. Turn. (120 dc)
Row 10: Color Change
With Color B, ch 3, dc in each dc across. Turn. (120 dc)
Tip: When changing colors, leave a 6-inch tail to weave in later. Do not cut Color A; carry it up the side of the work to use again in Row 20.
Row 11: Set-Up Row (Color B)
Ch 3, *skip next 2 dc, fpdc around next dc, ch 1, fpdc around same dc, skip next 2 dc, dc in next dc; repeat from * across, ending with dc in last dc. Turn.
Rows 12-17: Building the Diamond (Color B)
Repeat Rows 4-7 (working fpdc around fpdc, ch 1, fpdc around same fpdc, dc in next dc) for six rows total. This will give your Color B diamonds the same height as your Color A diamonds.
Row 18: Diamond Closure (Color B)
Repeat Row 8 (diamond closure). (120 dc)
Row 19: Plain Row
Ch 3, dc in each dc across. Turn. (120 dc)
Row 20: Color Change Back to Color A
With Color A, ch 3, dc in each dc across. Turn. (120 dc)
Repeating the Pattern
Repeat Rows 3-20 until piece measures approximately 34 inches from foundation, ending with a Color A row. Then work 2 more rows of dc in Color A to create a balanced top edge.
Important: Always end with a Color A section to ensure the border color matches. Count your repeats carefully—each full repeat (Rows 3-20) adds approximately 4 inches to your length.
Border
Round 1: With Color A, ch 1, sc evenly around all edges, working 3 sc in each corner. Join with sl st to first sc.
Round 2: Ch 1, sc in each sc around, working 3 sc in each corner. Join.
Round 3 (Scalloped Edge): Ch 1, *sc in next sc, ch 2, skip next sc; repeat from * around, working (sc, ch 2, sc) in each corner. Join. Fasten off and weave in all ends.
Finishing Touch: The ch-2 spaces in Round 3 create a delicate, airy scallop that softens the blanket's edge and adds to its heirloom appeal.
Weaving in Ends
Using your tapestry needle, weave in all loose ends carefully, following the path of the stitches to hide them completely. Block the blanket gently to open up the diamond pattern and even out the edges.
Your Duo Diamond baby blanket is now complete! The combination of soft cream and dusty sage creates a soothing palette perfect for a modern nursery, while the textured diamonds provide sensory stimulation for little fingers. This heirloom-quality piece will be cherished for years to come—a beautiful testament to the love and care you've stitched into every row.