Celestial Driftwood Wrap Free Pattern – Knit a Starry Beach Stroll
Celestial Driftwood Wrap Free Pattern – Knit a Starry Beach Stroll
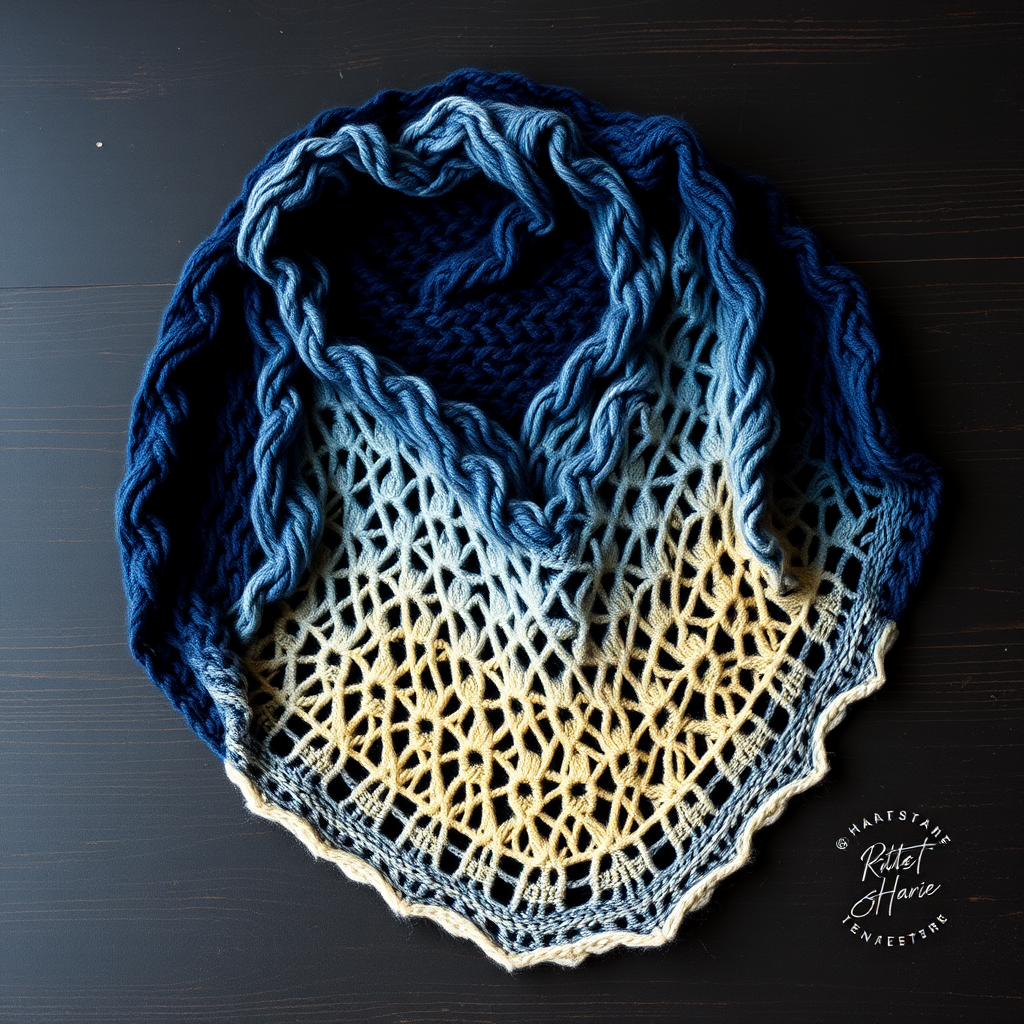
Wrap yourself in the quiet magic of a moonlit shoreline with this ethereal, textured shawl. The gradient yarn mimics the shifting colors of dusk—from deep midnight navy through slate blue and misty silver to a warm pale gold—while delicate lace panels echo the foam of retreating waves. This free knitting pattern creates a stunning, shallow triangular wrap that drapes elegantly over your shoulders, perfect for cool evenings by the sea or cozy nights at home. Whether you're a seasoned knitter or looking for your next rewarding project, the Celestial Driftwood Wrap is a journey through color and texture that you'll treasure.
Materials Needed
Before you begin, gather the following supplies to ensure a smooth knitting experience:
- Yarn: Fingering weight yarn in a gradient colorway (e.g., from deep navy to soft silver to pale gold) – approximately 800 yards (732 meters). Choose a soft, drapey yarn like merino or a merino-silk blend for best results.
- Needle: US 6 (4.0 mm) circular knitting needle, 32 inches (80 cm) long. The circular needle is essential to accommodate the growing number of stitches.
- Notions: Stitch markers (at least 4), tapestry needle for weaving in ends, blocking pins and mats (optional but recommended).
- Gauge: 20 stitches and 28 rows = 4 inches (10 cm) in stockinette stitch, after blocking. Gauge is important for achieving the correct size and drape, so take a moment to swatch.
Step-by-Step Instructions
This wrap is worked from the top center down, increasing at the edges and center to form a shallow triangle. The lace pattern is simple but creates a stunning effect. Follow along carefully, and you'll have a beautiful, starry wrap in no time.
Abbreviations
- k = knit
- p = purl
- yo = yarn over (creates an eyelet and increases a stitch)
- k2tog = knit two together (right-leaning decrease)
- ssk = slip, slip, knit (left-leaning decrease)
- pm = place marker
- sm = slip marker
Setup
Let's start by creating the foundation of your wrap. This section establishes the center spine and the beginning of the edge increases.
- Cast on: Cast on 5 stitches loosely.
- Row 1 (RS): k2, yo, k1, yo, k2. You now have 7 stitches.
- Row 2 (WS): k2, p3, k2. (Knit the first and last 2 stitches for the garter edge, purl the middle.)
- Row 3 (RS): k2, yo, k1, yo, pm, k1, pm, yo, k1, yo, k2. You now have 11 stitches. Place a marker on each side of the center stitch.
- Row 4 (WS): k2, p7, k2.
Body – Garter Stitch Increases
Now we'll establish the main body of the wrap. You'll continue to increase on every right-side row to create the triangular shape. The first 4 and last 4 stitches of every row are your edge stitches, worked in garter stitch (knit every row).
- Place edge markers: After completing the setup, place a marker after the first 4 stitches and before the last 4 stitches. You should now have markers in this order: edge marker, center marker, edge marker.
- Row 5 (RS): k4, yo, k1, yo, sm, knit to center marker, yo, sm, k1, sm, yo, knit to last 5 stitches, sm, yo, k1, yo, k4. (This increases 4 stitches: 2 at each edge and 2 at the center.)
- Row 6 (WS): k4, purl to last 4 stitches, k4. (Knit the edge stitches, purl everything in between.)
- Repeat: Continue repeating Rows 5 and 6 until you have 45 stitches on each side of the center marker (91 stitches total). This will take some time, but the rhythm is simple and meditative.
Lace Section
This is where the magic happens! The lace pattern creates the starry, sea-foam effect. You'll continue the edge increases on every RS row while working the lace pattern between the markers.
- Row 1 (RS): k4, yo, k1, yo, sm, *k2tog, yo* repeat from * to * until 2 stitches before center marker, k2, sm, k1, sm, k2, *yo, ssk* repeat from * to * until 2 stitches before last marker, sm, yo, k1, yo, k4.
- Row 2 (WS): k4, purl to last 4 stitches, k4.
- Row 3 (RS): k4, yo, k1, yo, sm, *yo, ssk* repeat from * to * until 2 stitches before center marker, k2, sm, k1, sm, k2, *k2tog, yo* repeat from * to * until 2 stitches before last marker, sm, yo, k1, yo, k4.
- Row 4 (WS): k4, purl to last 4 stitches, k4.
- Repeat: Continue repeating these 4 rows until the wrap measures approximately 28 inches (71 cm) from the cast-on edge, ending with a WS row. The lace pattern alternates the direction of the decreases, creating a beautiful, balanced rhythm of eyelets.
Final Garter Section
To finish the body of the wrap, we'll add a clean garter stitch border that frames the lace beautifully.
- Continue with the edge increases every RS row (as in Row 5 of the Body section), but knit all stitches (no lace pattern) for 10 rows total. This creates a solid, textured border.
Bind Off
A stretchy bind-off is crucial for a shawl edge that drapes nicely. Here's how to do it:
- On the next RS row, bind off loosely. To ensure elasticity, you can use a larger needle (e.g., US 8 or 9) or use a stretchy bind-off method like the "Jeny's Surprisingly Stretchy Bind-Off." Simply knit the first stitch, knit the second, then pass the first over the second, and continue in this manner, keeping the tension loose.
Finishing
The final steps will transform your knitting into a polished, professional-looking wrap.
- Weave in ends: Use a tapestry needle to carefully weave in all loose yarn ends on the wrong side of the work.
- Blocking: This step is essential for lace. Soak the wrap in lukewarm water with a gentle wool wash for 20-30 minutes. Gently squeeze out excess water (do not wring). Lay the wrap flat on a blocking mat or towel. Pin out the points along the edges and the center to open up the lace pattern and accentuate the gradient. Allow it to dry completely before unpinning.
Your Celestial Driftwood Wrap is now complete! The gentle gradient and delicate lace will remind you of a peaceful, starry beach stroll every time you wear it. Enjoy your beautiful, handcrafted creation—a true testament to the joy of knitting.



