Amigurumi Patterns
Free Pattern: Velvet Pumpkin Patchwork Amigurumi
Anonymous
•
July 10, 2026
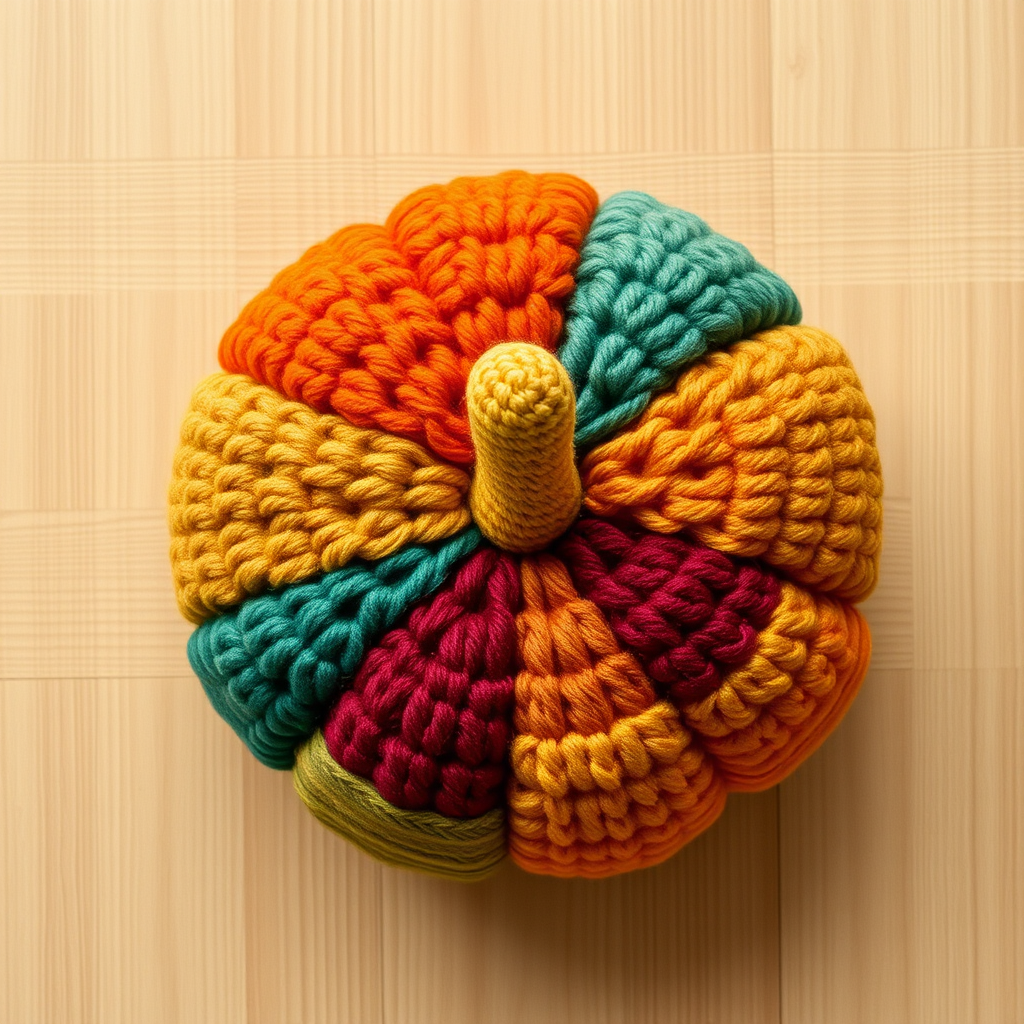
Free Pattern: Velvet Pumpkin Patchwork Amigurumi
Introduction
Welcome to your next crafting adventure! In this post, we will guide you through creating a delightful Velvet Pumpkin Patchwork Amigurumi. This charming piece combines the cozy aesthetics of patchwork quilting with the plush texture of velvet yarn, making it a perfect decorative item for the autumn season. Whether you’re a beginner or an experienced crafter, this pattern offers a fun and engaging experience that results in a unique and whimsical pumpkin to brighten your home.
Materials Needed
- Yarn: Velvet yarn in assorted colors (orange, green, burgundy, mustard, teal)
- Hook: 4.5mm crochet hook
- Stuffing: Polyester fiberfill or similar stuffing material
- Needle: Tapestry needle for sewing
- Scissors: For cutting yarn
Step-by-Step Instructions
1. Create the Pumpkin Body
- Start by making a magic ring with the orange velvet yarn.
- Round 1: Work 6 single crochet (sc) stitches into the magic ring. Pull the ring tight to close.
- Round 2: Increase in each stitch around (12 stitches total).
- Round 3: (Sc in the next stitch, increase) around (18 stitches total).
- Round 4: (Sc in the next 2 stitches, increase) around (24 stitches total).
- Continue this pattern of increasing until you reach 48 stitches. To increase, you will always add one more single crochet stitch between increases.
- Once you have 48 stitches, work evenly for 5 rounds without increasing or decreasing.
- Begin decreasing: (Sc in the next 6 stitches, decrease) around. Repeat this until you have 6 stitches remaining.
- Fasten off the yarn, leaving a long tail for sewing. Stuff the pumpkin lightly with fiberfill before closing it up.
2. Create the Patchwork Panels
- Using the green yarn, create a magic ring.
- Round 1: Chain 4, then join to form a ring.
- Round 2: Work 8 single crochet stitches into the ring.
- Round 3: (Sc in the next stitch, increase) around (12 stitches total).
- Round 4: (Sc in the next 2 stitches, increase) around (16 stitches total).
- Fasten off and cut the yarn. Repeat these steps with the other colors (burgundy, mustard, teal) to create several patchwork panels.
3. Assemble the Pumpkin
- Arrange the patchwork panels on the pumpkin body in a random pattern that you find visually appealing.
- Using the tapestry needle and a length of yarn, sew each patchwork panel onto the pumpkin securely. Make sure to position them so they overlap slightly for a cozy patchwork look.
4. Create the Pumpkin Stem
- Using the mustard yarn, create a magic ring.
- Chain 6, then join to form a ring.
- Work 6 single crochet stitches into the ring.
- Continue working in a spiral for 4 rounds without joining. This will create a short, stout stem.
- Stuff the stem lightly with fiberfill and sew it securely to the top of the pumpkin.
5. Add Final Touches
- To enhance the patchwork design, use a contrasting yarn to embroider veins on each patchwork panel. This adds a lovely detail to your pumpkin.
Conclusion
Your Velvet Pumpkin Patchwork Amigurumi is now complete! This charming piece not only adds a touch of whimsy to your autumn decor but also showcases your crafting skills. Enjoy displaying your creation or gifting it to someone special. Happy crafting!


