Frosted Pine Forest Blanket Free Pattern – Knit a Cozy Nordic Woodland Throw
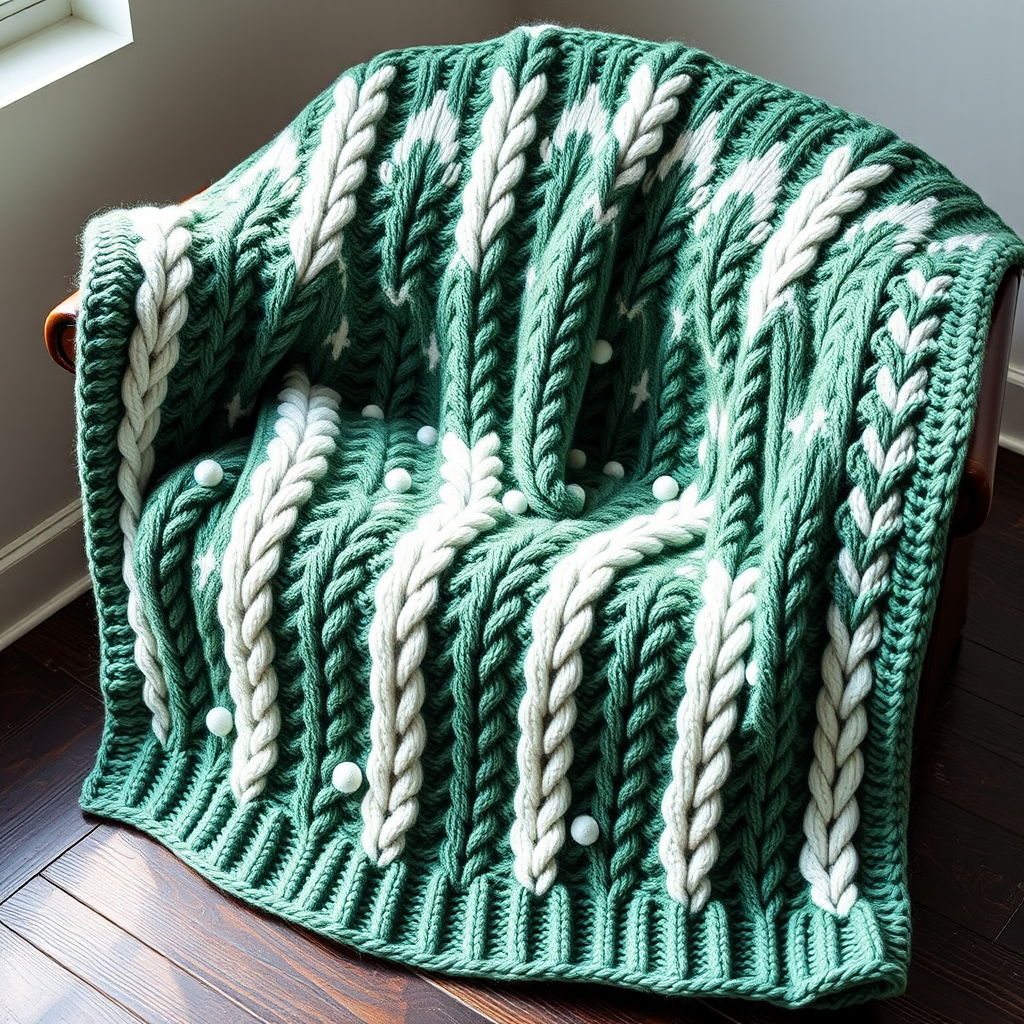
Frosted Pine Forest Blanket Free Pattern – Knit a Cozy Nordic Woodland Throw
Wrap yourself in the serene beauty of a snow-dusted pine forest with this textured knit blanket. Featuring a modern mosaic of cables and bobbles in icy greens and creamy whites, this heirloom-quality throw brings a touch of Nordic hygge to any living space. Whether you're curling up with a book or adding a layer of warmth to your sofa, this pattern is designed to be both rewarding and achievable for knitters ready to explore cables and texture.
Materials Needed
Before you begin, gather the following supplies to ensure a smooth knitting experience:
- Yarn: Worsted weight yarn in 3 colors:
- Color A (Forest Green) – approx. 600g
- Color B (Snow White) – approx. 600g
- Color C (Frost Blue) – approx. 600g
- Needle: US 8 (5mm) circular knitting needle, 32-inch cable (to accommodate the large number of stitches)
- Notions: Cable needle, stitch markers (optional), tapestry needle for weaving in ends
- Gauge: 18 stitches and 24 rows = 4 inches in stockinette stitch (always check your gauge for best results)
Step-by-Step Instructions
Finished Size & Abbreviations
Finished Size: Approx. 50" x 60"
Abbreviations:
- CO: Cast on
- K: Knit
- P: Purl
- K2tog: Knit two together
- C4F: Cable 4 front (slip 2 stitches to cable needle, hold in front, knit next 2 stitches, then knit stitches from cable needle)
- C4B: Cable 4 back (slip 2 stitches to cable needle, hold in back, knit next 2 stitches, then knit stitches from cable needle)
- MB: Make bobble (knit into front and back of same stitch 3 times, turn, purl 3, turn, knit 3, turn, purl 3, turn, k3tog)
- Rep: Repeat
Pattern Notes
This blanket is worked flat in one piece. Use a long circular needle to accommodate the large number of stitches comfortably. The pattern consists of a repeating 24-row block, framed by a simple garter stitch border. Take your time with the cable rows—they create the beautiful tree-like texture that makes this design special.
Getting Started: The Border
Step 1: With Color A (Forest Green), cast on 180 stitches.
Step 2: Knit 6 rows in garter stitch (knit every row). This forms the bottom border of your blanket.
Main Pattern: The 24-Row Repeat
Now you'll begin the main body of the blanket. Follow each row carefully, repeating the section between the asterisks (*) across the row. The first and last 6 stitches of every row are always knit (these form the side borders).
Row 1 (Right Side): With Color A, K6 (border), *K2, P2, K2, C4F, P2, K2, P2, C4B, K2, P2, K2*; rep from * to * across, ending with K6 (border).
Row 2 (Wrong Side): With Color A, K6, *P2, K2, P2, P4, K2, P2, K2, P4, P2, K2, P2*; rep from * to *, ending with K6.
Row 3: With Color A, K6, *K2, P2, K2, K4, P2, K2, P2, K4, K2, P2, K2*; rep from * to *, ending with K6.
Row 4: Rep Row 2.
Row 5: With Color A, K6, *K2, P2, K2, C4B, P2, K2, P2, C4F, K2, P2, K2*; rep from * to *, ending with K6.
Row 6: Rep Row 2.
Row 7: With Color B (Snow White), K6, *K2, P2, MB, K2, P2, K2, P2, MB, K2, P2, K2*; rep from * to *, ending with K6.
Row 8: With Color B, K6, *P2, K2, P1, K2, P2, K2, P2, K2, P1, K2, P2*; rep from * to *, ending with K6.
Row 9: With Color B, K6, *K2, P2, K1, K2, P2, K2, P2, K2, K1, P2, K2*; rep from * to *, ending with K6.
Row 10: Rep Row 8.
Row 11: With Color B, K6, *K2, P2, MB, K2, P2, K2, P2, MB, K2, P2, K2*; rep from * to *, ending with K6.
Row 12: Rep Row 8.
Row 13: With Color C (Frost Blue), K6, *K2, P2, K2, C4F, P2, K2, P2, C4B, K2, P2, K2*; rep from * to *, ending with K6.
Row 14: With Color C, K6, *P2, K2, P2, P4, K2, P2, K2, P4, P2, K2, P2*; rep from * to *, ending with K6.
Row 15: With Color C, K6, *K2, P2, K2, K4, P2, K2, P2, K4, K2, P2, K2*; rep from * to *, ending with K6.
Row 16: Rep Row 14.
Row 17: With Color C, K6, *K2, P2, K2, C4B, P2, K2, P2, C4F, K2, P2, K2*; rep from * to *, ending with K6.
Row 18: Rep Row 14.
Row 19: With Color A, K6, *K2, P2, MB, K2, P2, K2, P2, MB, K2, P2, K2*; rep from * to *, ending with K6.
Row 20: With Color A, K6, *P2, K2, P1, K2, P2, K2, P2, K2, P1, K2, P2*; rep from * to *, ending with K6.
Row 21: With Color A, K6, *K2, P2, K1, K2, P2, K2, P2, K2, K1, P2, K2*; rep from * to *, ending with K6.
Row 22: Rep Row 20.
Row 23: With Color A, K6, *K2, P2, MB, K2, P2, K2, P2, MB, K2, P2, K2*; rep from * to *, ending with K6.
Row 24: Rep Row 20.
Repeat Rows 1-24 until the blanket measures approximately 58 inches from the cast-on edge, ending with Row 24 to complete a full pattern block.
Finishing the Border
Step 1: With Color A (Forest Green), knit 6 rows in garter stitch (knit every row) to create the top border.
Step 2: Bind off loosely in knit. A loose bind-off is essential to prevent the edge from pulling in—consider using a larger needle or a stretchy bind-off method if needed.
Final Touches
Weave in all ends: Use a tapestry needle to carefully weave in all yarn tails on the wrong side of the blanket. Make sure to secure them well so they don't unravel with use.
Block gently to size: Lay the blanket flat on a clean surface or blocking mats. Gently pin to the finished measurements (approx. 50" x 60") and mist with water. Allow to dry completely before removing pins. This will even out the stitches and enhance the cable definition.
Tips for Success
- Keep your tension consistent: Cables can pull in your work. If you find the fabric is getting too tight, try using a slightly larger needle for the cable rows or relax your grip.
- Use stitch markers: Place a marker after the first 6 border stitches and before the last 6 border stitches. This helps you keep track of the border and the pattern repeat.
- Count your stitches: After each cable row, count your stitches to ensure you haven't accidentally dropped or added any. The pattern repeat is 24 stitches, so you should have 7 full repeats plus 12 border stitches (6 on each side).
- Practice the bobble: If you're new to bobbles, practice on a swatch first. The key is to work into the same stitch multiple times, then decrease them back to one stitch on the return rows.
This Frosted Pine Forest Blanket is a labor of love that will reward you with a stunning, cozy heirloom piece. The combination of cables and bobbles creates a rich, dimensional texture that evokes a serene winter woodland. Enjoy the process, and don't hesitate to take breaks—your hands will thank you! Happy knitting!


