Harvest Moon Pumpkin Stem, Leaf, and Vine Free Pattern – Crochet a Rustic Fall Charm
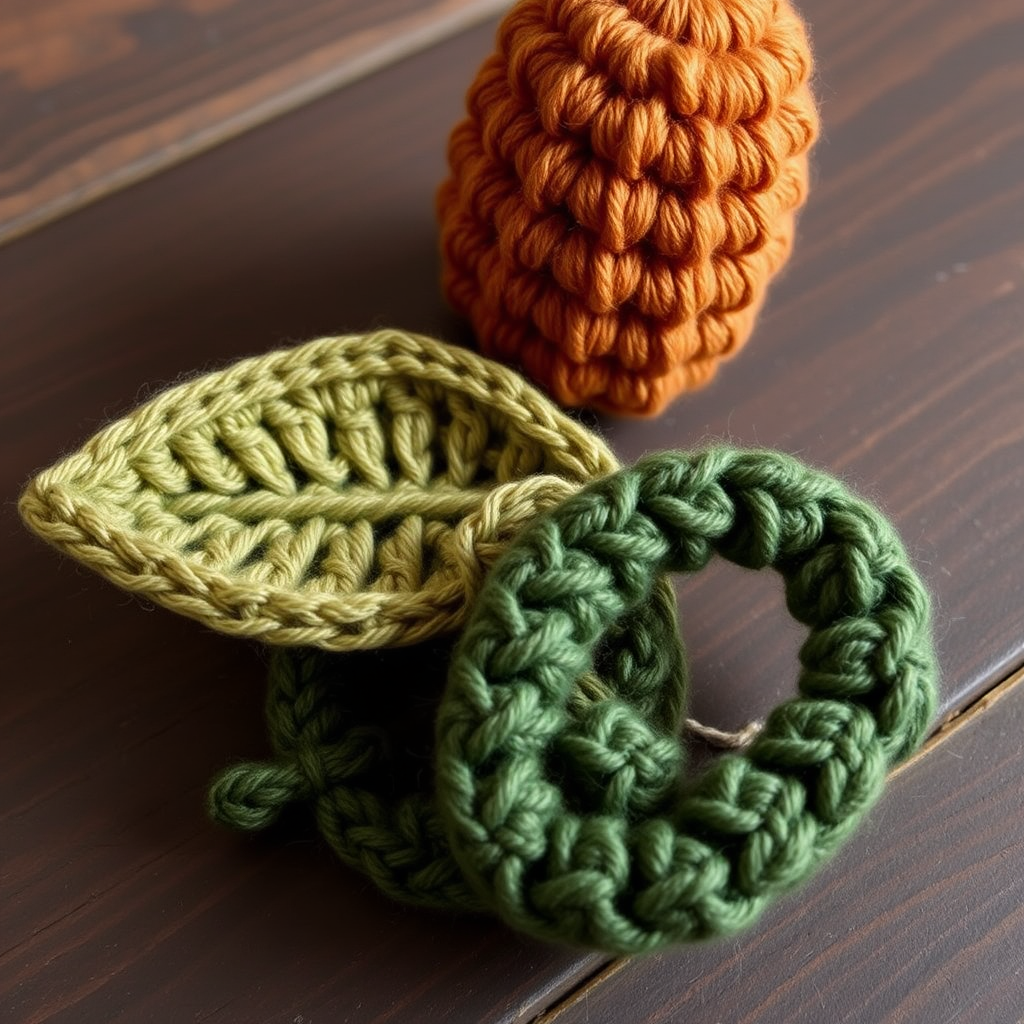
Harvest Moon Pumpkin Stem, Leaf, and Vine – Free Crochet Pattern
Embrace the cozy spirit of autumn with this charming crochet set featuring a textured pumpkin stem, a delicate leaf, and a curling vine. Perfect for adorning your favorite pumpkin or as a standalone seasonal decoration, this pattern brings a handmade touch to your harvest decor. Whether you're a seasoned crocheter or just starting your amigurumi journey, this project is quick, satisfying, and uses simple stitches to create a rustic, natural look that will elevate any fall display.
This pattern is designed with beginners in mind, using only single crochet, half double crochet, double crochet, and treble crochet stitches. The result is a soft, pliable set of pieces with visible stitch definition and a cozy, handcrafted charm. Let's dive in and create this delightful fall accent!
Materials Needed
Before you begin, gather the following supplies. The gauge is not critical for this project, but aim for a tight tension to prevent stuffing from showing through your stitches.
- Yarn: Worsted weight cotton or acrylic yarn in earthy tones:
- Stem: Brown (rich, warm brown)
- Leaf: Olive green (muted, earthy green)
- Vine: Deep green (forest green)
- Crochet Hook: 3.5mm (E) crochet hook
- Stuffing: Polyester fiberfill or cotton stuffing (for the stem)
- Yarn Needle: For sewing pieces together and weaving in ends
- Scissors: For cutting yarn
- Stitch Marker (optional): To help keep track of rounds
Step-by-Step Instructions
Follow these detailed instructions carefully. Each section is broken down into clear steps. Remember to keep your tension tight and consistent throughout the project for the best results.
Part 1: The Pumpkin Stem
The stem is worked in continuous rounds (spiral) without joining, unless otherwise noted. Use your brown yarn.
- Round 1: Make a magic ring. Work 6 single crochet (sc) into the ring. Pull the tail to tighten the ring closed. (6 stitches)
- Round 2: Work 2 sc in each stitch around. This is an increase round. (12 stitches)
- Rounds 3-5: Work 1 sc in each stitch around. (12 stitches) – Repeat this round for three total rounds. Your stem should start to form a small, tapered cylinder.
- Round 6: (Sc in the next 2 stitches, sc2tog) repeat around. The sc2tog (single crochet two together) is a decrease. Insert hook into next stitch, yarn over, pull up a loop, insert hook into the following stitch, yarn over, pull up a loop (3 loops on hook), yarn over, and pull through all 3 loops. (9 stitches)
- Rounds 7-8: Work 1 sc in each stitch around. (9 stitches)
- Finishing: Fasten off, leaving a long tail (about 12 inches) for sewing. Lightly stuff the stem with your fiberfill. Do not overstuff; you want it to be firm but still slightly pliable.
Part 2: The Leaf
The leaf is worked in rows, back and forth. Use your olive green yarn. This creates a pointed oval shape with a subtle central vein when folded.
- Foundation: Chain 10.
- Row 1: Starting in the 2nd chain from the hook, work 1 sc in the next 3 chains, 1 half double crochet (hdc) in the next 2 chains, 1 double crochet (dc) in the next 2 chains, and 1 treble crochet (tr) in the last chain. (8 stitches)
- Row 2: Chain 2, turn your work. Work 2 dc in the first stitch, 1 dc in the next 2 stitches, 1 hdc in the next 2 stitches, 1 sc in the next 2 stitches, and 1 slip stitch (sl st) in the last stitch. (9 stitches)
- Row 3: Chain 1, turn your work. Now you will work back along the other side of the foundation chain. Work 1 sc in the next 3 chains, 1 hdc in the next 2 chains, 1 dc in the next 2 chains, and 1 tr in the last chain. (8 stitches)
- Row 4: Chain 2, turn your work. Work 2 dc in the first stitch, 1 dc in the next 2 stitches, 1 hdc in the next 2 stitches, 1 sc in the next 2 stitches, and 1 sl st in the last stitch. (9 stitches)
- Finishing: Fasten off, leaving a long tail (about 12 inches). Fold the leaf in half lengthwise so the right sides are together. Using your yarn needle and the long tail, sew the two halves together at the base (the pointed end) to create a central vein. Sew a few stitches through both layers at the base, then weave the tail to the center and back out to secure. This will give the leaf its characteristic shape.
Part 3: The Curling Vine
The vine is quick and simple, creating a beautiful spiral curl. Use your deep green yarn.
- Foundation: Chain 30.
- Row 1: Starting in the 2nd chain from the hook, work 3 sc in each chain across. (87 stitches) – This is the entire row. The combination of the long chain and the 3 sc in each chain will naturally cause the vine to curl into a spiral.
- Finishing: Fasten off, leaving a long tail (about 8 inches) for sewing.
Part 4: Assembly
Now it's time to bring all the pieces together to create your finished fall charm.
- Attach the Stem: If you are attaching this to a crocheted pumpkin, position the stem at the top center of your pumpkin. Using the long tail from the stem, sew it securely in place with a few strong stitches. If you are making a standalone piece, you can sew the stem to a small, stuffed pumpkin shape or simply leave it as a decorative set.
- Attach the Leaf: Position the leaf at the base of the stem. Using the long tail from the leaf, wrap the tail around the stem a few times to secure it, then sew it firmly to the stem and the pumpkin (if applicable). Make sure the leaf curves to one side nicely.
- Attach the Vine: Take the curled vine and wrap it around the base of the stem and leaf. Arrange the curls to your liking. Using the long tail from the vine, sew the end securely in place, tucking the tail underneath the vine wraps to hide it.
- Weave in Ends: Use your yarn needle to weave in any remaining loose ends inside the work to keep it neat and secure.
Your Harvest Moon Pumpkin Stem, Leaf, and Vine set is now complete! Display it proudly on a shelf, attach it to a store-bought pumpkin for an instant handmade upgrade, or use it as a charming gift topper. The earthy tones and rustic texture will bring a touch of autumn warmth to any space. Happy crocheting!


