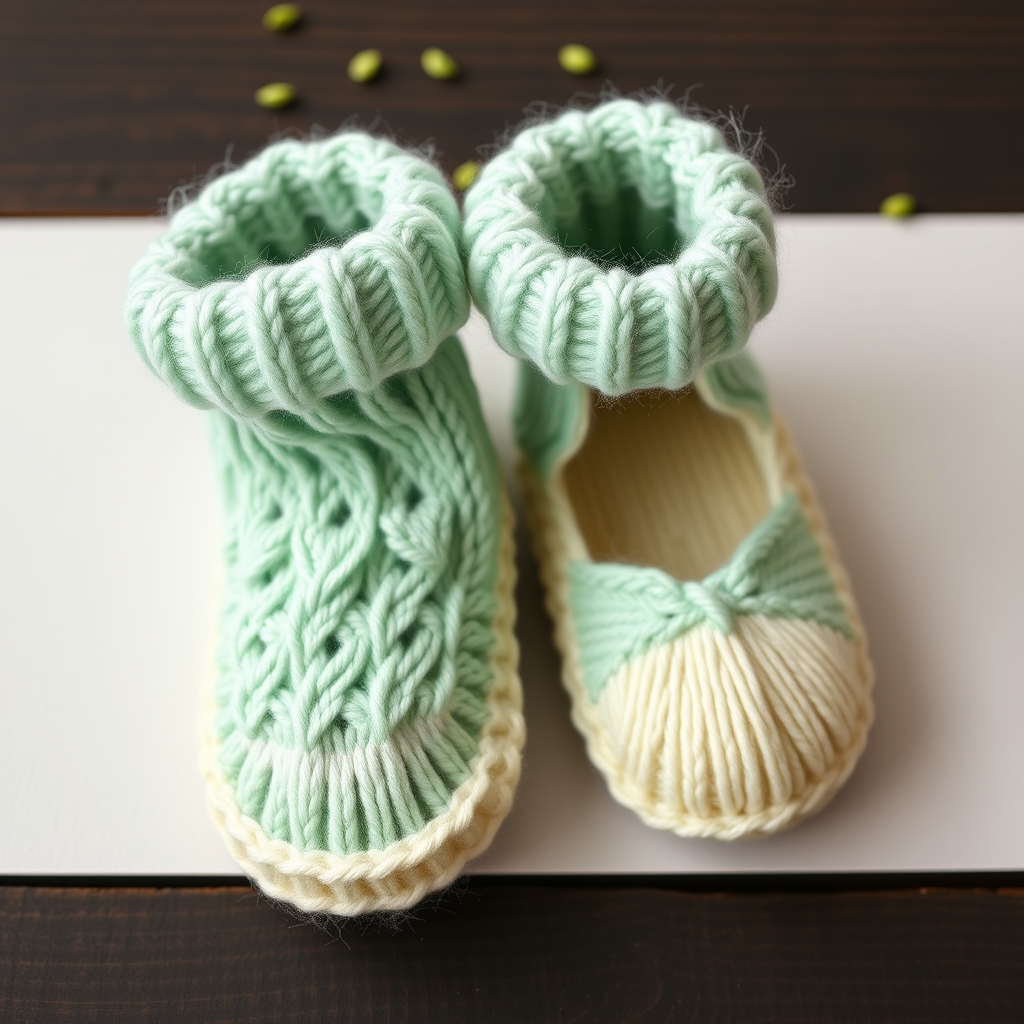
Pearl Cascade Baby Flap Sandals Free Pattern – A Knitted Summer Heirloom

Pearl Cascade Baby Flap Sandals Free Pattern – A Knitted Summer Heirloom
There is something truly magical about creating a handmade gift for a new little one. These Pearl Cascade Baby Flap Sandals are the perfect blend of vintage charm and modern baby fashion. Featuring a delicate pearl stitch pattern and a soft, secure flap design, these sandals will keep tiny feet cool, comfortable, and utterly adorable all summer long. Whether you're a seasoned knitter or a beginner looking for a rewarding project, this free pattern will guide you through every step to create a timeless heirloom piece that will be treasured for years to come.
Made with breathable cotton yarn, these sandals are ideal for warm weather, baby showers, or as a thoughtful handmade addition to any newborn's wardrobe. The soft white and pale blush color combination gives them an airy, elegant look that pairs beautifully with any summer outfit. Let's dive into this delightful knitting project!
Materials Needed
Before we begin, gather the following materials to ensure a smooth and enjoyable knitting experience:
- Yarn: DK weight cotton yarn (e.g., Lion Brand 24/7 Cotton) in soft white (main color) and pale blush (accent color) – approximately 50g of each
- Knitting Needles: US 3 (3.25 mm) knitting needles
- Notions: Yarn needle for weaving in ends, small pearl buttons (2), snap buttons (optional), stitch markers
- Optional: 3.25 mm crochet hook for making ankle straps
Gauge: 24 stitches and 32 rows = 4 inches in stockinette stitch. Always check your gauge to ensure the correct finished size.
Sizes: 0-6 months (6-12 months)
Abbreviations
Familiarize yourself with these standard knitting abbreviations before starting:
- CO = cast on
- K = knit
- P = purl
- K2tog = knit two stitches together (decrease)
- SSK = slip, slip, knit (decrease)
- YO = yarn over (increase)
- BO = bind off
- St(s) = stitch(es)
- RS = right side
- WS = wrong side
Step-by-Step Instructions
This pattern consists of three main pieces per sandal: the sole, the upper, and the flap. Follow each section carefully, and you'll have a beautiful pair of sandals in no time.
SOLE (Make 2)
The sole is worked flat in garter stitch (knit every row) with increases to create a rounded, foot-shaped base.
Instructions for 0-6 months (6-12 months):
CO 30 (34) sts.
Row 1: K all.
Row 2: K1, YO, K14 (16), YO, K2, YO, K14 (16), YO, K1 – you now have 34 (38) sts.
Row 3: K all.
Row 4: K1, YO, K16 (18), YO, K2, YO, K16 (18), YO, K1 – 38 (42) sts.
Row 5: K all.
Row 6: K1, YO, K18 (20), YO, K2, YO, K18 (20), YO, K1 – 42 (46) sts.
Row 7: K all.
Row 8: K1, YO, K20 (22), YO, K2, YO, K20 (22), YO, K1 – 46 (50) sts.
Row 9: K all.
Row 10: K1, YO, K22 (24), YO, K2, YO, K22 (24), YO, K1 – 50 (54) sts.
Row 11: K all.
Row 12: K all.
BO all sts loosely.
Pro tip: The YO increases create a subtle decorative edge along the sides of the sole. Make sure to keep your tension even for a polished look.
UPPER (Make 2)
The upper features the signature pearl stitch pattern, created by alternating knit stitches with yarn overs and decreases. This gives the sandal its delicate, textured appearance.
CO 20 (22) sts.
Row 1 (RS): K all.
Row 2: P all.
Row 3: K1, *K2tog, YO, K1* repeat from * to * until last st, K1.
Row 4: P all.
Row 5: K all.
Row 6: P all.
Repeat rows 3-6 until piece measures 2.5 (3) inches from CO edge, ending with a WS row.
SHAPE TOE:
Row 1 (RS): K1, SSK, K to last 3 sts, K2tog, K1 – 18 (20) sts.
Row 2: P all.
Row 3: K1, SSK, K to last 3 sts, K2tog, K1 – 16 (18) sts.
Row 4: P all.
Row 5: K1, SSK, K to last 3 sts, K2tog, K1 – 14 (16) sts.
Row 6: P all.
BO all sts.
Note: The SSK and K2tog decreases create a gentle curve at the toe, ensuring a comfortable fit for baby's little feet.
FLAP (Make 2)
The flap is the decorative piece that folds over the instep and fastens with a button. It mirrors the pearl stitch pattern of the upper for a cohesive design.
CO 12 (14) sts.
Row 1 (RS): K all.
Row 2: P all.
Row 3: K1, *K2tog, YO, K1* repeat from * to * until last st, K1.
Row 4: P all.
Repeat rows 1-4 until flap measures 1.5 (2) inches from CO edge, ending with a WS row.
Next row (RS): K1, SSK, K to last 3 sts, K2tog, K1 – 10 (12) sts.
Next row: P all.
Next row: K1, SSK, K to last 3 sts, K2tog, K1 – 8 (10) sts.
Next row: P all.
BO all sts.
Finishing Instructions
Now that all pieces are complete, it's time to assemble your beautiful sandals. Follow these steps carefully for a professional finish:
Step 1: Attach the Upper to the Sole
Sew the upper to the sole, matching the center of the toe to the center of the sole's front edge. Use a whip stitch with matching yarn, working from the inside of the sandal for a clean look. Take your time to ensure the upper is centered and evenly distributed along the sole.
Step 2: Attach the Flap
Position the flap at the back of the upper, overlapping slightly. Sew securely using a whip stitch, making sure the flap is centered and will fold naturally over the instep.
Step 3: Create the Buttonhole
Fold the flap over the instep and mark where a button would naturally sit. Use a yarn needle to create a small loop, or sew a snap button for a more secure closure. If you prefer a traditional buttonhole, you can work a small yarn loop at the edge of the flap.
Step 4: Attach the Button
Sew a small pearl button on the side of the upper to fasten the flap. Position it so the flap overlaps comfortably and the button aligns with your buttonhole or snap.
Step 5: Weave in All Ends
Using a yarn needle, carefully weave in all loose ends on the wrong side of the work. Trim any excess yarn.
Optional: Ankle Strap
For extra security, create a crocheted chain strap using a 3.25 mm hook. Make a chain long enough to wrap around baby's ankle, and attach it to the back of the sandal. This is especially useful for active babies who love to kick!
Final Thoughts
Congratulations! You've just created a beautiful pair of Pearl Cascade Baby Flap Sandals that will be cherished as a handmade heirloom. These sandals make a wonderful gift for baby showers, newborn photos, or as a special addition to your own little one's summer wardrobe.
The combination of the delicate pearl stitch pattern, soft cotton yarn, and elegant pearl buttons creates a timeless piece that looks anything but homemade. As you watch these tiny sandals take shape, you'll feel the joy and satisfaction that comes from creating something truly special with your own hands.
Happy knitting, and enjoy watching those tiny toes stay cool and stylish all summer long!