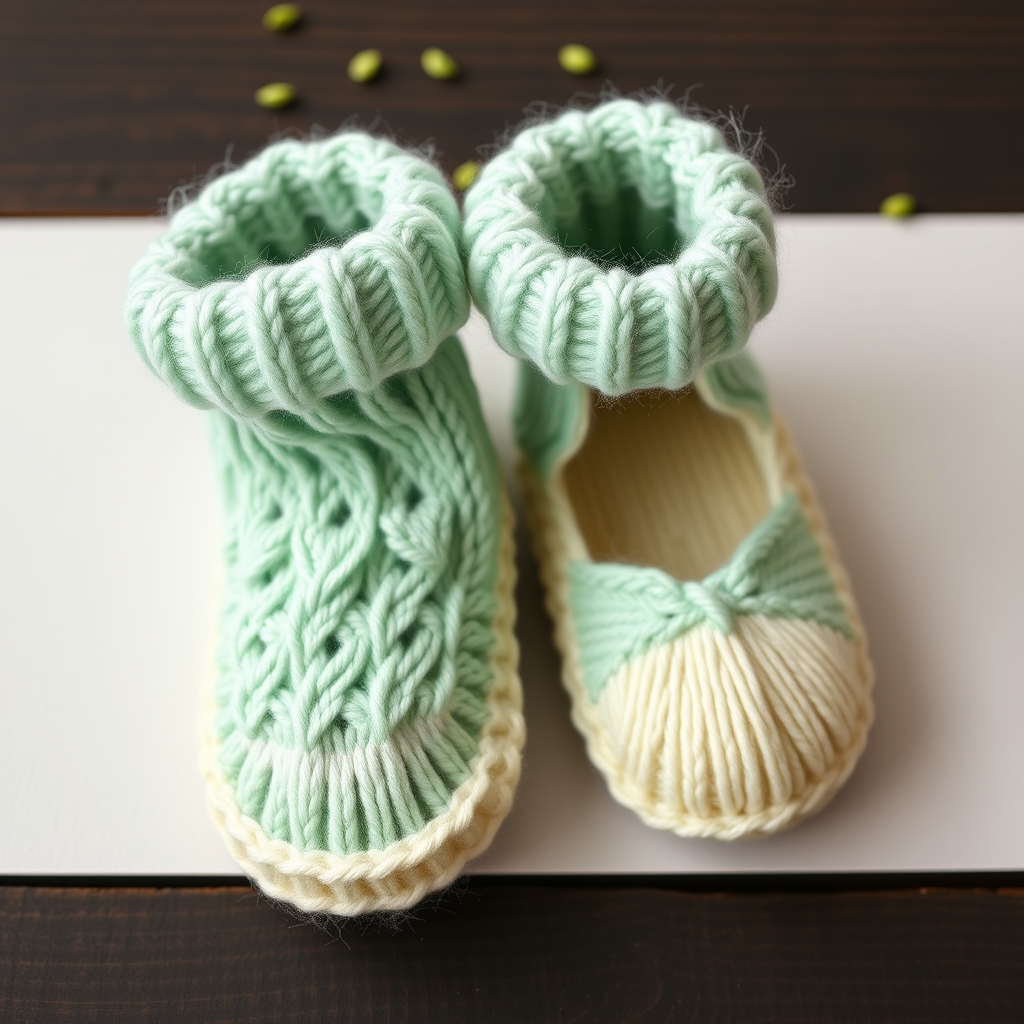
The Little Acorn Cup Cozy Booties Free Pattern – A Knitted Ode to Forest Naps

The Little Acorn Cup Cozy Booties Free Pattern – A Knitted Ode to Forest Naps
Wrap tiny toes in the softest woodland charm with these acorn-inspired booties. Featuring a textured seed-stitch cuff and a rounded, snug fit, this pattern transforms simple worsted-weight yarn into a pair of heirloom-quality baby booties that look like they were plucked straight from a forest floor. Perfect for newborns and a joy to knit in under an hour, these booties make an unforgettable handmade gift for baby showers, newborn photos, or simply for your own little one's cozy naps.
The design cleverly mimics the beloved acorn silhouette: a warm brown ribbed cuff stands in for the cap, while a creamy stockinette body forms the smooth nut. A tiny crocheted acorn cap sewn to the side adds a whimsical finishing touch that will make everyone smile. Whether you're a seasoned knitter looking for a quick project or a beginner ready for your first pair of booties, this pattern is approachable, forgiving, and deeply satisfying to create.
Materials Needed
Before you begin, gather the following supplies. All materials are readily available at any craft store or online yarn retailer.
Yarn
- Main Color (MC): Worsted weight yarn (100% merino wool or soft acrylic blend), approximately 50g in warm brown. The yarn should be machine-washable if possible, as baby items need frequent cleaning.
- Contrast Color (CC): Worsted weight yarn, approximately 20g in cream or off-white. Choose a shade that contrasts nicely with your brown for the classic acorn look.
Needles and Tools
- Knitting Needles: US size 6 (4.0 mm) straight needles, or size needed to obtain gauge. If you prefer circular needles for flat knitting, a 16-inch circular will work beautifully.
- Tapestry Needle: A blunt-tipped tapestry needle for seaming and weaving in ends.
- Crochet Hook (optional): A small crochet hook (size C/D or 2.75mm) for making the decorative acorn cap. If you don't crochet, you can skip this step or substitute with a knitted circle.
- Scissors: Sharp scissors for cutting yarn.
- Stitch Markers (optional): Helpful for keeping track of rows, though not strictly necessary for this pattern.
Gauge
20 stitches and 28 rows = 4 inches in stockinette stitch (after blocking).
Always knit a gauge swatch before starting. If your gauge is off, adjust your needle size accordingly. A proper gauge ensures the booties fit correctly and the fabric is dense enough to be durable yet soft.
Step-by-Step Instructions
This pattern is knit flat from the cuff down, then seamed up the back. It's a straightforward construction that's perfect for beginners. The pattern includes instructions for two sizes: 0-3 months and 3-6 months. Instructions for the larger size are shown in parentheses ( ).
Please read through the entire pattern before beginning. Take your time, and enjoy the process!
Abbreviations
- K = knit
- P = purl
- k2tog = knit two stitches together (decrease)
- sc = single crochet (for the decorative cap)
- RS = right side
- WS = wrong side
- MC = main color (brown)
- CC = contrast color (cream)
Cuff (Make 2)
The cuff is worked in a seed stitch pattern, which creates a lovely textured rib that mimics the rough texture of an acorn cap. This stitch is also wonderfully stretchy, making it easy to slip over baby's chubby feet.
- With MC, cast on 30 (34) stitches using your preferred method. A long-tail cast-on works well here.
- Row 1 (RS): *K1, P1; repeat from * to end of row.
- Row 2 (WS): *P1, K1; repeat from * to end of row.
- Repeat Rows 1 and 2 until the cuff measures 1.5 (2) inches from the cast-on edge, ending with a WS row. You should have a neat, ribbed rectangle of fabric.
Pro Tip: The seed stitch pattern means that on the RS, you knit the purl bumps and purl the knit stitches from the previous row. If you lose your place, look at the row below: if the stitch below is a knit stitch (V-shape), you purl it; if it's a purl bump, you knit it.
Leg
Now we switch to the cream yarn and work in smooth stockinette stitch, which will form the smooth "nut" of the acorn.
- Switch to CC. Do not cut MC yet—you'll need it later for the decorative cap.
- Work in stockinette stitch (knit on RS, purl on WS) for 6 (8) rows, ending with a WS row. Your work should now have a smooth, flat section of cream-colored fabric above the textured brown cuff.
Heel Shaping
This is the trickiest part of the pattern, but don't worry—it's simpler than it looks. We're creating a short-row heel that gives the bootie its rounded shape. The key is to follow the instructions carefully and count your stitches.
- Row 1 (RS): K18 (20), turn. Leave the remaining stitches unworked on the left needle. You will now be working back and forth over only the center stitches.
- Row 2 (WS): Slip 1 stitch purlwise (just move it to the right needle without knitting), P11 (12), turn.
- Row 3: Slip 1 stitch purlwise, K11 (12), turn.
- Repeat Rows 2 and 3 until you have 12 (13) slipped stitches on each side of the heel, ending with a WS row. You will have worked back and forth over the center 12 (12) stitches.
Understanding the Heel: Each time you repeat Rows 2-3, you're working one more stitch from the sides into the center section. The slipped stitches create a neat edge that will be hidden in the seam. When you've completed this section, all stitches are back on one needle, and you're ready to work the foot.
Foot
Now we work across all stitches again to create the foot of the bootie. This section is simple stockinette stitch.
- Row 1 (RS): K30 (34) across all stitches.
- Row 2 (WS): Purl all stitches.
- Repeat these 2 rows until the foot measures 2.5 (3) inches from the heel, ending with a WS row.
Measuring Tip: To measure correctly, place the work flat and measure from the center of the heel shaping (where the short rows ended) to the current edge. This ensures the foot is the right length for the size you're making.
Toe Shaping
We'll now decrease stitches to create a rounded toe that gathers beautifully. The decreases are placed symmetrically on both sides of the foot.
- Row 1 (RS): K1, k2tog, K10 (12), k2tog, K2, k2tog, K10 (12), k2tog, K1 — you should now have 26 (30) stitches on your needle.
- Row 2 (WS): Purl all stitches.
- Row 3 (RS): K1, k2tog, K8 (10), k2tog, K2, k2tog, K8 (10), k2tog, K1 — 22 (26) stitches remain.
- Row 4 (WS): Purl all stitches.
- Row 5 (RS): K1, k2tog, K6 (8), k2tog, K2, k2tog, K6 (8), k2tog, K1 — 18 (22) stitches remain.
- Cut the yarn, leaving a long tail (at least 12 inches). Thread the tail through a tapestry needle, then pass it through the remaining stitches on your knitting needle, slipping them off the needle as you go. Pull the yarn tight to gather the toe closed, and secure with a few small stitches.
Finishing the Toe: The gathered toe creates a beautiful, rounded shape that's perfect for tiny feet. Make sure to pull the yarn firmly but not so tight that it puckers the fabric.
Finishing
Now it's time to assemble your bootie and add the charming acorn cap detail.
- Seam the Back: With the right side facing you, use the mattress stitch to sew the back seam from the toe up to the cuff. The mattress stitch creates an invisible, professional-looking seam. Work from the toe upward, matching the rows carefully.
- Weave in Ends: Use your tapestry needle to weave in all loose ends on the inside of the bootie. Trim any excess yarn.
- Optional Decorative Acorn Cap: With MC, make a magic ring. Work 6 single crochet (sc) into the ring, join with a slip stitch. Then work 2 sc in each stitch around (12 sc total), join and fasten off, leaving a long tail. Sew this small crocheted circle to the side of the bootie, just above the cuff, as a decorative button (non-functional). This adds the perfect acorn detail!
Repeat all steps for the second bootie. Remember that the second bootie should be identical, not mirrored, since the seam is at the back.
Blocking (Optional but Recommended)
To give your booties a professional finish, lightly block them. Soak them in lukewarm water with a drop of gentle soap, gently squeeze out excess water (never wring), and lay them flat to dry, shaping them gently with your hands. This helps even out the stitches and gives the booties a polished look.
And there you have it—a pair of adorable acorn cup cozy booties that are as delightful to make as they are to gift. The combination of the textured brown cuff, smooth cream body, and whimsical acorn cap creates a truly special keepsake. Whether you're knitting for your own little one or as a heartfelt gift, these booties are sure to be treasured.
Happy knitting, and may your days be filled with cozy forest naps and tiny, warm toes!