Sunlit Meadow Daffodil Amigurumi Free Pattern – Textured Crochet Spring Bouquet
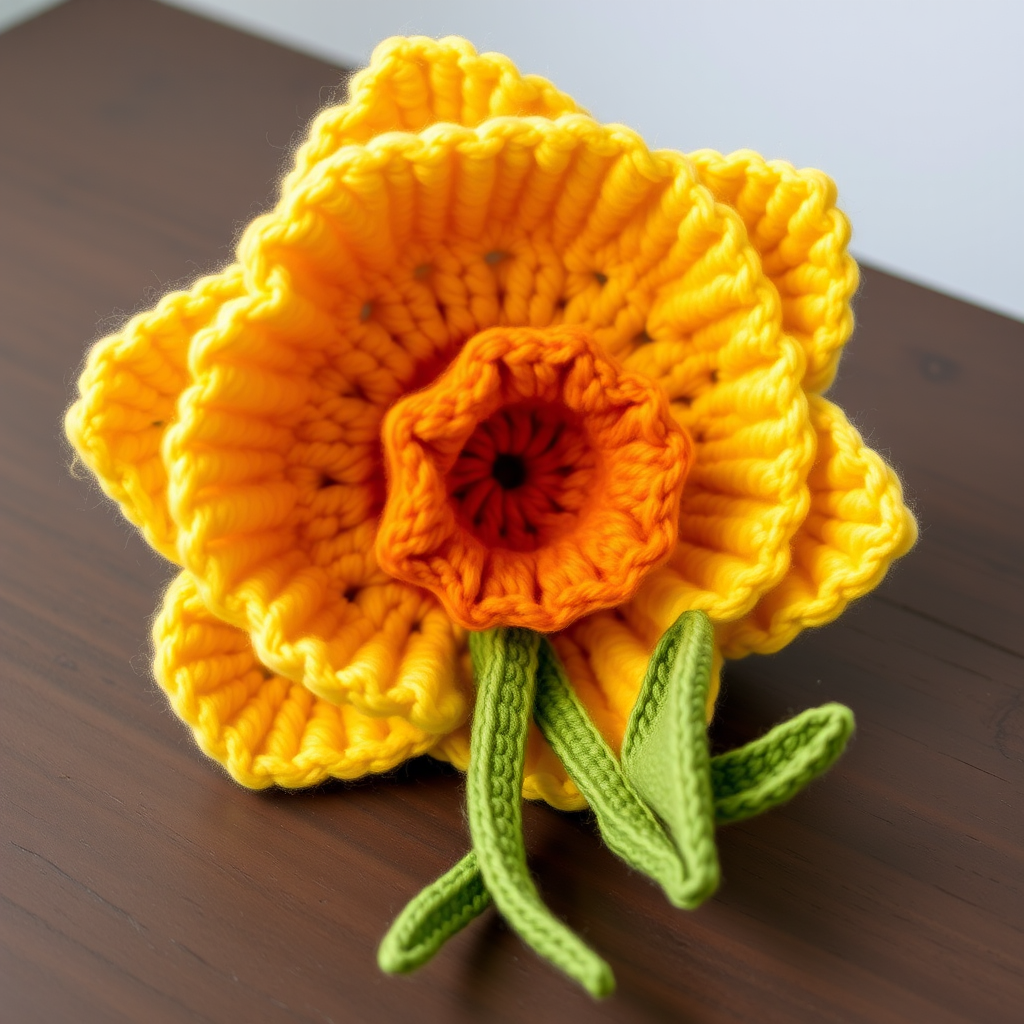
Bring Spring to Life with the Sunlit Meadow Daffodil Amigurumi
There’s something magical about a handcrafted flower that never wilts. The Sunlit Meadow Daffodil Amigurumi is the perfect way to capture the bright, hopeful energy of spring and keep it on your shelf all year round. This charming pattern features two layers of soft, rounded petals in sunny yellows, a warm orange trumpet center, and a slender green stem with delicate leaves. Whether you’re looking for a heartfelt handmade gift or a cheerful addition to your own décor, this project is a joy to create.
Designed with clear, detailed instructions, this pattern is accessible to crocheters of all skill levels. The repetitive, meditative rounds make it a relaxing project, while the final assembly brings a rewarding sense of accomplishment. Let’s gather our materials and start crocheting a little piece of sunshine!
Materials Needed
Before you begin, make sure you have everything you need. This project uses simple, readily available materials:
- Yarn: Worsted weight cotton yarn in the following colors:
- Yellow (for the back petals)
- Bright yellow (for the front petals)
- Orange (for the trumpet center)
- Green (for the stem and leaves)
- Crochet Hook: 3.5mm hook (E-4)
- Other Tools: Yarn needle, stitch marker, and polyester fiberfill for stuffing.
Gauge: Not critical for this project. However, aim for tight, firm stitches to prevent the stuffing from showing through. If your stitches are loose, consider using a smaller hook.
Step-by-Step Instructions
This pattern is worked in continuous spirals unless otherwise noted. Always use a stitch marker to keep track of the beginning of your rounds. Let’s break it down piece by piece.
Petal Layer 1 (Back Petals) – Make 6
These form the larger, softer-colored base of the flower. Work each petal separately and set them aside.
- With yellow yarn, make a magic ring, ch 1, work 6 sc into ring. Pull tight. (6)
- Inc in each st around. (12)
- (Sc in next st, inc) around. (18)
- (Sc in next 2 sts, inc) around. (24)
- Rounds 5-6: Sc in each st around. (24)
- (Sc in next 2 sts, inc) around. (32)
- Rounds 8-9: Sc in each st around. (32)
- (Sc in next 3 sts, inc) around. (40)
- Rounds 11-12: Sc in each st around. (40)
- (Sc in next 3 sts, dec) around. (32)
- (Sc in next 2 sts, dec) around. (24)
- (Sc in next st, dec) around. (16)
- Dec around. (8)
Fasten off, leaving a long tail for sewing. Stuff lightly with fiberfill and set aside. Repeat this entire process to make a total of 6 back petals.
Petal Layer 2 (Front Petals) – Make 6
These petals are worked identically to the back petals but use the brighter yellow yarn to create a beautiful contrast and sense of depth.
- With bright yellow yarn, make a magic ring, ch 1, work 6 sc into ring. Pull tight. (6)
- Inc in each st around. (12)
- (Sc in next st, inc) around. (18)
- (Sc in next 2 sts, inc) around. (24)
- Rounds 5-6: Sc in each st around. (24)
- (Sc in next 2 sts, inc) around. (32)
- Rounds 8-9: Sc in each st around. (32)
- (Sc in next 3 sts, inc) around. (40)
- Rounds 11-12: Sc in each st around. (40)
- (Sc in next 3 sts, dec) around. (32)
- (Sc in next 2 sts, dec) around. (24)
- (Sc in next st, dec) around. (16)
- Dec around. (8)
Fasten off, leaving a long tail. Stuff lightly and set aside. Make 6 front petals in total.
Trumpet (Center of Flower)
This is the iconic daffodil trumpet. It’s worked as a tube that flares slightly at the top.
- With orange yarn, make a magic ring, ch 1, work 6 sc into ring. Pull tight. (6)
- Inc in each st around. (12)
- (Sc in next st, inc) around. (18)
- Rounds 4-6: Sc in each st around. (18)
- (Sc in next 2 sts, inc) around. (24)
- Rounds 8-10: Sc in each st around. (24)
- (Sc in next 2 sts, dec) around. (18)
- Sc in each st around. (18)
Fasten off, leaving a long tail. Stuff firmly to give the trumpet a solid shape.
Stem
A simple, sturdy tube that supports the flower head.
- With green yarn, make a magic ring, ch 1, work 6 sc into ring. Pull tight. (6)
- Rounds 2-20: Sc in each st around. (6)
Fasten off, leaving a long tail. Do not stuff the stem; it should remain flexible.
Leaf – Make 2
These elongated leaves curve out elegantly from the stem.
- With green yarn, ch 12.
- Sc in 2nd ch from hook, hdc in next, dc in next 6, hdc in next, sc in last. Ch 1, turn.
- Sc in each st across. Fasten off, leaving a long tail.
Repeat to make a second leaf.
Assembly
Now for the fun part—bringing all the pieces together! Take your time and use the long yarn tails for a secure finish.
- Attach Petal Layers: Sew the two petal layers together, offsetting them so the front petals sit neatly between the back petals. Use the long tails and a yarn needle to whipstitch them together securely.
- Attach the Trumpet: Position the trumpet in the center of the petal layers. Sew it securely around its base, making sure it’s centered and firmly attached.
- Attach the Stem: Sew the stem to the bottom of the flower, ensuring it is perfectly centered. Use strong, even stitches.
- Attach the Leaves: Sew the leaves to the stem, positioning them near the base. Angle them outward for a natural look.
- Weave in Ends: Carefully weave in all remaining yarn ends using your yarn needle to give your daffodil a clean, professional finish.
And there you have it—your very own Sunlit Meadow Daffodil! This project is a wonderful way to practice your amigurumi skills while creating a beautiful, lasting piece of spring. Whether you make a single flower or a whole bouquet, these cheerful daffodils are sure to bring a smile to anyone’s face. Happy crocheting!


