The Aurora Borealis Wrap Free Pattern – Knit a Shimmering Gradient Shawl
The Aurora Borealis Wrap Free Pattern – Knit a Shimmering Gradient Shawl
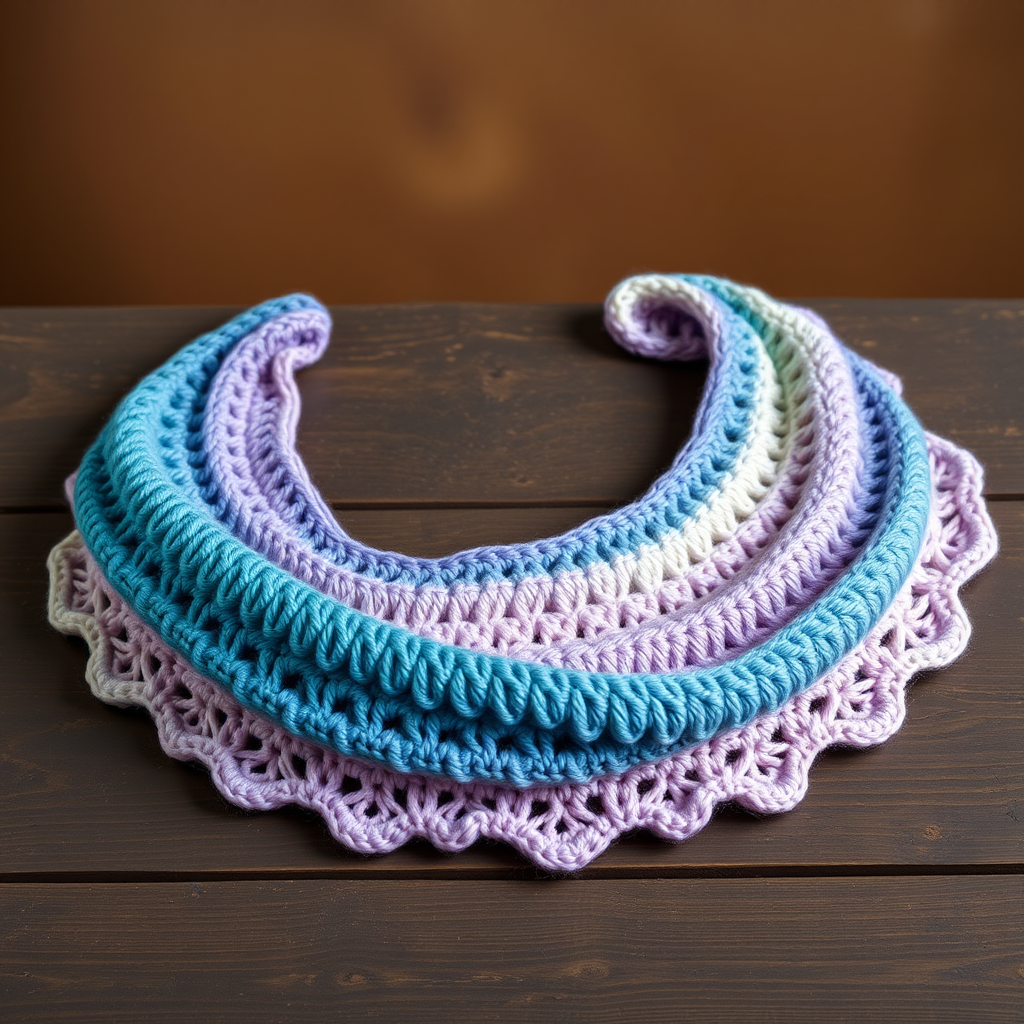
Wrap yourself in the magic of the northern lights with this stunning gradient knit shawl. The shifting colors and delicate lace texture create a mesmerizing, wearable piece of art. This pattern is designed for adventurous beginners and intermediate knitters alike, offering a rhythmic, meditative knit that rewards you with a breathtaking crescent-shaped shawl. The color transitions—from deep teal through emerald green and soft purple to pale pink—mimic the ethereal dance of the aurora borealis across a night sky. Whether you're curling up with a book or heading out for an evening stroll, this wrap adds a touch of celestial elegance to any moment.
This free pattern is perfect for using up your fingering weight yarn stash or for treating yourself to a luxurious gradient set. The construction is simple: you'll knit from the top center down, increasing gradually to form a graceful crescent. The lace pattern is easy to memorize but produces a stunning ripple effect that catches the light beautifully. Let's dive in and create your own piece of wearable art!
Materials Needed
Before you begin, gather the following supplies to ensure a smooth knitting experience:
- Yarn: Fingering weight yarn in 4 colors: deep teal, emerald green, soft purple, and pale pink (approx. 400g total). You can use a gradient yarn set or choose your own color progression. For a true aurora effect, select colors that blend harmoniously.
- Needle: US 6 (4.0mm) circular knitting needle with a 32-inch cable. The long cable is essential to accommodate the growing number of stitches.
- Gauge: 20 stitches and 28 rows = 4 inches in stockinette stitch (blocked). Gauge is important for achieving the correct drape and size, but this pattern is forgiving—a slightly looser or tighter gauge will still produce a beautiful shawl.
- Notions: Stitch markers (at least 2), tapestry needle for weaving in ends, blocking pins and mats, and a gentle wool wash for finishing.
Pro tip: If you're using a gradient yarn set, you'll simply knit through the colors in order. If you're using separate skeins, you can join them with a Russian join or simply tie a secure knot and weave in ends later. For a seamless look, consider alternating rows when changing colors.
Step-by-Step Instructions
This shawl is knit from the top center down, increasing gradually to form a crescent shape. The lace pattern is simple but creates a stunning ripple effect reminiscent of the aurora. Follow along carefully, and you'll have a gorgeous wrap in no time.
Abbreviations
- k = knit
- p = purl
- yo = yarn over
- k2tog = knit two together (right-leaning decrease)
- ssk = slip, slip, knit (left-leaning decrease)
- pm = place marker
- sm = slip marker
Setup Section
Let's start with the foundation of your shawl. This section creates the top edge and establishes the increase rhythm.
- Cast on: Cast on 5 stitches using your preferred method (long-tail cast on works well).
- Row 1 (WS): Knit all stitches. (5 stitches)
- Row 2 (RS): K2, yo, k1, yo, k2. (7 stitches)
- Row 3: Knit all stitches. (7 stitches)
- Row 4: K2, yo, k3, yo, k2. (9 stitches)
- Row 5: Knit all stitches. (9 stitches)
You've now established the base. Notice how the increases are placed 2 stitches in from each edge—this creates a neat, decorative border that will continue throughout the shawl.
Increase Section
This section builds the body of the shawl with simple, rhythmic increases. The edge stitches remain consistent, creating a clean frame.
- Row 6 (RS): K2, yo, knit to last 2 stitches, yo, k2. (Increase 2 stitches)
- Row 7 (WS): K2, purl to last 2 stitches, k2. (The knit edge stitches create a garter stitch border.)
- Repeat Rows 6-7 until you have 45 stitches on the needle, ending with a WS row. This will take approximately 18 repeats. Count your stitches carefully after each RS row to ensure accuracy.
Tip: Place a marker after the first 2 stitches and before the last 2 stitches. This will help you quickly identify where to place your yarn overs and keep your edge stitches distinct.
Lace Pattern Section
Now for the magical part! The lace pattern is worked over a multiple of 6 stitches plus 5, with 2 edge stitches on each side. The yarn overs at the edges continue to increase the stitch count, while the lace pattern in the middle creates the beautiful aurora ripples.
Important: The lace pattern repeat is 6 stitches. As you work, the stitch count will grow by 2 every RS row (from the edge yarn overs). The pattern will naturally accommodate the increasing stitches—just continue the repeat across the middle stitches.
- Row 1 (RS): K2, yo, *k2tog, yo, k1, yo, ssk, k1; repeat from * to last 3 stitches, yo, k3.
- Row 2 (WS): K2, purl to last 2 stitches, k2.
- Row 3 (RS): K2, yo, *k1, yo, ssk, k2tog, yo, k1; repeat from * to last 3 stitches, yo, k3.
- Row 4 (WS): K2, purl to last 2 stitches, k2.
Repeat Rows 1-4, continuing to increase 2 stitches every RS row (the yarn overs at the edges). Work until the shawl measures approximately 60 inches from the cast-on edge, or your desired length. This will take some time—enjoy the meditative rhythm!
Understanding the lace: The combination of k2tog and ssk creates balanced decreases that form the ripple effect. The yarn overs create the eyelets that catch the light. When you work Row 1, you're creating a right-leaning decrease followed by a yarn over, then a left-leaning decrease. Row 3 reverses this, creating a beautiful symmetry.
Final Increase Section
This short section adds a gentle curve to the bottom edge, giving the shawl its elegant crescent shape.
- Work the increase section (Rows 6-7 from earlier) for 10 more rows. This means you'll work 5 RS rows (each increasing by 2 stitches) and 5 WS rows.
- End with a WS row. Your stitch count will have increased by 10 stitches from where you left off.
Edging
The edging adds a delicate, scalloped finish that complements the lace pattern beautifully.
- Row 1 (RS): K2, yo, *k2tog, yo; repeat from * to last 2 stitches, yo, k2.
- Row 2 (WS): Knit all stitches. (This creates a garter stitch ridge.)
- Row 3: K2, yo, *k2tog, yo; repeat from * to last 2 stitches, yo, k2.
- Row 4: Knit all stitches.
This creates a lovely picot-like edge that will open up beautifully when blocked.
Bind Off
Bind off loosely to ensure the edge remains stretchy and doesn't pull the shawl out of shape. If your bind off tends to be tight, use a needle one or two sizes larger.
- Knit the first stitch.
- Knit the next stitch.
- Pass the first stitch over the second stitch and off the needle.
- Continue this pattern across all stitches, being careful not to pull too tightly.
- When you have one stitch left, cut the yarn leaving a 6-inch tail, and pull it through the last loop.
Weaving in Ends
Using your tapestry needle, weave in all ends carefully. For color changes, weave the ends through the purl bumps on the wrong side of the work, going in opposite directions for security. Trim any excess yarn.
Blocking
Blocking is essential for this shawl—it opens up the lace pattern and creates the beautiful drape and shape. Follow these steps for perfect results:
- Fill a sink or basin with lukewarm water and add a gentle wool wash according to the product instructions.
- Submerge the shawl and let it soak for 20 minutes. Do not agitate or wring—this can cause felting.
- Gently squeeze out excess water (do not wring).
- Lay the shawl flat on a clean towel and roll it up, pressing gently to remove more water.
- Place the shawl on blocking mats or a clean, padded surface.
- Pin out to shape, stretching the lace points slightly. Focus on the scalloped edges and the top edge to create a smooth crescent.
- Allow to dry completely, which may take 24-48 hours depending on humidity.
Blocking tip: Use rust-proof pins and pin through the yarn, not around it, to avoid distortion. For the lace points, gently pull each point outward to emphasize the scalloped effect.
Final Thoughts
Congratulations! You've created a stunning Aurora Borealis Wrap that captures the ethereal beauty of the northern lights. This shawl is perfect for cozy evenings, special occasions, or as a thoughtful handmade gift. The gradient colors and delicate lace make it a true statement piece.
Remember, knitting is a journey—enjoy every stitch. If you make this pattern, we'd love to see your creation! Share your photos on social media with the hashtag #AuroraBorealisWrap and inspire others to knit their own piece of wearable art.
Happy knitting, and may your days be filled with shimmering stitches and cozy warmth!



