The Emberwood Ridge Fingerless Gloves Free Pattern – Knit a Cozy Forest Floor Texture
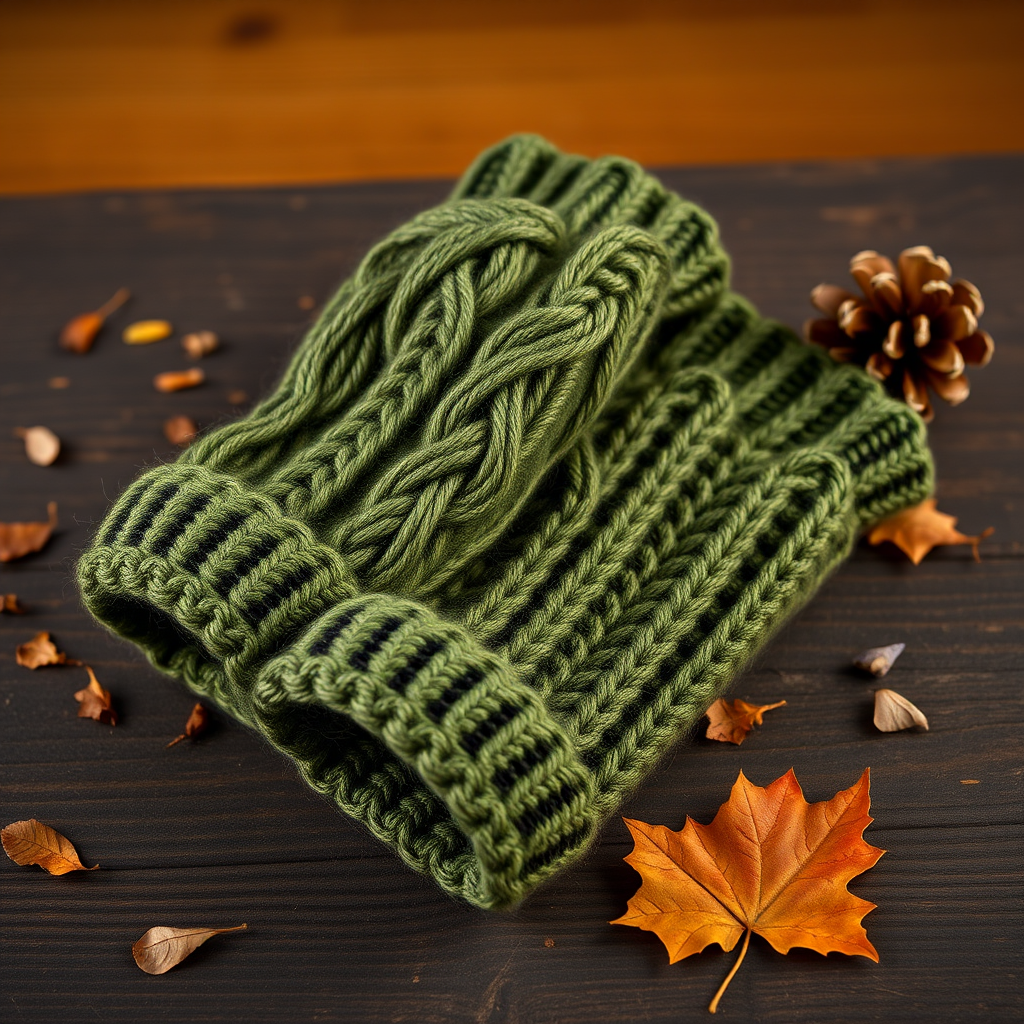
Wrap Your Hands in Woodland Warmth: The Emberwood Ridge Fingerless Gloves Pattern
There's something magical about slipping your hands into a pair of hand-knit fingerless gloves—especially when they're textured with the organic, earthy feel of a forest floor. The Emberwood Ridge Fingerless Gloves capture that exact sensation, combining a striking braided cable with a bumpy moss stitch that evokes fallen leaves and pine needles underfoot. This one-skein wonder is the perfect quick knit for gifting, for treating yourself, or for adding a touch of rustic luxury to your autumn wardrobe. Whether you're a seasoned knitter looking for a satisfying weekend project or a brave beginner ready to tackle your first cable, this pattern delivers cozy, form-fitting results that you'll reach for all season long.
Materials Needed: Gather Your Forest Treasures
Before you cast on, let's make sure you have everything you need. This project is wonderfully portable and requires just a single skein of worsted weight yarn—making it an ideal stash-buster or a thoughtful, handmade gift.
Yarn
- Weight: Worsted weight yarn
- Amount: Approximately 180–200 yards (1 skein)
- Suggested Yarns: Malabrigo Rios in "Pine Grove" or Cascade 220 in "Forest Heather" for that rich, heathered woodland look
Needles & Notions
- Needles: US Size 6 (4.0 mm) knitting needles—either a set of double-pointed needles (DPNs) or a circular needle for the magic loop method
- Notions: Cable needle, stitch markers (at least 4), stitch holder or waste yarn, tapestry needle for weaving in ends
Gauge
22 stitches and 30 rows = 4 inches in stockinette stitch (after blocking). Always take the time to swatch—your hands will thank you for the perfect fit!
Step-by-Step Instructions: Knit Your Own Emberwood Ridge Gloves
This pattern is written for a Women's Medium (fits 7–8 inch hand circumference). To adjust the size, simply add or remove stitches in multiples of 4 in the stockinette sections. Let's dive into the pattern!
Abbreviations You'll Need
- CO: Cast on
- K: Knit
- P: Purl
- K2tog: Knit two together (decrease)
- SSK: Slip, slip, knit (decrease)
- C4F: Slip 2 stitches to cable needle, hold in front, knit next 2 stitches, then knit 2 from cable needle
- C4B: Slip 2 stitches to cable needle, hold in back, knit next 2 stitches, then knit 2 from cable needle
- PM: Place marker
- RM: Remove marker
- St(s): Stitch(es)
- M1L: Make 1 left (increase)
- M1R: Make 1 right (increase)
Right Glove
Cast On & Ribbing
CO 40 sts. Distribute evenly on DPNs or use the magic loop method. Join in the round, being extremely careful not to twist your stitches.
Rounds 1–12: *K2, P2* repeat to end of round. (40 sts)
Main Body: The Forest Floor Texture
Now we begin the beautiful cable and moss stitch pattern that gives these gloves their name.
Round 13: *K4, P1, K1, P1, K1* repeat to end. (40 sts)
Round 14: *C4F, P1, K1, P1, K1* repeat to end. (40 sts)
Rounds 15–16: Repeat Round 13.
Round 17: *C4B, P1, K1, P1, K1* repeat to end. (40 sts)
Rounds 18–20: Repeat Round 13.
Repeat Rounds 14–20 until the piece measures 4 inches from the cast-on edge, ending with a Round 13 repeat. This creates the braided cable flanked by the bumpy moss stitch texture.
Thumb Gusset: Shaping for Comfort
Now we'll add stitches to create room for your thumb. This is where the magic of a gusset happens!
Round 21: K1, PM, M1L, K1, M1R, PM, K to end. (42 sts)
Round 22: Work in pattern as established (K4, P1, K1, P1, K1) across, but when you reach the markers, knit the stitches between markers (the thumb gusset sts) in stockinette.
Round 23: K1, M1L, K to marker, M1R, slip marker, K to end. (44 sts)
Round 24: Work in pattern, knitting gusset sts.
Repeat Rounds 23–24 until there are 13 sts between the markers (i.e., after 6 increase rounds). You should now have 52 sts total.
Separate the Thumb
Next Round: Work in pattern to first marker, RM, place next 13 sts on a stitch holder or waste yarn, RM, CO 1 st (this is your bridge stitch), continue in pattern to end. (40 sts)
Hand Section
Continue in pattern (Rounds 13–20 sequence) until the hand measures 3 inches from thumb separation, or your desired length to cover the knuckles. End with a Round 13 repeat.
Top Ribbing
Rounds 1–8: *K2, P2* repeat to end. (40 sts)
Bind off loosely in pattern. This neat 2x2 ribbing will keep your gloves snug and secure.
Thumb
Transfer the 13 sts from the holder to your needles. Pick up and knit 2 sts from the bridge (one from each edge). (15 sts)
Rounds 1–6: *K1, P1* ribbing around.
Bind off loosely in rib. Your thumb is complete!
Left Glove
Work as for the Right Glove, but place the thumb gusset at the end of the round (last 2 sts of the round) instead of the beginning. To do this:
Round 21: K to last 2 sts, PM, M1L, K1, M1R, PM, K to end.
Then follow the same increase pattern, but work the gusset at the end of the round. When separating, place the last 13 sts (before the end marker) on the holder, CO 1 bridge st, and continue.
Finishing Touches
Weave in all ends with your tapestry needle. Block gently to shape, allowing the cables to relax and the moss stitch to bloom. This step truly transforms the fabric, giving it that professional, polished look.
And there you have it—your very own pair of Emberwood Ridge Fingerless Gloves! These cozy accessories are perfect for chilly mornings, crisp autumn hikes, or simply curling up with a warm drink. The textured pattern is a joy to knit and even more delightful to wear. Enjoy your handmade forest-floor treasures!


