Amigurumi Patterns
The Enchanted Teacup Amigurumi Free Pattern
Anonymous
•
July 03, 2026
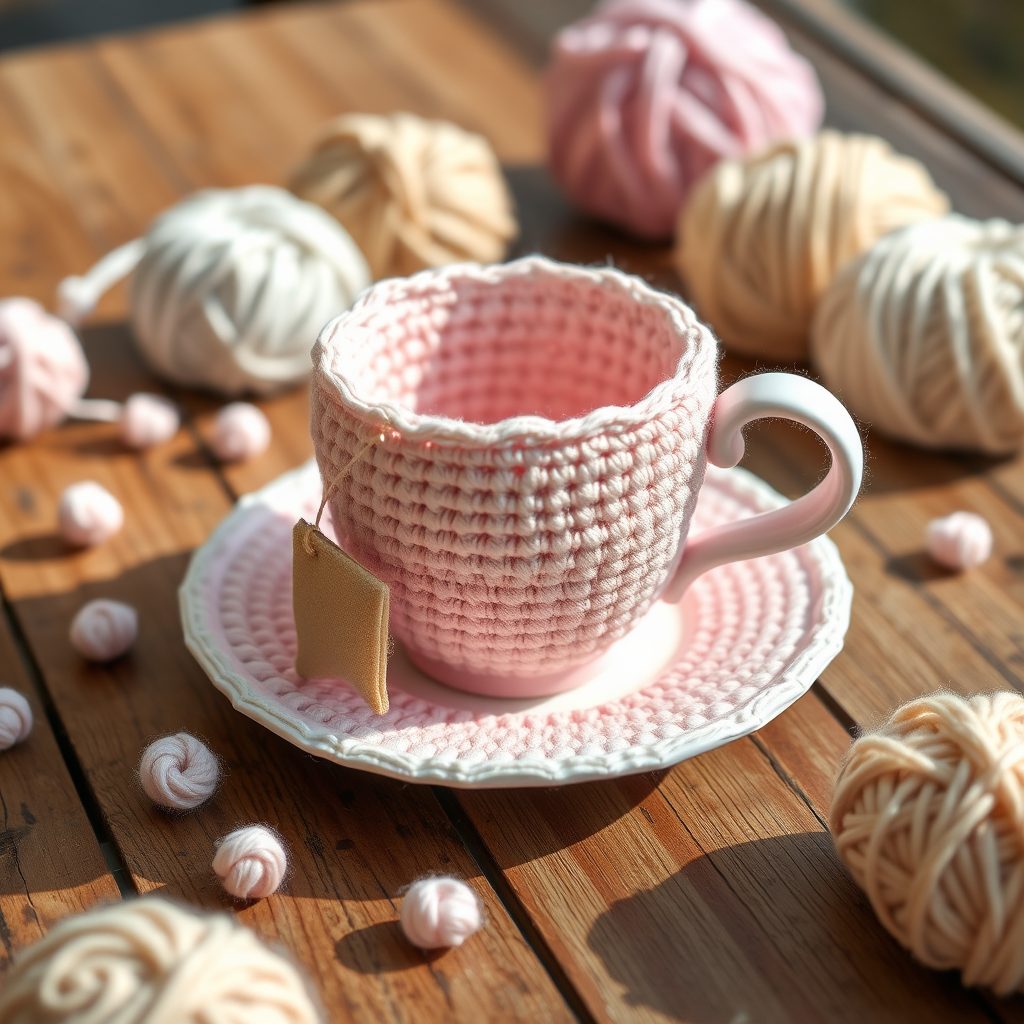
The Enchanted Teacup Amigurumi Free Pattern
Introduction
Welcome to the enchanting world of crochet! In this blog post, we will guide you through creating a delightful Amigurumi teacup, complete with a saucer and a charming little tea bag. This whimsical project is perfect for adding a touch of magic to your decor or gifting to a tea-loving friend. Let’s dive into the materials and get started on your new crafting adventure!
Materials Needed
- Yarn: Light worsted weight cotton yarn in pastel pink, white, and beige
- Hook: 3.5 mm crochet hook
- Gauge: 22 stitches and 30 rows = 4 inches in single crochet
- Scissors: For cutting yarn
- Tapestry Needle: For weaving in ends
Step-by-Step Instructions
Teacup
- Round 1: Using pink yarn, make a magic ring and work 6 single crochets (sc) into the ring. (6 stitches)
- Round 2: Increase in each stitch around. (12 stitches)
- Round 3: *Single crochet in the next stitch, increase in the next stitch* around. (18 stitches)
- Round 4: *Single crochet in the next 2 stitches, increase in the next stitch* around. (24 stitches)
- Round 5: *Single crochet in the next 3 stitches, increase in the next stitch* around. (30 stitches)
- Rounds 6-10: Single crochet in each stitch around. (30 stitches each round)
- Round 11: *Single crochet in the next 3 stitches, decrease over the next 2 stitches* around. (24 stitches)
- Round 12: Single crochet in each stitch around. (24 stitches)
- Round 13: *Single crochet in the next 2 stitches, decrease over the next 2 stitches* around. (18 stitches)
- Round 14: Single crochet in each stitch around. (18 stitches)
- Fasten off and weave in ends.
Saucer
- Round 1: Using white yarn, make a magic ring and work 6 single crochets into the ring. (6 stitches)
- Round 2: Increase in each stitch around. (12 stitches)
- Round 3: *Single crochet in the next stitch, increase in the next stitch* around. (18 stitches)
- Round 4: *Single crochet in the next 2 stitches, increase in the next stitch* around. (24 stitches)
- Round 5: *Single crochet in the next 3 stitches, increase in the next stitch* around. (30 stitches)
- Round 6: *Single crochet in the next 4 stitches, increase in the next stitch* around. (36 stitches)
- Round 7: *Single crochet in the next 5 stitches, increase in the next stitch* around. (42 stitches)
- Fasten off and weave in ends.
Tea Bag
- Row 1: With beige yarn, chain 6, single crochet in the second chain from the hook and across. (5 stitches)
- Rows 2-4: Chain 1, turn, single crochet in each stitch across. (5 stitches each row)
- Row 5: Chain 1, turn, decrease over the first 2 stitches, single crochet in the next stitch, decrease over the last 2 stitches. (3 stitches)
- Row 6: Chain 1, turn, decrease over the first 2 stitches, single crochet in the last stitch. (2 stitches)
- Row 7: Chain 1, turn, decrease over the 2 stitches. (1 stitch)
- Fasten off and weave in ends.
- Attach a small length of yarn to the top of the tea bag to mimic a string.
Assembly
- Sew the teacup to the center of the saucer using your tapestry needle.
- Attach the tea bag string to the inside of the teacup, ensuring it dangles charmingly from the rim.
Congratulations! You have now completed your very own Enchanted Teacup Amigurumi. Enjoy displaying it in your home or gifting it to someone special!


