The Whispering Willow Book Nook Elf: A Free Knitting Pattern for a Cozy, Textured Shelf Companion
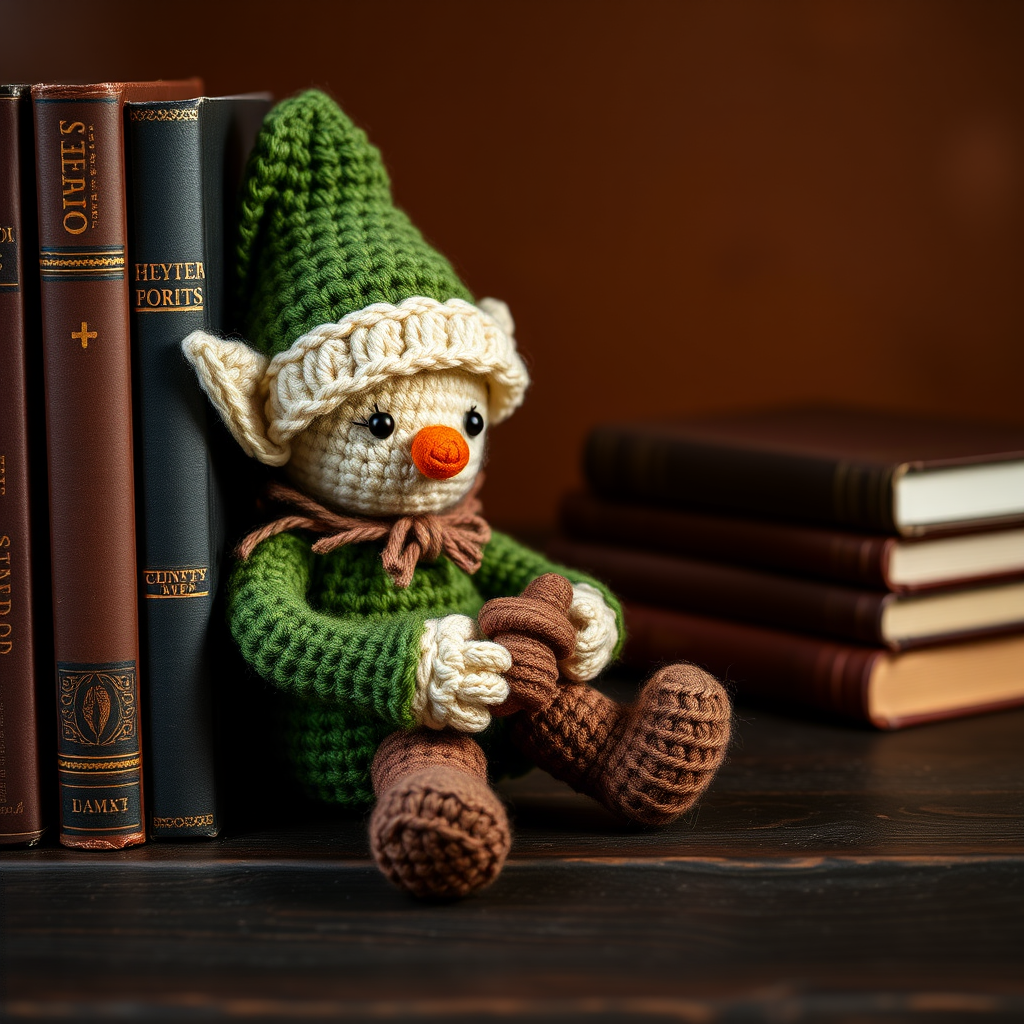
Bring a Touch of Woodland Magic to Your Shelf
There’s something truly special about adding a handmade touch to your home, especially when it brings a bit of whimsy into your everyday space. This free knitting pattern for the Whispering Willow Book Nook Elf is designed to be a cozy, textured companion for your bookshelf. With its earthy moss green body, warm brown boots, and a charming pointed hat, this little elf is the perfect project for knitters looking to create an heirloom-quality piece. The pattern uses simple increases and decreases, worked in the round, making it a delightful weekend project that results in a 4-inch tall friend who looks right at home among your favorite novels.
Materials Needed
Before you begin, gather the following supplies. Using the exact yarn weight and needle size will ensure your elf matches the intended size and texture.
- Yarn: Worsted weight yarn in three colors:
- Color A (Moss Green): For the body, hat, and arms.
- Color B (Warm Brown): For the boots and optional bag.
- Color C (Cream): For the beard and hat trim.
- Small amounts of black and orange: For embroidering the eyes and nose.
- Knitting Needles: US Size 5 (3.75 mm) double-pointed needles (or a circular needle for the magic loop method).
- Crochet Hook: US Size B/1 (2.25 mm) for the beard and any small details.
- Other: Tapestry needle for sewing, fiberfill stuffing, stitch markers (optional).
Gauge: 22 stitches and 30 rows = 4 inches in stockinette stitch with the larger needles. Gauge is important for achieving the correct size and firmness of the fabric.
Step-by-Step Instructions
Important Note: The elf is worked in the round from the bottom up using the magic loop method or double-pointed needles. All pieces are knitted separately and then assembled. Take your time with each section, and don’t forget to stuff the body firmly for a sturdy shelf companion.
Head
Using Color C (Cream), cast on 6 stitches. Join in the round, being careful not to twist the stitches. Place a stitch marker to mark the beginning of the round.
- Round 1: Knit all stitches. (6 stitches)
- Round 2: *K1, M1 (make one stitch by lifting the bar between stitches and knitting it through the back loop)* repeat around. (12 stitches)
- Round 3: Knit all stitches.
- Round 4: *K2, M1* repeat around. (18 stitches)
- Round 5: Knit all stitches.
- Round 6: *K3, M1* repeat around. (24 stitches)
- Rounds 7-12: Knit all stitches. (24 stitches)
- Round 13: *K2, K2tog (knit two together)* repeat around. (18 stitches)
- Round 14: *K1, K2tog* repeat around. (12 stitches)
- Round 15: *K2tog* repeat around. (6 stitches)
Cut the yarn, leaving a 6-inch tail. Thread the tail through the remaining 6 stitches using a tapestry needle, pull tight to close the hole, and weave in the end securely.
Body
With Color A (Moss Green), cast on 12 stitches. Join in the round.
- Round 1: Knit all stitches. (12 stitches)
- Round 2: *K1, M1* repeat around. (18 stitches)
- Round 3: Knit all stitches.
- Round 4: *K2, M1* repeat around. (24 stitches)
- Rounds 5-10: Knit all stitches. (24 stitches)
- Round 11: *K2, K2tog* repeat around. (18 stitches)
- Round 12: Knit all stitches.
- Round 13: *K1, K2tog* repeat around. (12 stitches)
- Round 14: Knit all stitches.
Cut the yarn, leaving a long tail (about 12 inches) for sewing. Stuff the body firmly with fiberfill, making sure it’s evenly filled and not lumpy. Set aside.
Arms (Make 2)
With Color A, cast on 6 stitches. Join in the round.
- Rounds 1-6: Knit all stitches. (6 stitches)
Cut the yarn, leaving a long tail. Do not stuff the arms. Flatten the tube so the seam is on one side, and sew the opening closed using the tail. This creates a flat, arm-like shape.
Legs (Make 2)
With Color B (Warm Brown), cast on 6 stitches. Join in the round.
- Rounds 1-4: Knit all stitches. (6 stitches)
Switch to Color A (Moss Green).
- Rounds 5-8: Knit all stitches. (6 stitches)
Cut the yarn, leaving a long tail. Stuff each leg lightly with fiberfill, just enough to give them shape without making them bulky.
Hat
With Color A, cast on 24 stitches. Join in the round.
- Rounds 1-3: Knit all stitches. (24 stitches)
- Round 4: *K2, K2tog* repeat around. (18 stitches)
- Rounds 5-6: Knit all stitches.
- Round 7: *K1, K2tog* repeat around. (12 stitches)
- Rounds 8-9: Knit all stitches.
- Round 10: *K2tog* repeat around. (6 stitches)
- Rounds 11-15: Knit all stitches. (6 stitches)
Cut the yarn, leaving a 6-inch tail. Thread the tail through the remaining 6 stitches, pull tight, and weave in the end. Fold the tip of the hat to one side and stitch it in place with a few small stitches to create the classic elf hat curve.
Beard
Using the smaller crochet hook (2.25 mm) and Color C (Cream), chain 10 stitches. Work 2 single crochet in each chain across (20 stitches total). Fasten off, leaving a 6-inch tail for sewing. This creates a fluffy, textured beard.
Assembly
Now it’s time to bring your elf to life. Use the long tails left from each piece and a tapestry needle for sewing.
- Attach the Head: Sew the head to the top of the body, matching the cast-on edges. Use small, even stitches to secure it firmly.
- Attach the Arms: Sew the arms to the sides of the body, positioning them just below the head. The flat side of the arm should face the body.
- Attach the Legs: Sew the legs to the bottom of the body, spacing them evenly so the elf can sit or stand.
- Attach the Hat: Sew the hat onto the head, slightly tilted to one side for a whimsical look. Make sure the folded tip is visible.
- Attach the Beard: Sew the beard onto the face, just below where the eyes will go. Center it so it covers the lower part of the face.
- Embroider the Face: Using black yarn, embroider two small French knots for eyes. Using orange yarn, embroider a small triangle for the nose, positioned just above the beard.
- Optional Details: Create a tiny book or mushroom using scrap yarn and sew it to the elf’s hands for extra charm.
Finishing
Weave in all remaining ends using a tapestry needle, making sure they are secure and hidden. Gently shape the elf by adjusting the limbs and hat. Your Whispering Willow Book Nook Elf is now ready to nestle among your books, bringing a cozy, magical touch to your home.


