Whimsical Patchwork Teddy Bear Free Pattern
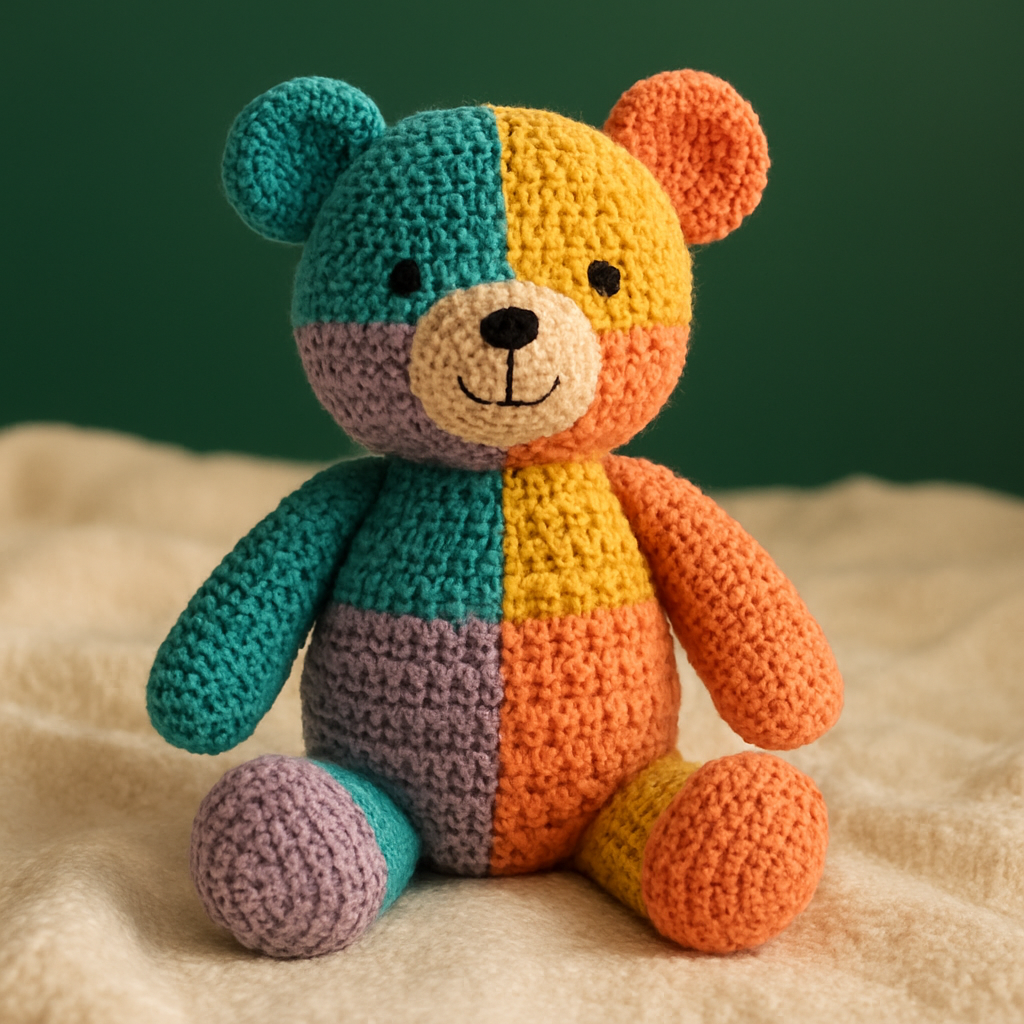
Whimsical Patchwork Teddy Bear Free Pattern
Introduction
Welcome to the delightful world of crochet! Today, we’re going to create a charming patchwork teddy bear that is not only a cuddly companion but also a wonderful project for beginners. This pattern combines various crochet stitches and an assortment of vibrant colors to craft a unique and whimsical teddy bear. Whether you’re making it for a child or as a decorative piece, this teddy bear will surely bring joy and warmth to any space!
Materials Needed
- Yarn: Worsted weight yarn in assorted colors (teal, mustard, coral, lavender)
- Hook: 3.5mm crochet hook
- Gauge: 15 stitches x 16 rows = 4 inches in single crochet
- Stuffing: Polyester fiberfill for stuffing the bear
- Embroidery thread: For facial features (black or dark color)
- Yarn needle: For sewing pieces together
Step-by-Step Instructions
1. Head
- Start with a magic ring. To create a magic ring, wrap the yarn around your fingers to form a loop and pull a loop through the center.
- Round 1: Work 6 single crochet (sc) into the magic ring. Pull the tail to close the ring.
- Round 2: Increase evenly (2 sc in each stitch) – 12 stitches.
- Round 3: Increase evenly – 18 stitches.
- Round 4: Increase evenly – 24 stitches.
- Rounds 5-6: Work even (1 sc in each stitch) – 24 stitches.
- Rounds 7-12: Continue working even to form the head, maintaining 24 stitches.
- Round 13: Decrease evenly (1 sc, then decrease) – 18 stitches.
- Round 14: Decrease evenly – 12 stitches.
- Round 15: Decrease evenly – 6 stitches. Stuff the head firmly with fiberfill.
- Fasten off and leave a long tail for sewing.
2. Body
- Start with a magic ring. Work 6 sc into the magic ring.
- Round 1: Increase evenly – 12 stitches.
- Round 2: Increase evenly – 18 stitches.
- Round 3: Increase evenly – 24 stitches.
- Rounds 4-8: Work even – 24 stitches.
- Rounds 9-18: Work even to form the body, maintaining 24 stitches.
- Rounds 19-24: Decrease evenly to close – 12 stitches. Stuff the body firmly with fiberfill.
- Fasten off and leave a long tail for sewing.
3. Arms and Legs (Make 4)
- Start with a magic ring. Work 6 sc into the magic ring.
- Round 1: Increase evenly – 12 stitches.
- Round 2: Increase evenly – 18 stitches.
- Rounds 3-4: Work even – 18 stitches.
- Rounds 5-10: Work even to form the arms/legs, maintaining 18 stitches.
- Rounds 11-14: Decrease evenly to close – 6 stitches. Stuff lightly with fiberfill.
- Fasten off and leave a long tail for sewing.
4. Assembly
- Position the head on top of the body and sew securely using the tail left from the head.
- Attach the arms on either side of the body and sew securely.
- Attach the legs at the bottom of the body and sew securely.
- Using embroidery thread, stitch the eyes and mouth onto the face to create facial features. You can use simple stitches for a whimsical look.
5. Finishing Touches
Weave in any loose ends with a yarn needle. Feel free to add additional embellishments, such as a scarf or a bow, to personalize your teddy bear!
Conclusion
Congratulations on completing your very own whimsical patchwork teddy bear! This project not only enhances your crochet skills but also results in a delightful handmade toy that can be cherished for years to come. Don't forget to share your creations with friends and family, and happy crocheting!


