Whimsical Woodland Gnome Home Free Pattern – Crochet Storybook Cottage
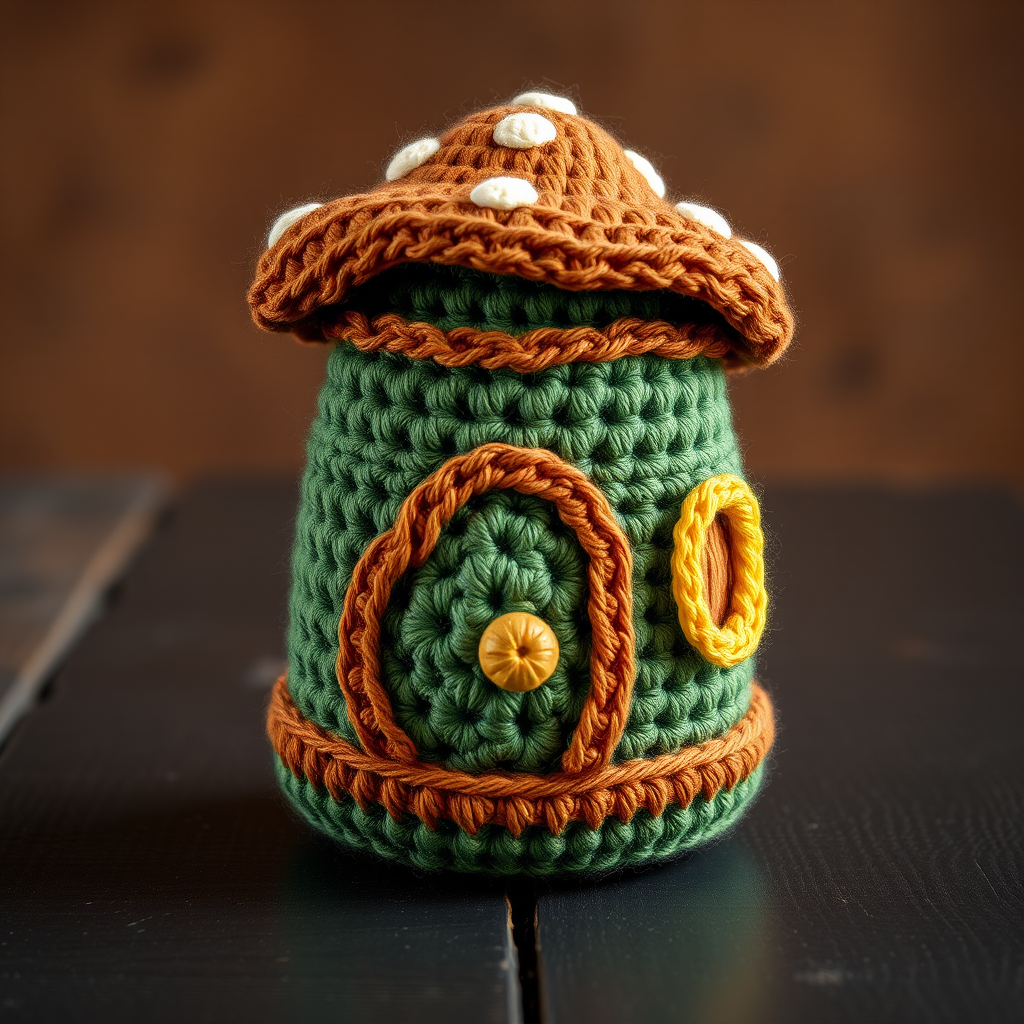
Whimsical Woodland Gnome Home Free Pattern – Crochet Storybook Cottage
Bring a touch of enchanted forest charm to your shelf with this crochet gnome home, complete with a mushroom cap roof and cozy door. Perfect for whimsical decor or a handmade gift that sparks imagination. This beginner-friendly amigurumi project creates a charming storybook cottage that stands about 6 inches tall—ideal for fairy gardens, bookshelves, or a magical handmade present.
Materials Needed
Before you begin, gather the following supplies to ensure a smooth crochet session:
- Yarn: Worsted weight yarn in earthy tones:
- Forest green (walls and base)
- Warm brown (trim band)
- Cream (mushroom spots, optional)
- Terracotta (door and mushroom cap roof)
- Golden yellow (window)
- Hook: 3.5mm (E) crochet hook
- Stitch marker (to track rounds)
- Yarn needle (for sewing pieces and weaving ends)
- Scissors
- Fiberfill stuffing (optional, if you want a firmer base)
Gauge: 4 sc x 4 rows = 1 inch. Gauge is not critical for this project, but consistent tension is recommended for a neat finish.
Step-by-Step Instructions
This pattern is worked in continuous rounds unless otherwise stated. Use a stitch marker to track the beginning of each round. All stitches are single crochet (sc) unless noted. Let's begin!
Base and Walls
- With forest green yarn, make a magic ring, ch 1, work 6 sc into ring. Pull tight. (6)
- Inc in each st around. (12)
- *Sc in next st, inc* repeat around. (18)
- *Sc in next 2 sts, inc* repeat around. (24)
- *Sc in next 3 sts, inc* repeat around. (30)
- *Sc in next 4 sts, inc* repeat around. (36)
- *Sc in next 5 sts, inc* repeat around. (42)
- *Sc in next 6 sts, inc* repeat around. (48)
- Rounds 9–20: Sc in each st around. (48) – This forms the cylindrical walls of the home. Keep your tension even for a smooth surface.
- Round 21: Switch to warm brown yarn. Sc in each st around for 2 rounds. (48) – This creates a decorative trim band.
- Round 22: Switch back to forest green. Sc in each st around for 3 rounds. (48)
- Round 23: Begin shaping the roof: *Sc in next 6 sts, dec* repeat around. (42)
- Round 24: *Sc in next 5 sts, dec* repeat around. (36)
- Round 25: *Sc in next 4 sts, dec* repeat around. (30)
- Round 26: *Sc in next 3 sts, dec* repeat around. (24)
- Round 27: *Sc in next 2 sts, dec* repeat around. (18)
- Round 28: *Sc in next st, dec* repeat around. (12)
- Round 29: Dec around. (6)
- Round 30: Fasten off, leaving a long tail. Weave tail through front loops of remaining stitches and pull tight to close. Hide tail inside.
Door
- With terracotta yarn, ch 8.
- Row 1: Sc in 2nd ch from hook and across. (7)
- Rows 2–8: Ch 1, turn, sc in each st across. (7)
- Fasten off, leaving a tail for sewing. Sew the door onto the front of the home, centered between the base and the roof trim. Position it about 1 inch above the base for a cozy look.
Window
- With golden yellow yarn, make a magic ring, ch 1, work 6 sc into ring. Pull tight. (6)
- Inc in each st around. (12)
- Fasten off, leaving a tail. Sew the window onto the wall beside the door, about 0.5 inches to the right or left, at the same height as the door's midpoint.
Mushroom Cap Roof
- With terracotta yarn, make a magic ring, ch 1, work 6 sc into ring. Pull tight. (6)
- Inc in each st around. (12)
- *Sc in next st, inc* repeat around. (18)
- *Sc in next 2 sts, inc* repeat around. (24)
- *Sc in next 3 sts, inc* repeat around. (30)
- *Sc in next 4 sts, inc* repeat around. (36)
- *Sc in next 5 sts, inc* repeat around. (42)
- *Sc in next 6 sts, inc* repeat around. (48)
- Round 9: Sc in each st around. (48)
- Round 10: *Sc in next 7 sts, inc* repeat around. (54)
- Round 11: Sc in each st around. (54)
- Round 12: *Sc in next 8 sts, inc* repeat around. (60)
- Round 13: Sc in each st around. (60)
- Round 14: Fasten off, leaving a long tail. Sew the mushroom cap onto the top of the home, covering the gathered roof opening. The cap should overhang slightly for a whimsical, floppy look. Use a whip stitch to secure it evenly around the edge.
Spots on Mushroom Cap (Optional)
- With cream yarn, make small circles: magic ring, 6 sc, join with sl st, fasten off. Make 4–5 spots.
- Sew spots randomly onto the mushroom cap, spacing them evenly for a classic toadstool appearance.
Finishing Touches
Weave in all ends with your yarn needle. For extra charm, consider these optional additions:
- Chimney: Create a short tube using warm brown yarn (ch 6, join with sl st, sc in each ch around for 4 rounds) and sew it to the side of the roof.
- Wreath: Make a small circle with forest green yarn and add tiny red berry knots (using a few French knots or small sc circles) to decorate the door.
- Stuffing: If you prefer a firmer base, stuff the walls lightly with fiberfill before closing the roof opening.
Your whimsical woodland gnome home is complete! Display it on a shelf, in a fairy garden, or gift it to someone who loves handmade magic. Happy crocheting!


