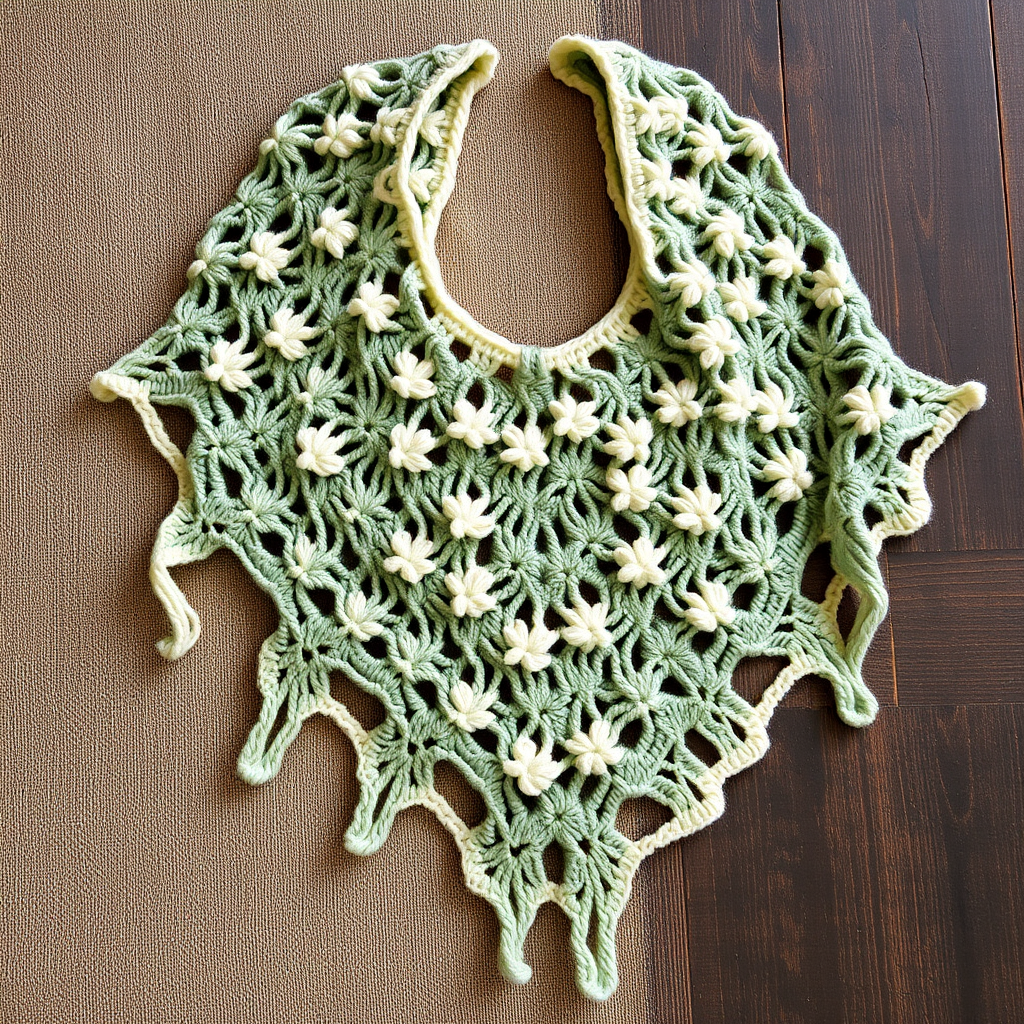
Whispering Willow Lace Shawl Free Pattern – A Breezy Crochet Crescent Wrap

Introducing the Whispering Willow Lace Shawl
Drape yourself in the delicate elegance of the Whispering Willow, a lightweight lacy shawl that feels like a gentle spring breeze. This crescent-shaped wrap features an airy fan-and-shell stitch pattern, perfect for cool evenings or adding a touch of handmade charm to any outfit. Whether you're a seasoned crocheter looking for a relaxing project or a confident beginner ready to tackle lacework, this free pattern will guide you through creating a stunning, heirloom-quality accessory. The symmetrical fan clusters radiate from a central spine, creating a graceful drape that sits beautifully on the shoulders. With its ethereal, romantic aesthetic and soft, breathable fabric, the Whispering Willow is destined to become a wardrobe favorite.
Materials Needed
Before you begin, gather the following supplies to ensure a smooth and enjoyable crochet experience:
- Yarn: Fingering weight yarn (e.g., Malabrigo Sock, 100% merino wool, 440 yards per 100g) – 2 skeins (approx. 880 yards) in a soft sage green or dusty lavender. The yarn's slight sheen will catch the light beautifully, enhancing the lace pattern.
- Crochet Hook: US G/6 (4.0 mm) crochet hook. This size creates the perfect balance between drape and stitch definition for fingering weight yarn.
- Other Tools: Yarn needle for weaving in ends, blocking mats, rust-proof pins, and a spray bottle or basin for wet blocking.
Gauge: 4 repeats of fan-and-shell pattern (approx. 5 inches) and 8 rows (approx. 4 inches) in pattern stitch, after blocking. Gauge is important for achieving the correct dimensions, but since this is a shawl, slight variations will not affect the overall look.
Step-by-Step Instructions
This shawl is worked from the center top down, increasing outward to form a crescent shape. The pattern uses US crochet terms. Chain counts at the beginning of rows are not counted as stitches unless stated. Blocking is essential to open up the lace and achieve the final dimensions. Take your time, count your stitches carefully, and enjoy the rhythmic repetition of the pattern.
Foundation & Row 1: Creating the Center Spine
Foundation: Chain 5, slip stitch to form a ring. This small ring will be the starting point from which all the fans will grow.
Row 1: Chain 4 (counts as first dc + ch1). Work 3 double crochet (dc) into the ring. Chain 2. Work 3 dc into the ring. Chain 1. Work 1 dc into the ring. Turn your work. (You now have two fan sections separated by a ch-2 space.) This establishes the central increase point that will create the crescent shape.
Row 2: Building the First Expansion
Row 2: Chain 4 (counts as dc + ch1). Work 3 dc into the first ch-1 space (this is the space created by the turning chain at the beginning of Row 1). Chain 1. Work 3 dc into the ch-2 space (the center space). Chain 2. Work 3 dc into the same ch-2 space. Chain 1. Work 3 dc into the last ch-1 space (the space before the final dc). Chain 1. Work 1 dc into the top of the turning chain. Turn. (Now you have 4 fan sections total: 2 on each side of the center ch-2 space.)
Row 3: Establishing the Pattern Rhythm
Row 3: Chain 4 (counts as dc + ch1). *Work 3 dc into next ch-1 space, chain 1; repeat from * across until you reach the center ch-2 space. When you reach the center, work 3 dc into the ch-2 space, chain 2, work 3 dc into the same ch-2 space, chain 1. Then repeat from * across the remaining ch-1 spaces, ending with chain 1, work 1 dc into the top of the turning chain. Turn. (Each row adds 2 more fan sections, one on each side of the center.)
Rows 4-10: Growing the Crescent
Rows 4-10: Repeat Row 3, always working the center increase (3 dc, ch 2, 3 dc) into the center ch-2 space. This is the key to the crescent shape—the center always gets the double fan, while the sides grow symmetrically. Continue repeating this row until you have 16 fan sections total (8 on each side of the center). Count your fans carefully at the end of each row to ensure accuracy. The shawl will begin to curve naturally as the center increases accumulate.
Row 11: Adding the Scalloped Edging
Row 11 (Edging): Chain 1 (does not count as a stitch). Work 1 single crochet (sc) in the first dc. *Chain 3, skip 1 dc, work 1 sc in the next dc; repeat from * across the row. When you reach the ch-1 spaces between fans, work 1 sc in each ch-1 space. At the center ch-2 space, work 1 sc in the space itself. Continue the chain-3 loop pattern across the remaining fans, ending with 1 sc in the last dc of the row. Fasten off. This creates a delicate, wavy scalloped border that beautifully frames the lace.
Finishing & Blocking: Unlocking the Lace
Weave in all ends using your yarn needle, being careful not to pull too tightly and distort the stitches. The final and most crucial step is blocking. Soak the shawl in lukewarm water with a drop of mild soap (like wool wash) for 20 minutes. Gently squeeze out excess water—do not wring or twist, as this can felt the wool. Lay the shawl flat on a clean towel and roll it up to remove additional moisture. Then, place the shawl on your blocking mats and pin it out to its final dimensions. Stretch it gently to open up the lace pattern and achieve the desired crescent shape. Pay special attention to the points of the scalloped edging, pinning each one to set the shape. Allow it to dry completely before unpinning. This process transforms the fabric from a dense mass of stitches into an airy, ethereal lace.
Your Whispering Willow Lace Shawl is now complete! Wear it draped over your shoulders for a romantic evening out, or wrap it snugly for a cozy layer on a cool spring day. The lightweight merino wool provides warmth without bulk, making it a versatile addition to your handmade wardrobe. Enjoy the compliments and the satisfaction of having created something truly beautiful with your own hands.