Amber Dune Crescent Wrap Free Pattern – Knit a Sunset-Inspired Boho Scarf
Amber Dune Crescent Wrap Free Pattern – Knit a Sunset-Inspired Boho Scarf
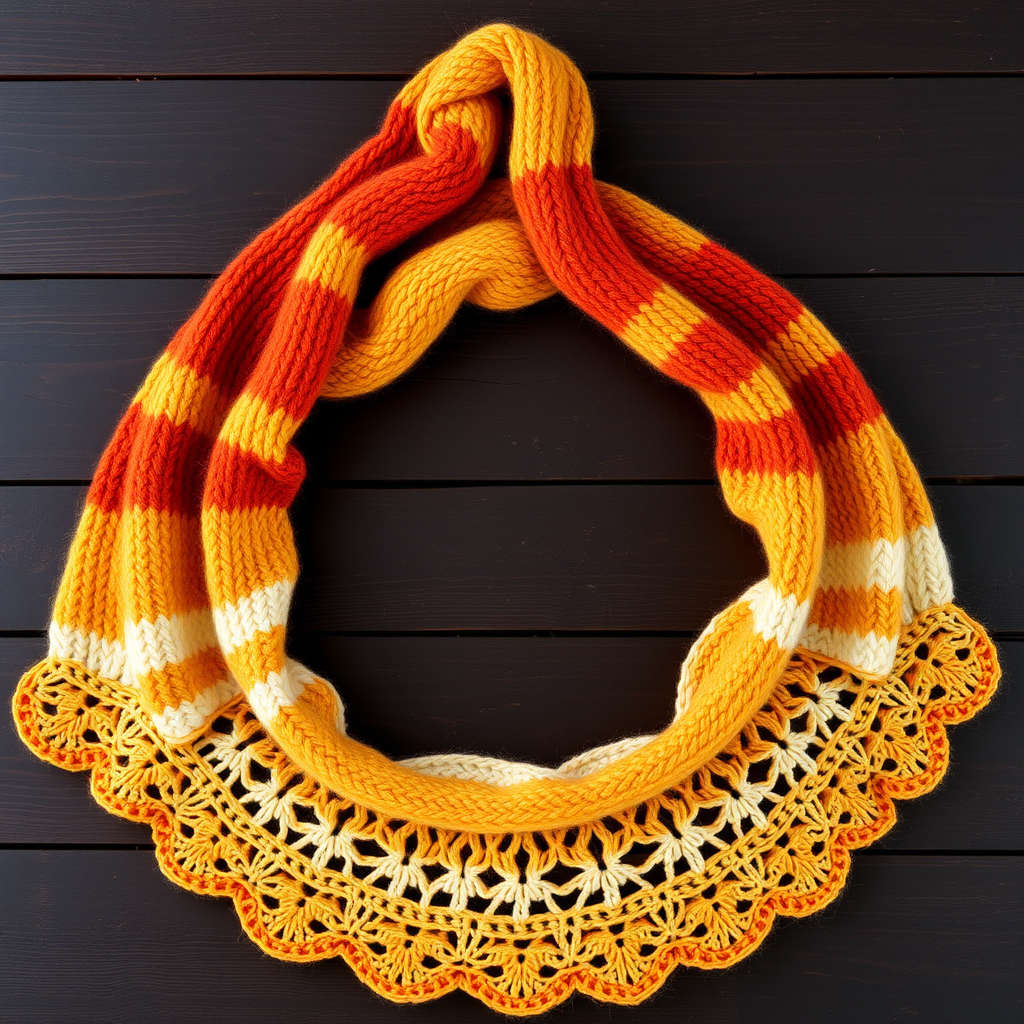
Wrap yourself in the warm hues of a desert sunset with this crescent-shaped knit shawl, featuring a delicate lace edge and soft, draping fabric. This pattern is perfect for intermediate knitters seeking a mindful, meditative project that results in a stunning, versatile accessory. The warm, earthy tones of burnt orange, golden yellow, and cream blend together like the sky at dusk, creating a piece that is both bohemian and elegant. Whether you're curling up with a book or heading out for an evening stroll, this wrap adds a touch of handcrafted artistry to any outfit.
Materials Needed
Before you begin, gather the following supplies to ensure a smooth and enjoyable knitting experience:
- Yarn: Worsted weight yarn in three colors:
- Color A (Burnt Orange) – 150g
- Color B (Golden Yellow) – 100g
- Color C (Cream) – 100g
- Needle: US 8 (5.0 mm) circular knitting needle, 32-inch or longer (to accommodate the growing number of stitches).
- Notions: Stitch markers (at least 2), tapestry needle for weaving in ends, blocking pins and towel for finishing.
- Gauge: 18 stitches and 24 rows = 4 inches in stockinette stitch (blocked). Gauge is important for achieving the correct drape and size, so take a moment to swatch.
Step-by-Step Instructions
This crescent shawl is knit from the top center down, increasing on both sides to create a gentle curve. The lace border is worked at the end. Follow these detailed instructions carefully, and you'll have a beautiful wrap in no time.
Abbreviations
- k = knit
- p = purl
- yo = yarn over (creates an increase and a small hole)
- k2tog = knit two together (right-leaning decrease)
- ssk = slip, slip, knit (left-leaning decrease)
- pm = place marker
- sm = slip marker
- RS = right side (the front of the work)
- WS = wrong side (the back of the work)
Setup
With Color A (Burnt Orange), cast on 5 stitches using your preferred method (long-tail cast on works well).
Knit 4 rows (this creates a garter stitch edge at the top of the shawl).
Initial Increases (Shaping the Center)
Now we'll begin shaping the crescent by increasing at the edges and center.
- Row 1 (RS): k2, yo, k1, yo, k2 (7 stitches)
- Row 2 (WS): k2, p3, k2
- Row 3 (RS): k2, yo, k3, yo, k2 (9 stitches)
- Row 4 (WS): k2, p5, k2
- Row 5 (RS): k2, yo, k5, yo, k2 (11 stitches)
- Row 6 (WS): k2, p7, k2
Note: The first and last 2 stitches of every row are always knit (this forms a neat garter stitch edge). All stitches between the edge stitches are purled on WS rows and knit on RS rows unless otherwise specified.
Increase Section (Main Body)
Place a marker after the first 2 stitches and before the last 2 stitches. You will increase 1 stitch on each side of the center section every RS row.
- Row 7 (RS): k2, yo, sm, k to marker, sm, yo, k2 (13 stitches)
- Row 8 (WS): k2, p to last 2 sts, k2
Repeat Rows 7 and 8, but on every 4th RS row, also increase in the center by working: k2, yo, sm, k1, yo, k to last 3 sts, yo, k1, sm, yo, k2. This creates a subtle center spine that adds structure and visual interest to the shawl.
Color Changes: Continue in this manner, alternating between Color A (Burnt Orange) and Color B (Golden Yellow) every 10 rows (or as desired for striping). To change colors, simply drop the old color and pick up the new one at the beginning of a RS row, leaving a tail to weave in later. Carry the unused color loosely up the side if you prefer, or cut and rejoin each time for cleaner edges.
Continue increasing until the shawl measures approximately 20 inches from the cast-on edge (measured at the center point). End with a WS row. This measurement is from the top center down to the point, so the shawl will be quite large and drapey.
Lace Border
Switch to Color C (Cream). Work the following lace pattern across all stitches, maintaining the edge stitches (first 2 and last 2 stitches are always knit).
- Row 1 (RS): k2, *yo, k2tog, k1* repeat from * to * until last 2 stitches, k2
- Row 2 (WS): k2, purl to last 2 stitches, k2
- Row 3 (RS): k2, *k1, yo, ssk* repeat from * to * until last 2 stitches, k2
- Row 4 (WS): k2, purl to last 2 stitches, k2
Repeat these 4 rows until the border measures 3 inches from the start of the lace pattern, ending with a WS row. The lace pattern creates a beautiful, airy scalloped edge that contrasts with the solid stockinette body.
Bind Off
On the RS, bind off loosely in pattern: knit stitches knitwise, purl stitches purlwise. This ensures the bind-off edge has the same stretch as the lace pattern, preventing a tight, puckered edge. Weave in all ends with a tapestry needle.
Blocking
Blocking is essential for this shawl to open up the lace and achieve the proper drape. Soak the shawl in lukewarm water with a gentle wool wash for 20 minutes. Gently squeeze out excess water (do not wring or twist). Lay flat on a clean towel, roll up to remove more water, then shape into a crescent on a blocking mat or dry towel. Pin the lace edge to open up the eyelets and scallops. Allow to dry completely before unpinning.
Your Amber Dune Crescent Wrap is now complete! The warm, earthy colors and delicate lace make it a stunning addition to any wardrobe. Enjoy wearing your handcrafted masterpiece, and don't forget to share your creation with fellow knitters. Happy knitting!


