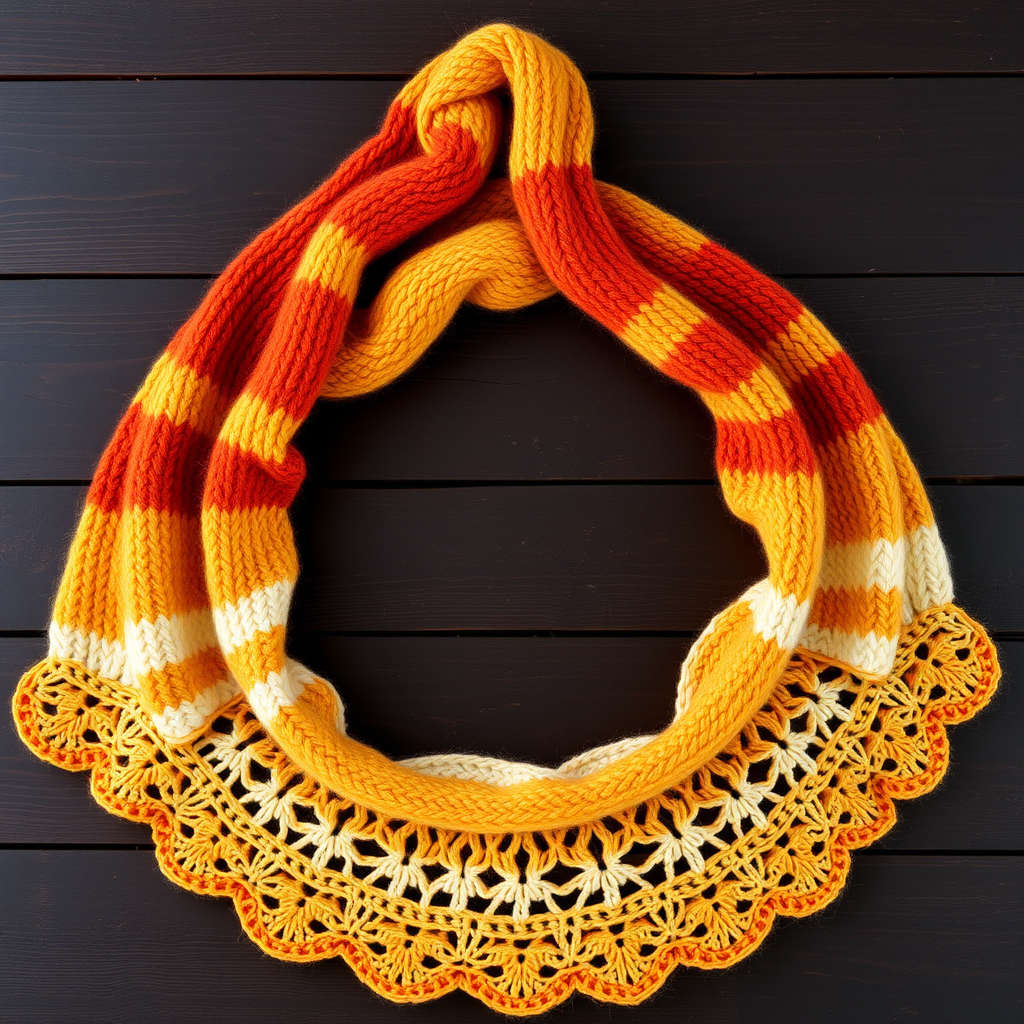
Frosted Bellflower Shawl Free Pattern – A Knitted Silver Petal Wrap

Frosted Bellflower Shawl Free Pattern – A Knitted Silver Petal Wrap
Wrap yourself in the delicate chime of winter with this crescent-shaped shawl, where silver-grey petals cascade down a soft, cloud-like body. The unique bellflower lace motif creates a gentle, ringing texture that catches the light with every movement. This pattern is perfect for intermediate knitters looking to expand their lace skills while creating a stunning, wearable piece of art.
Whether you're curling up by the fire or stepping out into a frosty evening, this shawl adds an ethereal, romantic touch to any outfit. The combination of shimmering silver-grey and soft white creates a visual symphony that resembles frost on a windowpane—delicate, beautiful, and utterly captivating.
Materials Needed
Before you begin, gather the following supplies to ensure a smooth knitting experience:
- Yarn: Worsted weight yarn in silver-grey (MC) and soft white (CC) – approximately 600 yards of MC and 200 yards of CC. Look for a yarn with a subtle sheen to enhance the frosty effect.
- Needles: US 7 (4.5 mm) circular needle with a 32-inch cable. The long cable is essential for accommodating the growing number of stitches.
- Gauge: 18 stitches and 24 rows = 4 inches in stockinette stitch (blocked). Gauge is important for achieving the correct drape and size.
- Notions: Stitch markers (at least 4), tapestry needle for weaving in ends, blocking pins and mats for finishing.
Understanding the Pattern Structure
This shawl is worked from the top center down, increasing on both sides to form a crescent shape. The construction is elegant and logical: you'll begin with a small cast-on, increase gradually to create the shawl's body, then introduce the stunning bellflower lace pattern in the contrast color.
Abbreviations
- k = knit
- p = purl
- yo = yarn over
- k2tog = knit two together (right-leaning decrease)
- ssk = slip, slip, knit (left-leaning decrease)
- pm = place marker
- sm = slip marker
- MC = main color (silver-grey)
- CC = contrast color (soft white)
Step-by-Step Instructions
Setup and Foundation
Step 1: With MC, cast on 5 stitches using your preferred method (long-tail cast-on works well).
Step 2: Knit 6 rows in garter stitch (knit every row). This creates a small tab that will form the top center of your shawl.
Step 3: Now you'll pick up stitches to create the foundation. Pick up and knit 3 stitches along the side edge of your garter tab, then pick up and knit 5 stitches from the cast-on edge. You should now have a total of 13 stitches on your needle.
Step 4: Place your markers as follows: pm after 3 stitches, pm after 7 stitches (this marks the center), pm after 3 stitches. You now have 3 edge stitches on each side and 7 center stitches.
Increasing the Shawl Body
Row 1 (RS): k3, yo, sm, k1, yo, k5, yo, k1, yo, sm, k3 – you should now have 17 stitches.
Row 2 (WS): k3, sm, purl to last 3 stitches, sm, k3. The edge stitches remain in garter stitch throughout the pattern.
Row 3: k3, yo, sm, k1, yo, knit to center marker, yo, k1, yo, knit to last marker, yo, sm, k3 – 21 stitches.
Row 4: k3, sm, purl to last 3 stitches, sm, k3.
Repeat Rows 3-4 until you have 45 stitches total (this means you've completed 8 increases on each side of the center). End with a wrong-side row.
Beginning the Bellflower Lace Pattern
Now you'll work the lace pattern on the center section between your markers. The edge stitches remain in garter stitch throughout.
Row 1 (RS): k3, yo, sm, k1, yo, *k2tog, yo, k1, yo, ssk, k1* repeat from * to * until 1 stitch before center marker, k1, yo, k1, yo, *k2tog, yo, k1, yo, ssk, k1* repeat from * to * until 1 stitch before last marker, k1, yo, sm, k3.
Row 2 (WS): k3, sm, purl to last 3 stitches, sm, k3.
Row 3: k3, yo, sm, k1, yo, *k1, yo, ssk, k2tog, yo, k1* repeat from * to * until 1 stitch before center, k1, yo, k1, yo, *k1, yo, ssk, k2tog, yo, k1* repeat until 1 stitch before last marker, k1, yo, sm, k3.
Row 4: k3, sm, purl to last 3 stitches, sm, k3.
Repeat Rows 1-4, but on every RS row, work the increases at the edges (k3, yo, sm, k1, yo) and before the last marker (yo, sm, k3). This will add 4 stitches per RS row. Continue until the shawl measures approximately 24 inches from the center top, ending with a wrong-side row.
Bellflower Motif in Contrast Color
Now it's time to introduce the stunning contrast color that creates the bellflower effect.
Step 1: Switch to CC. Work 2 rows of stockinette (RS knit, WS purl) across all stitches, maintaining the edge garter stitches.
Next RS row: k3, yo, sm, k1, yo, *k5, yo, k2tog, yo, k1, yo, ssk, yo* repeat from * to * until 1 stitch before center, k1, yo, k1, yo, *k5, yo, k2tog, yo, k1, yo, ssk, yo* repeat until 1 stitch before last marker, k1, yo, sm, k3.
WS row: k3, sm, purl to last 3 stitches, sm, k3.
Next RS row: k3, yo, sm, k1, yo, *k4, k2tog, yo, k3, yo, ssk, k1* repeat until 1 stitch before center, k1, yo, k1, yo, *k4, k2tog, yo, k3, yo, ssk, k1* repeat until 1 stitch before last marker, k1, yo, sm, k3.
WS row: k3, sm, purl to last 3 stitches, sm, k3.
Next RS row: k3, yo, sm, k1, yo, *k3, k2tog, yo, k5, yo, ssk, k1* repeat until 1 stitch before center, k1, yo, k1, yo, *k3, k2tog, yo, k5, yo, ssk, k1* repeat until 1 stitch before last marker, k1, yo, sm, k3.
WS row: k3, sm, purl to last 3 stitches, sm, k3.
Next RS row: k3, yo, sm, k1, yo, *k2, k2tog, yo, k7, yo, ssk, k1* repeat until 1 stitch before center, k1, yo, k1, yo, *k2, k2tog, yo, k7, yo, ssk, k1* repeat until 1 stitch before last marker, k1, yo, sm, k3.
WS row: k3, sm, purl to last 3 stitches, sm, k3.
Next RS row: k3, yo, sm, k1, yo, *k1, k2tog, yo, k9, yo, ssk, k1* repeat until 1 stitch before center, k1, yo, k1, yo, *k1, k2tog, yo, k9, yo, ssk, k1* repeat until 1 stitch before last marker, k1, yo, sm, k3.
WS row: k3, sm, purl to last 3 stitches, sm, k3.
Next RS row: k3, yo, sm, k1, yo, *k2tog, yo, k11, yo, ssk, k1* repeat until 1 stitch before center, k1, yo, k1, yo, *k2tog, yo, k11, yo, ssk, k1* repeat until 1 stitch before last marker, k1, yo, sm, k3.
WS row: k3, sm, purl to last 3 stitches, sm, k3.
Finishing the Shawl
Step 1: Switch back to MC. Work 4 rows of garter stitch (knit all stitches) across all stitches, maintaining the edge increases on RS rows (k3, yo, sm, k1, yo ... yo, sm, k3).
Step 2 - Bind off loosely: On the RS, k3, yo, sm, k1, yo, then bind off all stitches knitwise until 3 stitches before the last marker, yo, sm, k3, bind off remaining stitches. Cut yarn and weave in all ends with your tapestry needle.
Blocking for Perfection
Blocking is essential for this shawl to open up the lace pattern and achieve the beautiful drape. Soak the shawl in lukewarm water with a gentle wool wash for 20-30 minutes. Gently squeeze out excess water (never wring or twist). Lay the shawl on a clean towel and roll to remove additional moisture.
Pin the shawl to shape on blocking mats, stretching the lace points to open up the bellflower motifs. Pay special attention to the scalloped edge, pinning each point to create the elegant curve. Allow to dry completely before unpinning.
Tips for Success
- Use stitch markers wisely: The markers are crucial for keeping track of your increases and the center of the shawl. Consider using different colored markers for the center versus the edges.
- Count your stitches regularly: Especially when working the lace pattern, counting after each repeat will help you catch mistakes early.
- Choose the right yarn: A yarn with a subtle sheen or silk content will enhance the frosty, ethereal quality of the finished shawl.
- Be patient with blocking: The magic of lace happens during blocking. Take your time to pin out each motif for the best results.
This Frosted Bellflower Shawl is more than just an accessory—it's a wearable piece of winter poetry. The combination of the silver-grey body with the white bellflower border creates a stunning contrast that will draw compliments wherever you go. Whether you're knitting it for yourself or as a gift for someone special, this pattern is sure to become a treasured favorite in your knitting repertoire.
Happy knitting, and may your stitches always be even and your yarn never tangle!