Aurora Borealis Driftwood Scarf Free Pattern – Knit a Shifting Sky Wrap
Wrap Yourself in the Northern Lights: The Aurora Borealis Driftwood Scarf
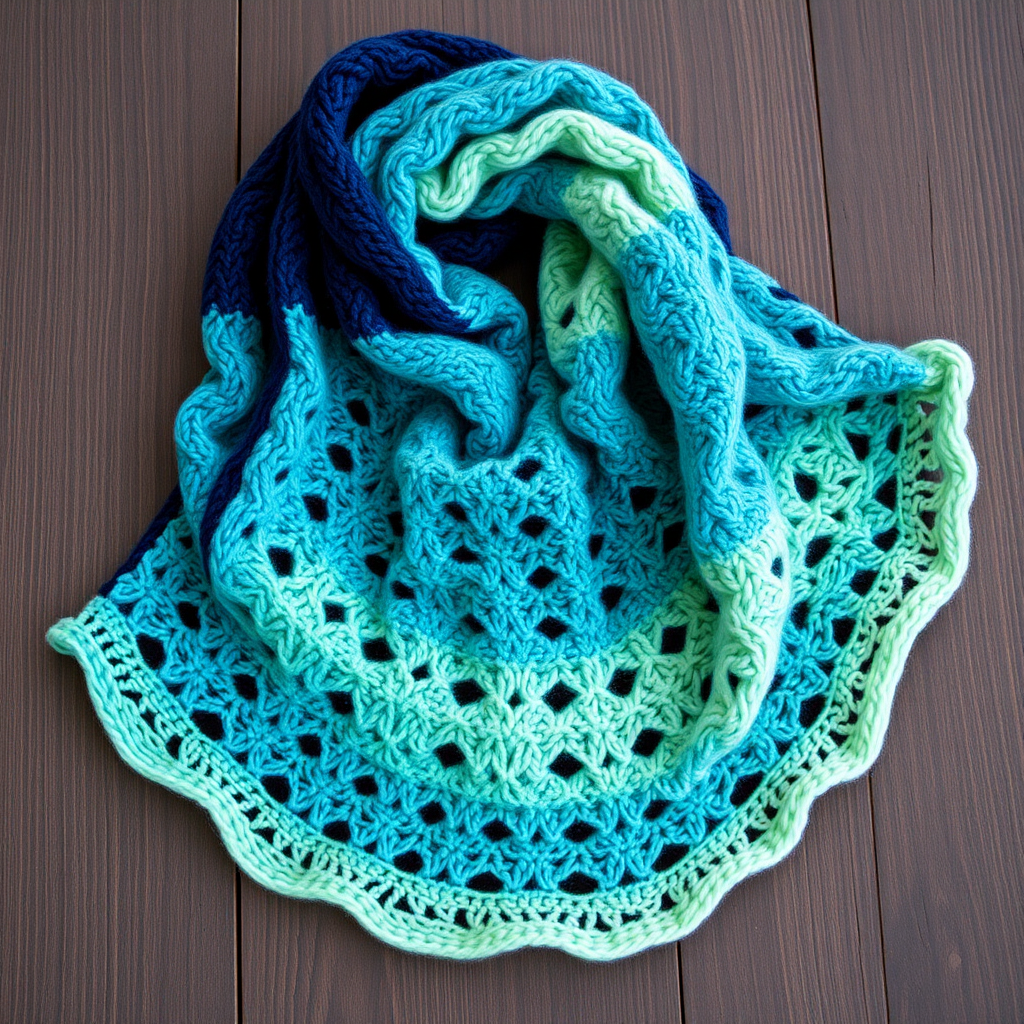
Imagine draping the ethereal dance of the aurora borealis around your shoulders. This isn't just a scarf; it's a wearable piece of art. The Aurora Borealis Driftwood Scarf is a stunning knitting project that transitions through a breathtaking gradient—from deep twilight navy to a rich, living teal, and finally to a soft, pale mint. The textured driftwood stitch, with its subtle eyelet holes, adds an organic, cozy feel that perfectly mimics the flow of light across a winter sky. Whether you're a seasoned knitter looking for a meditative project or a confident beginner ready for a beautiful challenge, this pattern is designed to guide you to a stunning, handcrafted result.
This isn't just about keeping warm; it's about creating a statement piece that reflects the beauty of the natural world. The clever color-blocking creates a modern, gradient effect without the fuss of complicated short rows or stranding. The result is a long, rectangular wrap with slightly wavy edges, perfect for draping over a coat or styling with a chunky sweater. Let's dive into the pattern and create a little magic with our own hands.
Materials Needed: Gathering Your Palette
Before you begin, let's gather your tools and yarn. This project is wonderfully portable and requires only a few essential items. The key to the scarf's magic is the color sequence, so choose your shades to create a smooth, pleasing transition.
Essential Tools & Yarn
- Knitting Needles: US Size 8 (5mm) knitting needles. Straight needles are perfect for this flat-knit project, but a circular needle (24" or longer) can also be used to hold the many stitches comfortably.
- Yarn: Worsted weight yarn in three colors. The pattern calls for approximately 400g total. Here’s a breakdown:
- Color A (Deep Navy): For the twilight beginning.
- Color B (Teal): For the vibrant middle.
- Color C (Pale Mint): For the soft, ethereal end.
- Tapestry Needle: A blunt-tipped tapestry needle for weaving in those ends securely.
- Scissors: For cutting yarn.
Gauge & Pattern Notes
Getting your gauge right is crucial for achieving the correct dimensions and drape. Take a moment to knit a small swatch to ensure your tension matches the pattern.
- Gauge: 18 stitches and 24 rows = 4 inches in stockinette stitch. (Knit one row, purl one row).
- Pattern Multiple: The driftwood stitch pattern is worked over a multiple of 4 + 2 stitches. Our cast-on of 38 stitches fits this perfectly (38 = 4*9 + 2).
- Construction: The scarf is worked flat in one piece, from one short end to the other. The color changes happen every 12 rows to create the beautiful gradient bands.
Step-by-Step Instructions: Knitting the Driftwood Scarf
Follow these detailed instructions carefully, and you'll be amazed at how quickly this beautiful pattern comes together. Remember to take your time, especially with the yarn overs, and enjoy the rhythmic flow of the stitches.
Getting Started: Cast On & Set-Up
- Cast On: With Color A (deep navy), cast on 38 stitches using your preferred method. A long-tail cast-on works beautifully here.
- Set-up Row (Wrong Side): Purl all stitches. This row establishes the base for the pattern.
The Driftwood Stitch Pattern
This 4-row repeat creates the gorgeous, textured lace. The yarn overs (yo) create the eyelet holes, while the knit two togethers (k2tog) shape the fabric.
- Row 1 (Right Side): K2, *yo, k2tog, k2; repeat from * to the end of the row.
- Row 2 (Wrong Side): Purl all stitches.
- Row 3 (Right Side): K3, *yo, k2tog, k2; repeat from * to the last 3 stitches, yo, k2tog, k1.
- Row 4 (Wrong Side): Purl all stitches.
Repeat Rows 1-4 for the duration of the scarf.
Creating the Gradient: Color Sequence
This is where the magic happens! The simple act of changing colors every 12 rows creates the stunning aurora effect. Work the driftwood stitch pattern for the specified number of rows in each color.
- Color A (Deep Navy): Work 12 rows of the pattern. (This includes the set-up row and 11 more rows, or just 12 rows of the pattern after the set-up).
- Color B (Teal): Switch to Color B and work 12 rows of the pattern.
- Color C (Pale Mint): Switch to Color C and work 12 rows of the pattern.
- Continue the Sequence: Keep alternating colors in this order (A, B, C) until the scarf measures approximately 70 inches from the cast-on edge. It's best to end after completing a wrong-side row (Row 2 or Row 4) to make the bind-off edge neat.
Binding Off & Finishing Touches
Once you've reached your desired length, it's time to secure your stitches and add the final flourishes.
- Bind Off: On the next right-side row, bind off all stitches loosely in pattern. This means you'll knit the knit stitches, purl the purl stitches (if any), and work the yarn overs as regular stitches. Binding off in pattern prevents the edge from being too tight and allows it to flare beautifully like the cast-on edge.
- Weave in Ends: Thread your tapestry needle with the yarn tails from your color changes and cast-on/bind-off edges. Weave them securely into the wrong side of the scarf, being careful not to pull too tightly and distort the fabric.
- Blocking: This step is essential! Gently wet-block your scarf. Soak it in lukewarm water with a little wool wash, then gently squeeze out the excess water (don't wring!). Lay it flat on a towel, roll it up to remove more water, then lay it flat to dry, shaping it to its final dimensions. Blocking will open up the lace holes and even out your stitches for a professional, polished look.
Optional: Adding Playful Fringe
For an extra touch of whimsy and texture, add a fringe to the short ends of your scarf.
- Cut Strands: Cut 12-inch strands of each color yarn. You'll need about 10-12 strands per fringe tassel, and you'll want a tassel every 2-3 stitches along the short edges.
- Attach: Fold a group of strands in half. Use a crochet hook to pull the folded loop through the edge of the scarf. Then, pull the loose ends through the loop and tighten. Repeat across both short ends.
- Alternate Colors: For a playful finish, alternate the colors of the fringe tassels (e.g., navy, teal, mint, navy, etc.) to echo the gradient of the scarf.
And there you have it—your very own Aurora Borealis Driftwood Scarf! This project is a joy to knit, and the result is a stunning, cozy accessory that you'll treasure for years. The combination of the textured stitch and the beautiful color gradient makes it a truly special piece. Happy knitting!