Aurora Borealis Driftwood Shawl Free Pattern – Knit with Gradient Yarn and Lace Waves
Aurora Borealis Driftwood Shawl: A Free Knitting Pattern for a Wearable Masterpiece
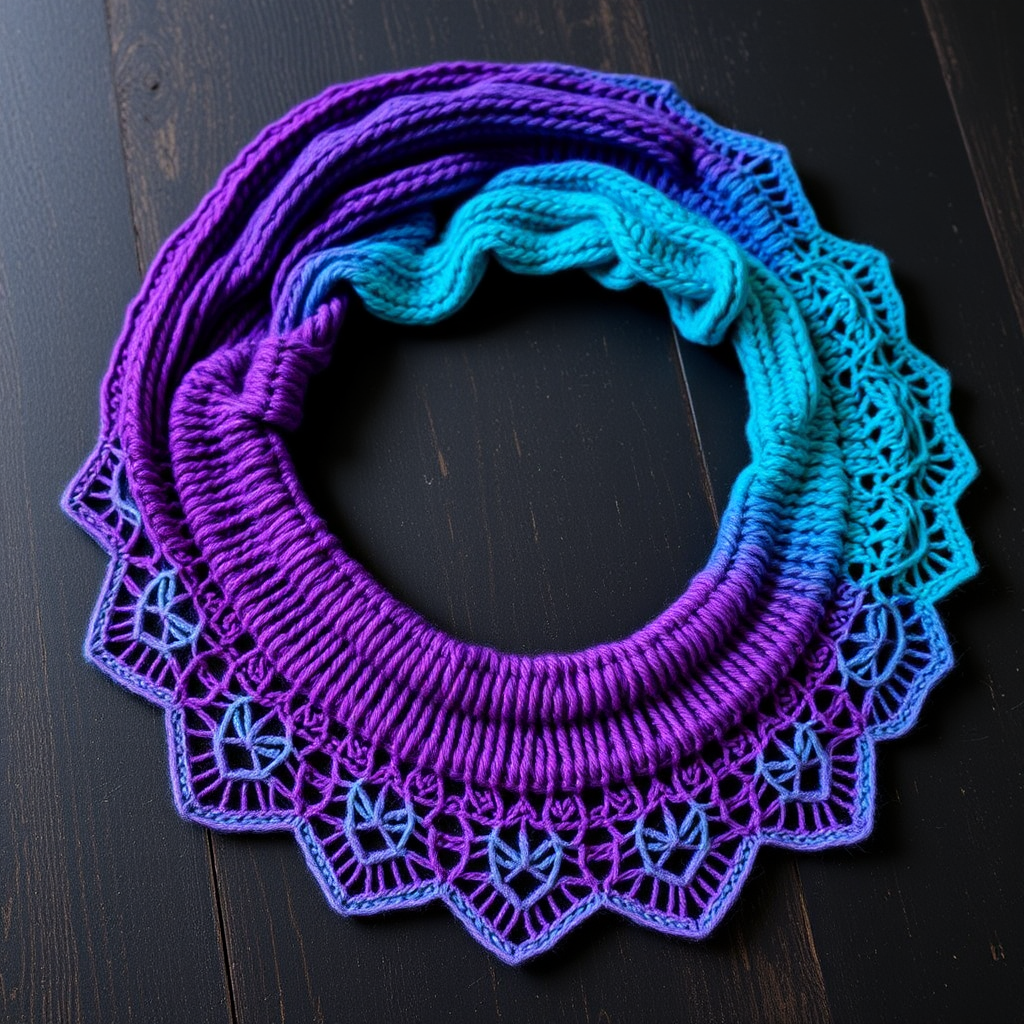
Imagine wrapping yourself in the ethereal, shifting colors of the northern lights. That's the magic of the Aurora Borealis Driftwood Shawl. This free knitting pattern combines the soothing rhythm of garter ridges with the delicate beauty of lace waves, resulting in a flowing, crescent-shaped shawl that feels like a gentle breeze against your skin.
Whether you're a seasoned knitter looking for a meditative project or a confident beginner ready for a beautiful challenge, this pattern is designed to guide you through every step. The use of a gradient yarn does all the colorwork for you, creating a stunning, handcrafted piece of wearable art that drapes elegantly and showcases the intricate stitch definition. Let's dive into creating this cozy, luxurious accessory together.
Materials Needed: Gathering Your Northern Lights Palette
Before you begin your knitting journey, it's essential to gather the right tools and materials. The beauty of this pattern lies in its simplicity—you only need a few key items to create something truly spectacular.
Yarn
- Weight: Fingering weight yarn (also known as 4-ply or sock weight).
- Colorway: A gradient or variegated colorway is essential for the "Aurora" effect. Look for yarns that transition through colors like deep teal, vibrant turquoise, rich purple, and magenta. A great example is Malabrigo Sock in 'Arco Iris' or any similar gradient yarn you love.
- Yardage: Approximately 400-450 yards (366-411 meters). This gives you plenty of yarn for the body and edging.
Needles & Notions
- Needle: US 6 (4.0 mm) circular knitting needle, 32 inches (80 cm) or longer. The long cable is crucial for holding the many stitches as the shawl grows.
- Notions: Stitch markers (at least 3), a tapestry needle for weaving in ends, and blocking pins or wires for the final step.
Gauge
- Gauge: 20 stitches and 28 rows = 4 inches (10 cm) in stockinette stitch (blocked). While gauge isn't critical for a shawl's fit, matching it ensures you use the correct amount of yarn and achieve the intended drape.
Step-by-Step Instructions: Knitting Your Aurora Borealis Shawl
This shawl is worked from the top center down, increasing at the edges and center to create its beautiful crescent shape. Don't be intimidated by the lace section—we'll break it down into manageable, repetitive rows. Let's get started!
Abbreviations
- k = knit
- p = purl
- yo = yarn over (increase)
- k2tog = knit two together (right-leaning decrease)
- ssk = slip, slip, knit (left-leaning decrease)
- kfb = knit front and back (increase)
- pm = place marker
- sm = slip marker
- RS = right side
- WS = wrong side
Part 1: The Setup (Creating the Foundation)
We'll start by casting on a few stitches and quickly building the base of our shawl. Follow these rows carefully to establish the center spine and edge increases.
- Cast on 5 stitches.
- Row 1 (RS): k2, yo, k1, yo, k2. (You now have 7 stitches)
- Row 2 (WS): k2, p3, k2.
- Row 3 (RS): k2, yo, k1, yo, k1, yo, k1, yo, k2. (You now have 11 stitches)
- Row 4 (WS): k2, p7, k2.
- Row 5 (RS): k2, yo, k3, yo, k1, yo, k3, yo, k2. (You now have 15 stitches)
- Row 6 (WS): k2, p11, k2.
Tip: The "k2" at the beginning and end of every row creates a neat, sturdy garter stitch edge that prevents curling.
Part 2: The Body (Building the Crescent Shape)
Now we'll establish the main body of the shawl. We'll place markers to define the edges and the center stitch, which is where our increases will happen.
- Place Markers: On your next RS row, place a marker after the first 2 stitches and before the last 2 stitches. Place a third marker immediately after the center stitch (the 8th stitch).
- Row 1 (RS): k2, yo, *k to center marker, yo, sm, k1, yo, k to last 2 stitches, yo, k2*. (This row increases 4 stitches: one at each edge and one on each side of the center stitch).
- Row 2 (WS): k2, purl to last 2 stitches, k2.
- Repeat these two rows until you have 51 stitches total, ending with a WS row. This creates a smooth, stockinette center with garter edges.
Part 3: The Lace Wave Section (Adding the Magic)
This is where the shawl truly comes alive. The lace pattern is worked in multiples of 6 stitches plus 1, with our edge and center increases continuing seamlessly. Don't worry about memorizing it—just follow the pattern row by row.
Note: The pattern is written for the right side (RS) and wrong side (WS). The WS rows are always the same: k2, purl to last 2 stitches, k2.
- Row 1 (RS): k2, yo, *k1, yo, ssk, k3, yo, k1, yo, ssk, k3* repeat from * to * until 2 stitches before center marker, k1, yo, sm, k1, yo, k1, *k3, k2tog, yo, k1, yo, k3, k2tog* repeat from * to * until 2 stitches before end, k1, yo, k2.
- Row 2 (WS): k2, purl to last 2 stitches, k2.
- Row 3 (RS): k2, yo, *k2, yo, ssk, k2, yo, k1, yo, ssk, k2* repeat until 2 stitches before center, k1, yo, sm, k1, yo, k1, *k2, k2tog, yo, k1, yo, k2, k2tog* repeat until 2 stitches before end, k1, yo, k2.
- Row 4 (WS): k2, purl to last 2 stitches, k2.
- Row 5 (RS): k2, yo, *k3, yo, ssk, k1, yo, k1, yo, ssk, k1* repeat until 2 stitches before center, k1, yo, sm, k1, yo, k1, *k1, k2tog, yo, k1, yo, k1, k2tog, k1* repeat until 2 stitches before end, k1, yo, k2.
- Row 6 (WS): k2, purl to last 2 stitches, k2.
- Row 7 (RS): k2, yo, *k4, yo, ssk, yo, k1, yo, ssk* repeat until 2 stitches before center, k1, yo, sm, k1, yo, k1, *k2tog, yo, k1, yo, k2tog, k4* repeat until 2 stitches before end, k1, yo, k2.
- Row 8 (WS): k2, purl to last 2 stitches, k2.
Repeat these 8 rows until the shawl measures approximately 20 inches (50 cm) from the cast-on edge, or until you have used most of your yarn, leaving enough for the edging and bind-off (about 15-20 yards).
Part 4: The Edging & Bind Off (Finishing Touches)
We're almost there! This simple garter stitch border creates a clean, rolled edge that beautifully frames the lace waves.
- Work the Edging: Work a simple garter stitch border for the last 6 rows. Continue the edge increases (k2, yo at beginning and end, and yo on each side of center marker) but knit all stitches between markers. This means every row is: k2, yo, knit to center marker, yo, sm, k1, yo, knit to last 2 stitches, yo, k2.
- Bind Off: Bind off loosely on the RS. A loose bind-off is crucial to prevent the edge from being too tight. You can use a larger needle or a yarn-over bind-off method if needed.
- Weave in Ends: Carefully weave in all loose ends with your tapestry needle.
Part 5: Blocking (The Final Reveal)
Blocking is non-negotiable for lace knitting. It's the magical step that opens up the lace waves, evens out the stitches, and enhances the beautiful gradient effect.
- Soak: Submerge the shawl in lukewarm water with a drop of mild wool wash for 20-30 minutes.
- Gently Squeeze: Do not wring or twist. Gently squeeze out excess water and roll the shawl in a clean towel to remove more moisture.
- Pin & Shape: Lay the shawl flat on a blocking mat. Gently stretch it to its final dimensions, pinning the top edge and then the scalloped bottom edge. Pull the lace points outward to open up the waves and create a beautiful crescent shape.
- Let Dry: Allow it to dry completely, ideally overnight, before unpinning.
Once dry, your Aurora Borealis Driftwood Shawl is ready to wear. Drape it over your shoulders and enjoy the compliments—you've just created a stunning piece of wearable art that captures the beauty of the night sky. Happy knitting!