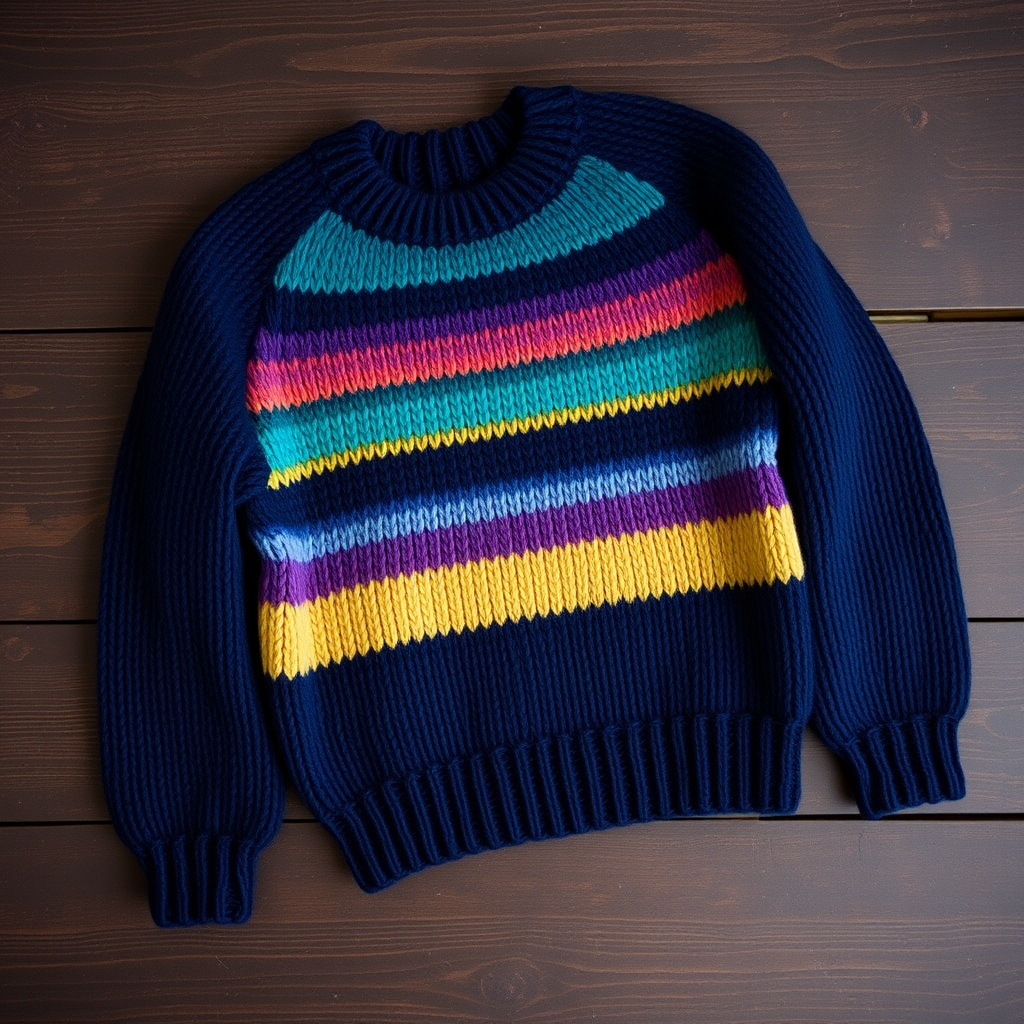
Aurora Peaks Diamond Sweater Free Pattern – A Knitted Alpine Aurora Dream

Introducing the Aurora Peaks Diamond Sweater: A Knitted Alpine Dream
Wrap yourself in the ethereal beauty of the northern lights with this stunning diamond-patterned sweater. The Aurora Peaks Diamond Sweater is knitted in soft, heathered worsted weight yarns, featuring intricate diamond motifs and gentle color transitions that create a cozy, wearable masterpiece. This free knitting pattern is perfect for intermediate knitters ready to explore stranded colorwork, resulting in a garment that feels like a warm mountain sunrise. The deep teal base with soft lavender and cream diamonds evokes the serene beauty of auroras over snowy peaks, making this hand-knit sweater a true statement piece for your autumn and winter wardrobe.
Materials Needed
Before you begin your knitting journey, gather the following materials to ensure a smooth and enjoyable crafting experience:
- Yarn: Worsted weight yarn in 3 colors:
- Color A (MC - Main Color): Deep Teal – approx 600 (675, 750, 825, 900) yards
- Color B (CC1 - Contrast Color 1): Soft Lavender – approx 300 (337, 375, 412, 450) yards
- Color C (CC2 - Contrast Color 2): Cream – approx 300 (337, 375, 412, 450) yards
- Needles:
- US 7 (4.5 mm) circular needles, 24-32 inches long (for yoke and body)
- US 7 (4.5 mm) double-pointed needles (for sleeves)
- Notions:
- Stitch markers (at least 8)
- Waste yarn or stitch holders (for sleeve stitches)
- Tapestry needle (for weaving in ends)
Gauge: 20 stitches and 26 rows = 4 inches in stockinette stitch; 22 stitches and 28 rows = 4 inches in diamond pattern (blocked). Always check your gauge before starting to ensure proper fit!
Step-by-Step Instructions
Sizes and Measurements
This pattern is written for sizes XS (S, M, L, XL). Finished bust measurements: 34 (38, 42, 46, 50) inches. The sweater is worked top-down in the round with raglan increases, then split for body and sleeves. Diamond motifs are worked using stranded colorwork.
Abbreviations
k = knit, p = purl, k2tog = knit 2 together, ssk = slip slip knit, yo = yarn over, pm = place marker, sm = slip marker, MC = main color (Deep Teal), CC1 = contrast color 1 (Soft Lavender), CC2 = contrast color 2 (Cream), m1L = make 1 left (increase), m1R = make 1 right (increase).
Yoke
Step 1: With MC (Deep Teal), cast on 88 (92, 96, 100, 104) stitches using the long-tail cast-on method. Place a marker at the beginning of the round and join in the round, being careful not to twist your stitches.
Step 2: Work 2 inches of k1, p1 ribbing. This creates a neat, stretchy neckline that will comfortably fit over your head.
Step 3: Next round: knit all stitches, increasing 8 (8, 10, 10, 12) stitches evenly around. To increase evenly, divide your stitch count by the number of increases needed and place increases at those intervals. You should now have 96 (100, 106, 110, 116) stitches on your needles.
Step 4: Place 4 raglan markers as follows:
- pm after 16 (17, 18, 19, 20) sts (left front)
- pm after 32 (33, 34, 35, 36) sts (left sleeve)
- pm after 16 (17, 18, 19, 20) sts (back)
- pm after 32 (33, 34, 35, 36) sts (right sleeve)
Step 5 – Raglan Increase Round: *Knit to 1 stitch before marker, m1L, k1, slip marker, k1, m1R* – repeat from * to * around the entire round. This increases 8 stitches total (2 per raglan line).
Step 6: Repeat this increase round every other round (i.e., knit one plain round, then work an increase round) for a total of 18 (20, 22, 24, 26) increase rounds. After completing all increases, you should have 240 (260, 282, 302, 324) stitches on your needles.
Step 7: Work even (without increases) until the yoke measures 8 (8.5, 9, 9.5, 10) inches from the cast-on edge, measured at the center back.
Diamond Pattern Insertion
Important: Begin the diamond motif after you have completed 10 increase rounds. This ensures the colorwork is properly positioned on the yoke.
Step 8: Begin the diamond motif on the front and back panels only (the sections between the sleeve markers). Work the chart as follows, using MC (Deep Teal) and CC1 (Soft Lavender):
- Row 1: *k5 MC, k1 CC1, k1 MC, k1 CC1, k5 MC* – repeat across front/back panels
- Row 2: *k4 MC, k2 CC1, k1 MC, k2 CC1, k4 MC*
- Row 3: *k3 MC, k3 CC1, k1 MC, k3 CC1, k3 MC*
- Row 4: *k2 MC, k4 CC1, k1 MC, k4 CC1, k2 MC*
- Row 5: *k1 MC, k5 CC1, k1 MC, k5 CC1, k1 MC*
- Row 6: *k2 MC, k4 CC1, k1 MC, k4 CC1, k2 MC*
- Row 7: *k3 MC, k3 CC1, k1 MC, k3 CC1, k3 MC*
- Row 8: *k4 MC, k2 CC1, k1 MC, k2 CC1, k4 MC*
- Row 9: *k5 MC, k1 CC1, k1 MC, k1 CC1, k5 MC*
Step 9: Repeat rows 1-9 twice more (for a total of 3 full diamond motifs in Lavender), then work rows 1-5 once more to complete the partial motif.
Step 10: Switch to CC2 (Cream) as your new MC for the next diamond motif. Work the same chart pattern, but now use Cream as the main color and Lavender as the contrast color. Work 2 full diamond motifs in this color combination.
Step 11: Switch back to MC (Deep Teal) as your main color and work one final diamond motif using the same chart, with Teal as MC and Cream as CC1.
Pro Tip: When working stranded colorwork, remember to keep your floats loose enough to maintain fabric elasticity. Carry the unused yarn loosely across the back of your work, catching it every 3-4 stitches if needed.
Body
Step 12: After completing the yoke and all diamond motifs, divide for the body. Place the sleeve stitches (the sections between the raglan markers) onto waste yarn or stitch holders. You should have approximately 160 (172, 186, 198, 212) stitches remaining for the body (front and back combined).
Step 13: Continue working in the round with MC (Deep Teal) over the body stitches. Work even in stockinette stitch (knit every round) until the body measures 12 (13, 14, 15, 16) inches from the underarm.
Step 14: Work 2 inches of k1, p1 ribbing for a neat, stretchy hem. Bind off loosely using the stretchy bind-off method (such as the Jenny's surprisingly stretchy bind-off) to ensure the hem doesn't pull.
Sleeves
Step 15: Transfer the sleeve stitches from waste yarn onto double-pointed needles (approximately 68 (72, 76, 80, 84) stitches per sleeve). Place a marker at the underarm to mark the beginning of the round.
Step 16: Work in stockinette stitch in the round, decreasing 2 stitches every 6 rounds. To decrease: k2tog at the beginning of the round (after the marker) and ssk at the end of the round (before the marker).
Step 17: Continue decreasing until the sleeve measures 16 (17, 18, 19, 20) inches from the underarm, or your desired sleeve length. Note: You may need fewer decreases for a more relaxed fit – adjust as needed.
Step 18: Work 2 inches of k1, p1 ribbing for the cuff. Bind off loosely.
Step 19: Repeat steps 15-18 for the second sleeve.
Finishing
Step 20: Weave in all loose ends using a tapestry needle. Take care to weave ends securely on the wrong side of the work, especially in colorwork areas.
Step 21: Block your sweater to the specified measurements. Wet blocking is recommended for this project – soak the sweater in lukewarm water with a gentle wool wash, gently squeeze out excess water (never wring), and lay flat to dry on a towel. Gently stretch the sweater to open up the diamond motifs and even out the stitches.
Step 22: Once completely dry, your Aurora Peaks Diamond Sweater is ready to wear! The gentle color transitions and intricate diamond pattern will make this a cherished piece in your hand-knit collection.
Care Instructions
To keep your sweater looking beautiful for years to come, hand wash in cold water with a gentle wool wash, lay flat to dry, and store folded (never hung) to maintain its shape.
Happy knitting, and may your finished sweater bring you the cozy warmth of an alpine sunrise!