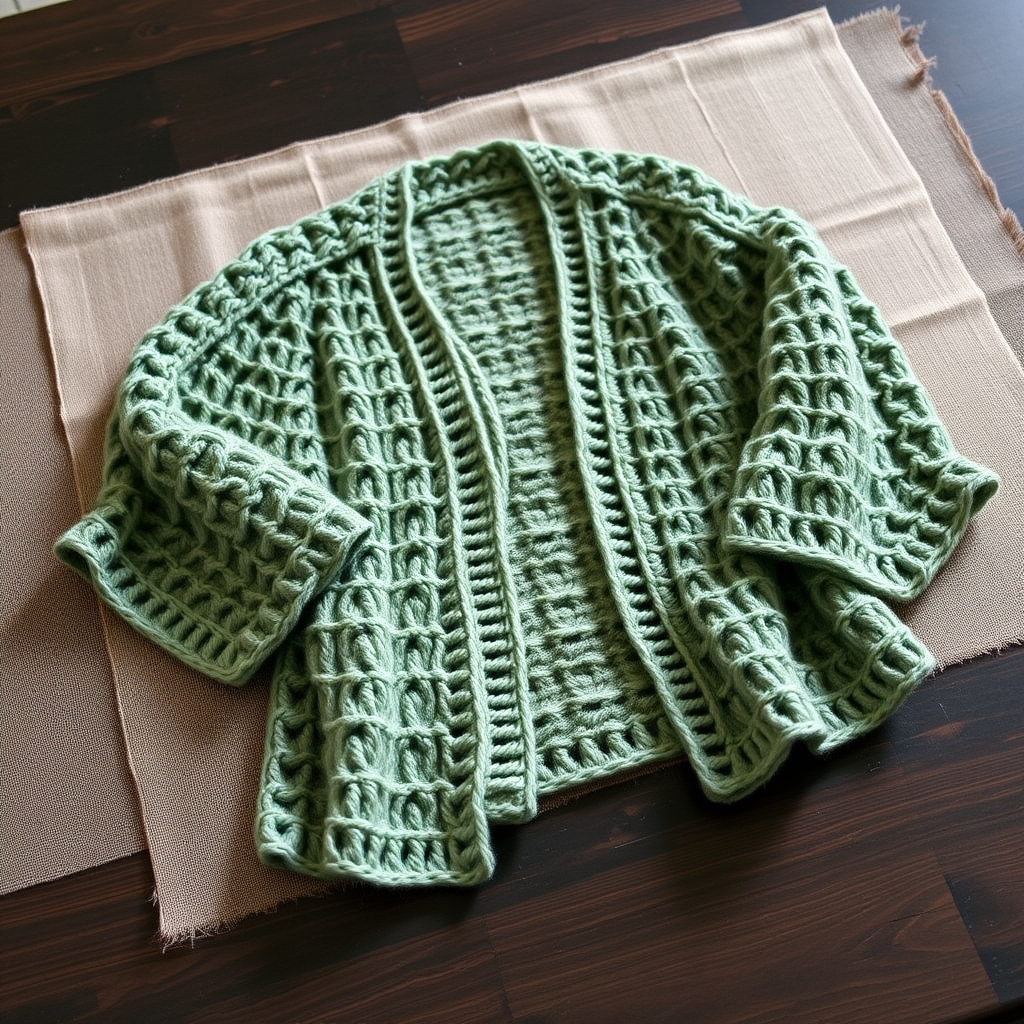
Hygge Cocoon Cardigan Free Pattern – A Cloud-Like Knit Wrap

Hygge Cocoon Cardigan Free Pattern – A Cloud-Like Knit Wrap
Wrap yourself in the ultimate comfort of this oversized, cloud-soft cocoon cardigan, knitted with a dreamy blend of chunky yarn and delicate lace panels. This pattern creates a luxurious, wearable blanket that drapes beautifully and feels like a warm hug on chilly days. Whether you're curling up with a book or heading out for a crisp autumn walk, this cardigan is the perfect companion. The combination of a plush, dense stockinette body and airy lace accents makes this piece both visually stunning and incredibly cozy. Best of all, this free pattern is beginner-friendly, with clear instructions that guide you through every step.
Materials Needed
Before you begin, gather the following materials to ensure a smooth knitting experience:
- Yarn: Super bulky weight yarn (approx. 600-700 yards) in a soft cream or oat color, with a contrasting lighter shade for the lace panels. The main body uses the yarn held double for extra thickness and warmth.
- Needles: US Size 13 (9.0 mm) circular knitting needles with a 32-inch cable. This length is essential for accommodating the large number of stitches in the back panel.
- Gauge: 10 stitches and 14 rows = 4 inches in stockinette stitch (with yarn held double for the main body). Always check your gauge to ensure the correct sizing.
- Other Tools: Stitch markers, tapestry needle for weaving in ends, and scissors.
Step-by-Step Instructions
Sizes and Abbreviations
Sizes: One size fits most (approx. 40-inch chest, 28-inch length). This relaxed, cocoon-style fit is designed to be oversized and drapey.
Abbreviations:
- CO: Cast on
- K: Knit
- P: Purl
- K2tog: Knit two together
- YO: Yarn over
- St(s): Stitch(es)
- RS: Right side
- WS: Wrong side
Pattern Notes
- The cardigan is worked in one piece from the top down, starting with the back panel, then picking up stitches for the shoulders and front panels.
- The main body is worked in a simple stockinette stitch with a garter stitch border for a clean, polished edge.
- The lace panels are worked separately and sewn on, adding a delicate, airy texture that beautifully contrasts the dense main fabric.
Back Panel
- Cast On: CO 80 sts.
- Garter Border: Work in garter stitch (knit every row) for 6 rows. This creates a sturdy, non-curling edge.
- Main Body: Switch to stockinette stitch (K on RS, P on WS) and work until piece measures 14 inches from cast-on edge, ending with a WS row. This will form the main back section of the cardigan.
- Shape Shoulders: Bind off 10 sts at the beginning of the next 2 rows (for shoulder slopes). This creates a gentle angle for the shoulders. Then bind off remaining 60 sts loosely. Do not cut the yarn yet; you'll be picking up stitches from this edge.
Left Front Panel
- Pick Up Stitches: With RS facing, pick up and knit 40 sts along the left shoulder edge of the back panel. This is the edge where you just bound off the 10 shoulder stitches.
- Garter Border: Work in garter stitch for 4 rows.
- Shape Neck: Switch to stockinette stitch, and at the same time, increase 1 st at the neck edge (the side closest to the center back) every 4 rows, 5 times. You should now have 45 sts. This creates a gentle curve for the neckline.
- Work Even: Work even until piece measures 12 inches from pick-up row, ending with a WS row.
- Shape Armhole: Bind off 5 sts at the beginning of the next RS row, then decrease 1 st at the armhole edge every RS row 3 times. You should now have 37 sts. This shapes the armhole for a comfortable fit.
- Work Even: Work even until piece measures 20 inches from pick-up row.
- Garter Border: Work in garter stitch for 6 rows. Bind off all sts loosely.
Right Front Panel
- Pick Up Stitches: With RS facing, pick up and knit 40 sts along the right shoulder edge of the back panel.
- Mirror Instructions: Repeat instructions for Left Front Panel, but mirror all shaping. This means increasing at the neck edge on the opposite side (the side closest to the center back) and binding off for the armhole on the opposite edge. Take care to reverse the shaping to ensure symmetry.
Sleeves (Make 2)
- Cast On: CO 30 sts.
- Garter Border: Work in garter stitch for 6 rows.
- Shape Sleeve: Switch to stockinette stitch and increase 1 st each side every 6 rows, 6 times. You should now have 42 sts. This creates a gentle flare towards the cuff.
- Work Even: Work even until sleeve measures 18 inches from cast-on edge.
- Bind Off: Bind off all sts loosely.
Lace Panels (Make 2)
- Cast On: Using the contrasting lighter yarn, CO 20 sts.
- Row 1 (RS): K2, *YO, K2tog, K1; repeat from * to last 2 sts, K2. This creates the delicate lace pattern.
- Row 2 (WS): Purl all sts.
- Repeat: Repeat Rows 1-2 until panel measures 12 inches. Bind off all sts.
Finishing
- Sew Shoulder Seams: Sew the shoulder seams of the front panels to the back panel. Use a mattress stitch for an invisible seam.
- Attach Sleeves: Sew sleeves into armholes, then sew the sleeve seams. Ensure the sleeves are centered on the shoulder seam for a balanced look.
- Add Lace Panels: Sew the lace panels onto the front of the cardigan, positioning them vertically along the center front edges. Leave a 2-inch gap at the bottom for a modern, layered look. This adds a beautiful, airy contrast to the dense main fabric.
- Weave in Ends: Weave in all loose ends with a tapestry needle to ensure a clean finish.
- Block: Block gently to shape. This will even out the stitches and give the cardigan a professional, polished appearance. Lay flat to dry.
Your Hygge Cocoon Cardigan is now complete! This cloud-like knit wrap is perfect for cozy evenings, and the delicate lace panels add a touch of elegance to a classic, comfortable design. Enjoy your handmade creation, and don't forget to share your finished project with the knitting community!