Prism Drift Mosaic Knit Blanket Free Pattern – Color-Shifting Textured Throw

Prism Drift Mosaic Knit Blanket Free Pattern – Color-Shifting Textured Throw
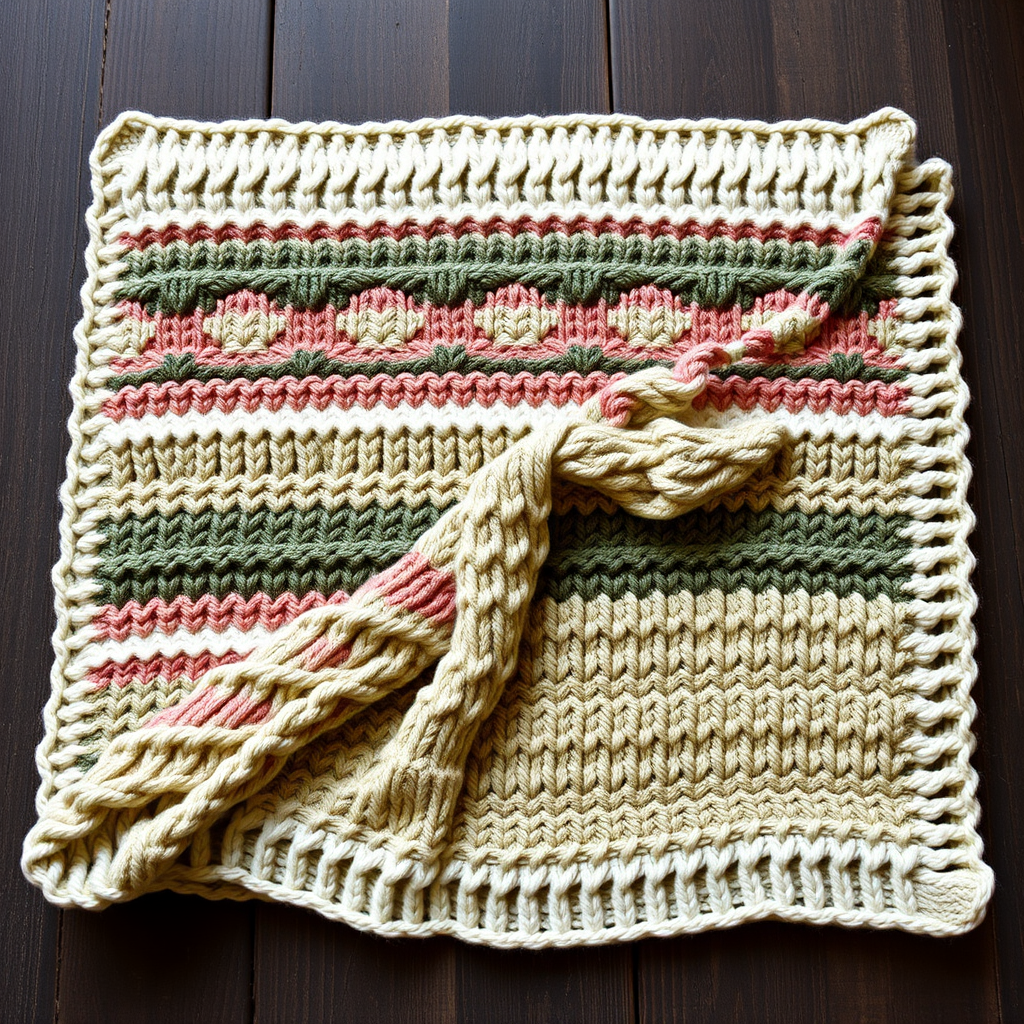
Imagine wrapping yourself in a sunset—that's the magic of the Prism Drift Mosaic Knit Blanket. This stunning, modern heirloom piece uses slipped stitches and a carefully curated gradient yarn sequence to create a mesmerizing, color-shifting drift of texture across your lap. The geometric waves and diamonds seem to ripple and flow, transitioning from deep teal through soft aqua, warm coral, and golden yellow, before settling into a creamy center and reversing back. It's not just a blanket; it's a statement piece that adds warmth, color, and artistic flair to any room. Best of all, this cozy throw is achievable for knitters who know the basics—if you can knit, purl, slip a stitch, and yarn over, you can create this breathtaking masterpiece.
Materials Needed
Before you begin your knitting journey, gather these essential supplies. The quality of your materials will directly impact the final look and feel of your blanket, so choose wisely.
- Yarn: Worsted weight yarn in 5 colors (approx. 1200g total)
- Color A: Deep Teal (approx. 300g)
- Color B: Soft Aqua (approx. 250g)
- Color C: Warm Coral (approx. 200g)
- Color D: Golden Yellow (approx. 200g)
- Color E: Cream (approx. 250g)
- Needles: US 8 (5mm) circular knitting needle with a 32-inch cable. The long cable is essential for holding all 120 stitches comfortably.
- Other Tools: Stitch markers (optional but helpful), tapestry needle for weaving in ends, scissors, and blocking mats with pins for finishing.
Gauge & Abbreviations
Getting your gauge right ensures your blanket turns out the perfect size. Take a moment to check it before diving in.
Gauge: 18 stitches and 24 rows = 4 inches in stockinette stitch (blocked). If your gauge is off, adjust your needle size accordingly—smaller needles for more stitches per inch, larger for fewer.
Abbreviations:
- K = knit
- P = purl
- Sl = slip stitch purlwise (insert needle as if to purl, slip the stitch to the right needle without knitting it)
- YO = yarn over (bring yarn to front, then over the needle to the back, creating a new loop)
- K2tog = knit two stitches together (decrease)
- P2tog = purl two stitches together (decrease)
Step-by-Step Instructions
This mosaic knit blanket is worked flat in rows, using slipped stitches to create geometric waves. The pattern is a 12-row repeat that shifts colors every 12 rows. Follow along carefully, and you'll be amazed at the intricate design that emerges.
Setup: Cast On & Border
Step 1: With Color A (deep teal), cast on 120 stitches using your preferred method (long-tail cast on works beautifully).
Step 2: Knit 6 rows in garter stitch (knit every row) to create a neat, sturdy border. This will prevent curling and give your blanket a polished edge.
Main Pattern: The 12-Row Repeat
Now for the heart of the pattern. Each 12-row block uses two colors—one for rows 1-6 and another for rows 7-12. The slipped stitches from the first color are carried up and "caught" by the second color, creating the mosaic effect.
Row 1 (RS): With Color A, K1, *K2, Sl1, K2, Sl1, K2, Sl1, K2, Sl1, K2, Sl1, K2, Sl1* repeat from * to * until 1 stitch remains, K1.
Row 2 (WS): With Color A, K1, *P2, Sl1, P2, Sl1, P2, Sl1, P2, Sl1, P2, Sl1, P2, Sl1* repeat from * to * until 1 stitch remains, K1.
Row 3 (RS): With Color A, K1, *K1, Sl1, K2, Sl1, K2, Sl1, K2, Sl1, K2, Sl1, K2, Sl1, K1* repeat from * to * until 1 stitch remains, K1.
Row 4 (WS): With Color A, K1, *P1, Sl1, P2, Sl1, P2, Sl1, P2, Sl1, P2, Sl1, P2, Sl1, P1* repeat from * to * until 1 stitch remains, K1.
Row 5 (RS): With Color A, K1, *K2, Sl1, K2, Sl1, K2, Sl1, K2, Sl1, K2, Sl1, K2, Sl1* repeat from * to * until 1 stitch remains, K1.
Row 6 (WS): With Color A, K1, *P2, Sl1, P2, Sl1, P2, Sl1, P2, Sl1, P2, Sl1, P2, Sl1* repeat from * to * until 1 stitch remains, K1.
Important: When slipping stitches, always slip them purlwise with the yarn held to the back on RS rows and to the front on WS rows. This keeps the floats tidy on the wrong side.
Row 7 (RS): Switch to Color B. K1, *K1, YO, K2tog, K1, Sl1, K2, Sl1, K2, Sl1, K2, Sl1, K2, Sl1, K1* repeat from * to * until 1 stitch remains, K1.
Row 8 (WS): With Color B, K1, *P1, YO, P2tog, P1, Sl1, P2, Sl1, P2, Sl1, P2, Sl1, P2, Sl1, P1* repeat from * to * until 1 stitch remains, K1.
Row 9 (RS): With Color B, K1, *K2, Sl1, K2, Sl1, K2, Sl1, K2, Sl1, K2, Sl1, K2, Sl1* repeat from * to * until 1 stitch remains, K1.
Row 10 (WS): With Color B, K1, *P2, Sl1, P2, Sl1, P2, Sl1, P2, Sl1, P2, Sl1, P2, Sl1* repeat from * to * until 1 stitch remains, K1.
Row 11 (RS): With Color B, K1, *K1, Sl1, K2, Sl1, K2, Sl1, K2, Sl1, K2, Sl1, K2, Sl1, K1* repeat from * to * until 1 stitch remains, K1.
Row 12 (WS): With Color B, K1, *P1, Sl1, P2, Sl1, P2, Sl1, P2, Sl1, P2, Sl1, P2, Sl1, P1* repeat from * to * until 1 stitch remains, K1.
Note on Row 7 & 8: The YO and K2tog/P2tog create a subtle eyelet detail. Ensure your YO is not too tight, or it will pucker. The stitch count remains the same because the YO replaces the decrease.
Color Sequence: Creating the Gradient
This is where the magic happens. Repeat the 12-row pattern, changing colors as follows. The sequence creates a symmetrical gradient that peaks at cream in the center.
- Rows 1-6: Color A, Rows 7-12: Color B
- Rows 13-18: Color B, Rows 19-24: Color C
- Rows 25-30: Color C, Rows 31-36: Color D
- Rows 37-42: Color D, Rows 43-48: Color E
- Rows 49-54: Color E, Rows 55-60: Color D
- Rows 61-66: Color D, Rows 67-72: Color C
- Rows 73-78: Color C, Rows 79-84: Color B
- Rows 85-90: Color B, Rows 91-96: Color A
Continue this sequence until the blanket measures approximately 60 inches from the cast-on edge. It's crucial to end with a full color sequence (finishing with Color A) to maintain symmetry. Don't cut your yarn between color changes—just carry it up the side or weave in ends as you go.
Border & Bind Off
Step 1: Once your blanket reaches the desired length, knit 6 rows in garter stitch with Color A. This mirrors the bottom border and frames the design beautifully.
Step 2: Bind off loosely. A tight bind-off will make the edge curl. Use a larger needle for binding off if needed, or use a stretchy bind-off method like "bind off in pattern" or "Jeny's surprisingly stretchy bind-off."
Finishing Touches
Step 1: Weave in all ends with a tapestry needle. Take your time—neat ends make a professional-looking blanket. Weave in on the wrong side, following the path of the yarn to keep it invisible.
Step 2: Block the blanket gently. Soak it in lukewarm water with a mild wool wash, gently squeeze out excess water (never wring), and lay it flat on blocking mats. Pin it to the correct dimensions (approximately 26 inches wide x 60 inches long) to open up the mosaic pattern and even out the stitches. Allow it to dry completely.
Pro Tips for Success
- Count your stitches: The pattern relies on a multiple of 12 + 2. If you make a mistake, it's easier to catch early. Use stitch markers every 12 stitches to help you track the repeats.
- Keep floats loose: When slipping stitches, don't pull the yarn too tight. Loose floats ensure the blanket lies flat and the slipped stitches don't pucker.
- Consistent tension: The mosaic pattern looks best with even tension. Practice on a swatch first if you're new to slipped stitches.
- Color choices: While the pattern specifies colors, feel free to customize! A monochromatic gradient or high-contrast colors will create entirely different vibes.
Your Prism Drift Mosaic Knit Blanket is now complete. This isn't just a throw—it's a labor of love, a piece of art that will keep you cozy for years to come. Whether draped over a chair, folded at the foot of your bed, or gifted to someone special, this blanket is sure to be treasured. Happy knitting!