Whispering Pines Forest Floor Blanket Free Pattern – Knit a Mossy Woodland Dream

Whispering Pines Forest Floor Blanket Free Pattern – Knit a Mossy Woodland Dream
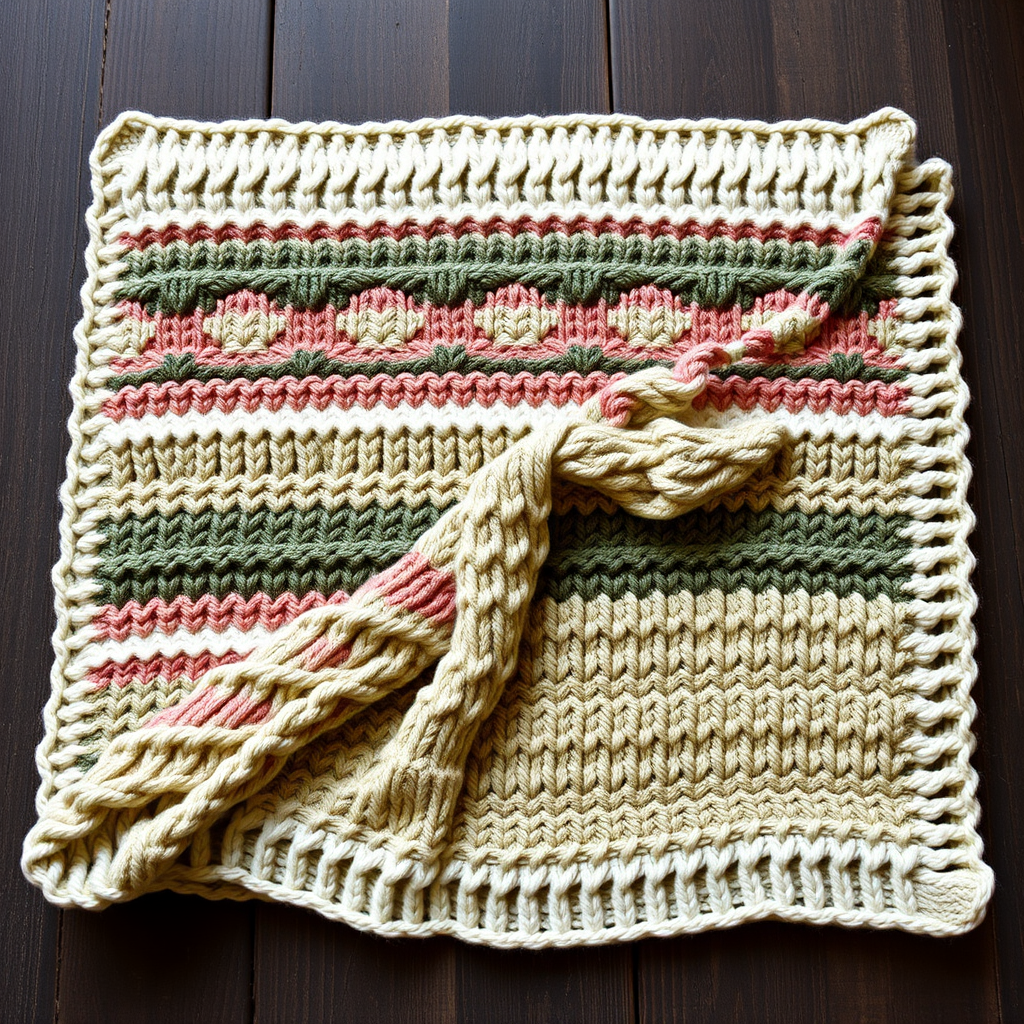
Wrap yourself in the quiet hush of an ancient forest with this deeply textured knit blanket, where cascading pine needles and soft mossy mounds are worked into every stitch. This heirloom-quality piece brings the grounding calm of a woodland floor into your living space. The Whispering Pines Forest Floor Blanket is a stunning, modern take on textured knitting that combines simple knit and purl stitches with slipped stitches and delicate bobbles to create a rich, organic landscape you'll love to snuggle under.
Whether you're an experienced knitter looking for a meditative project or a confident beginner ready to stretch your skills, this pattern offers a rewarding journey. The rhythmic repetition of the stitch pattern is almost therapeutic, and the result is a cozy, earthy masterpiece that will be cherished for years. Let's dive into creating this mossy woodland dream together.
Materials Needed
Before you begin, gather your supplies. Having everything ready will make your knitting experience smooth and enjoyable.
Yarn
You will need worsted weight yarn in four beautiful, earthy shades to create the forest floor effect:
- Deep Forest Green (MC - Main Color): Approximately 1800 yards. This is your dominant color, forming the base and borders.
- Mossy Sage (CC1 - Contrast Color 1): Approximately 600 yards. This adds a soft, muted green for the first textured bands.
- Birch Bark Beige (CC2 - Contrast Color 2): Approximately 400 yards. This warm neutral brings in the "mossy mounds" and lightens the palette.
- Soft Fern (CC3 - Contrast Color 3): Approximately 300 yards. This final shade adds a delicate, fresh green accent.
Pro Tip: Choose yarns with good stitch definition, such as a wool or wool-blend, to make the bobbles and slipped stitches really pop.
Needles & Notions
- US 8 (5.0 mm) circular knitting needles, 32-inch or longer. The long cable is essential to hold all 216 stitches comfortably.
- Tapestry needle for weaving in ends.
- Stitch markers (optional, but helpful for keeping track of pattern repeats).
Gauge
18 stitches and 24 rows = 4 inches in stockinette stitch. Gauge is crucial for achieving the finished size of 48 inches wide by 60 inches long. Always knit a swatch first to ensure your tension matches. If your gauge is off, adjust your needle size accordingly.
Step-by-Step Instructions
This blanket is worked in one piece from the bottom up. The pattern combines simple knit and purl stitches with slipped stitches and bobbles to create a rich, organic texture reminiscent of a forest floor. Take your time and enjoy the rhythmic repetition.
Special Stitches
Before you start, familiarize yourself with these two special techniques:
- Bobble (MB): (K1, P1, K1, P1, K1) all into the same stitch – this increases 1 stitch into 5 stitches. Turn work, P5, turn work, K5, turn work, P5, turn work, then pass the 2nd, 3rd, 4th, and 5th stitches over the 1st stitch to decrease back to 1 stitch. This creates a lovely, raised "mossy mound."
- Slip Stitch (Sl): Slip stitch purlwise with yarn in back (unless otherwise noted). This creates the subtle vertical lines that mimic pine needles.
Pattern Notes
- The finished blanket is 48 inches wide and 60 inches long.
- Work all slipped stitches loosely to maintain gauge and prevent puckering.
- Carry unused yarns up the side of the work when changing colors, or weave in ends as you go. Carrying them up the side is neater for a blanket with this many color changes.
Getting Started: The Foundation
Foundation Row (RS): With your Main Color (MC), cast on 216 stitches loosely. Knit 6 rows in garter stitch (knit every row) for the bottom border. This creates a sturdy, non-curling edge.
Begin the Pattern: The Pine Needle Section
This section creates the beautiful, textured vertical lines. You will repeat these 12 rows, alternating between MC and CC1.
Row 1 (RS): With MC, K6 (border), *K2, P2, K2, Sl1, K2, P2, K2, Sl1, repeat from * to last 6 stitches, K6 (border).
Row 2 (WS): With MC, K6, *P2, K2, P2, Sl1, P2, K2, P2, Sl1, repeat from * to last 6 stitches, K6.
Row 3 (RS): With MC, K6, *K2, P2, K2, Sl1, K2, P2, K2, Sl1, repeat from * to last 6 stitches, K6.
Row 4 (WS): With MC, K6, *P2, K2, P2, Sl1, P2, K2, P2, Sl1, repeat from * to last 6 stitches, K6.
Row 5 (RS): With CC1, K6, *K2, P2, K2, Sl1, K2, P2, K2, Sl1, repeat from * to last 6 stitches, K6.
Row 6 (WS): With CC1, K6, *P2, K2, P2, Sl1, P2, K2, P2, Sl1, repeat from * to last 6 stitches, K6.
Row 7 (RS): With CC1, K6, *K2, P2, K2, Sl1, K2, P2, K2, Sl1, repeat from * to last 6 stitches, K6.
Row 8 (WS): With CC1, K6, *P2, K2, P2, Sl1, P2, K2, P2, Sl1, repeat from * to last 6 stitches, K6.
Row 9 (RS): With MC, K6, *K2, P2, K2, Sl1, K2, P2, K2, Sl1, repeat from * to last 6 stitches, K6.
Row 10 (WS): With MC, K6, *P2, K2, P2, Sl1, P2, K2, P2, Sl1, repeat from * to last 6 stitches, K6.
Row 11 (RS): With MC, K6, *K2, P2, K2, Sl1, K2, P2, K2, Sl1, repeat from * to last 6 stitches, K6.
Row 12 (WS): With MC, K6, *P2, K2, P2, Sl1, P2, K2, P2, Sl1, repeat from * to last 6 stitches, K6.
The Mossy Mound Section
Now we introduce the beautiful bobbles that mimic mossy mounds. This section is worked over 12 rows, using CC2, CC3, and MC.
Row 13 (RS): With CC2, K6, *K4, MB, K3, Sl1, K4, MB, K3, Sl1, repeat from * to last 6 stitches, K6.
Row 14 (WS): With CC2, K6, *P4, K1 (the bobble stitch), P3, Sl1, P4, K1, P3, Sl1, repeat from * to last 6 stitches, K6.
Row 15 (RS): With CC2, K6, *K4, P1, K3, Sl1, K4, P1, K3, Sl1, repeat from * to last 6 stitches, K6.
Row 16 (WS): With CC2, K6, *P4, K1, P3, Sl1, P4, K1, P3, Sl1, repeat from * to last 6 stitches, K6.
Row 17 (RS): With CC2, K6, *K4, P1, K3, Sl1, K4, P1, K3, Sl1, repeat from * to last 6 stitches, K6.
Row 18 (WS): With CC2, K6, *P4, K1, P3, Sl1, P4, K1, P3, Sl1, repeat from * to last 6 stitches, K6.
Row 19 (RS): With CC3, K6, *K4, P1, K3, Sl1, K4, P1, K3, Sl1, repeat from * to last 6 stitches, K6.
Row 20 (WS): With CC3, K6, *P4, K1, P3, Sl1, P4, K1, P3, Sl1, repeat from * to last 6 stitches, K6.
Row 21 (RS): With CC3, K6, *K4, P1, K3, Sl1, K4, P1, K3, Sl1, repeat from * to last 6 stitches, K6.
Row 22 (WS): With CC3, K6, *P4, K1, P3, Sl1, P4, K1, P3, Sl1, repeat from * to last 6 stitches, K6.
Row 23 (RS): With MC, K6, *K4, P1, K3, Sl1, K4, P1, K3, Sl1, repeat from * to last 6 stitches, K6.
Row 24 (WS): With MC, K6, *P4, K1, P3, Sl1, P4, K1, P3, Sl1, repeat from * to last 6 stitches, K6.
Repeating the Pattern
Repeat Rows 1-24 until the blanket measures approximately 58 inches from the cast-on edge, ending with a Row 24. This ensures your pattern is complete before the final border.
Finishing the Top Border
Once you reach your desired length, knit 6 rows of garter stitch with MC for the top border. Bind off loosely in knit. A loose bind-off is essential to prevent the edge from being too tight and pulling the blanket out of shape.
Final Touches: Weaving and Blocking
Weave in all ends with a tapestry needle. Take your time to secure them neatly. Then, block the blanket gently to even out the stitches and enhance the beautiful texture. Lay it flat to dry. Blocking will truly make the bobbles and slipped stitches shine, giving your blanket that professional, heirloom-quality finish.
Congratulations! You've created a stunning Whispering Pines Forest Floor Blanket. This cozy, organic piece is perfect for draping over a sofa, snuggling under on a chilly evening, or giving as a heartfelt, handmade gift. Enjoy the fruits of your labor and the woodland calm it brings to your home.