Rustic Trails Cable Knit Water Bottle Cozy Free Pattern
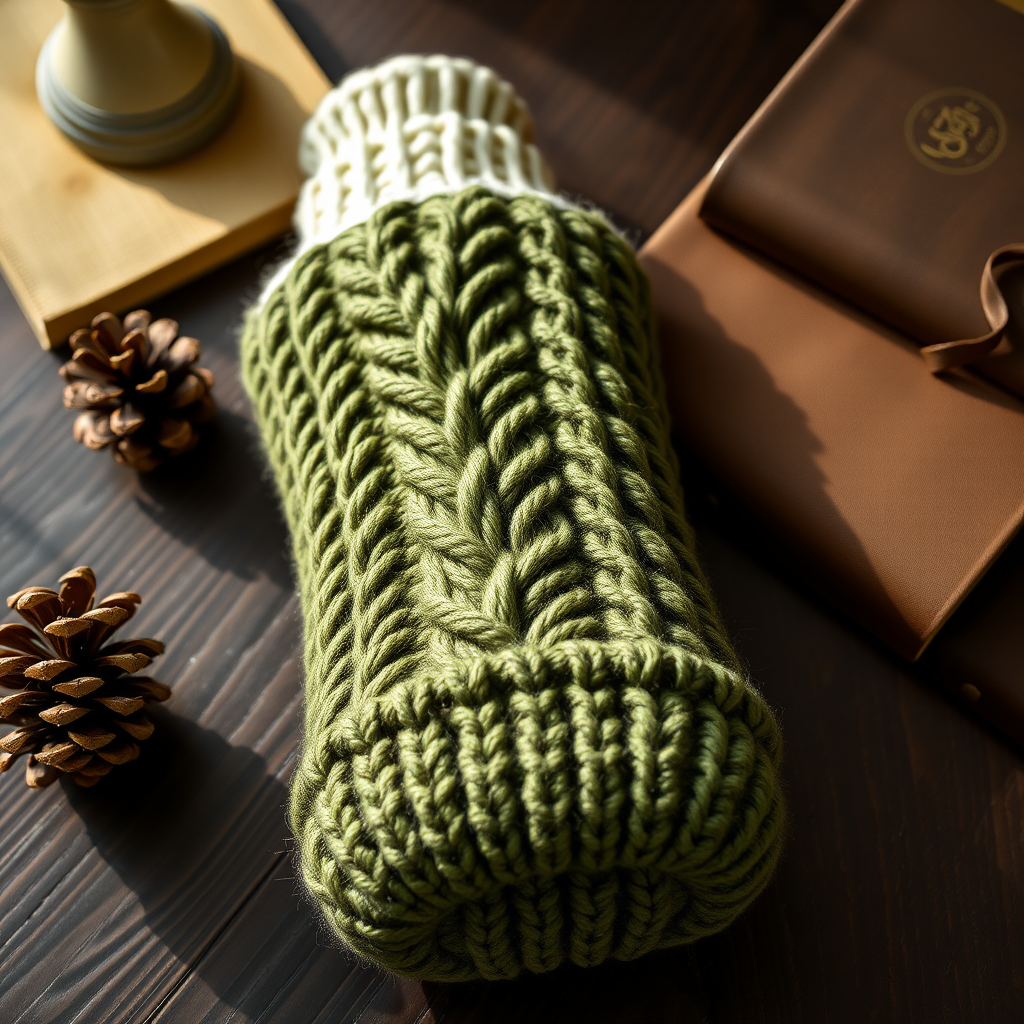
Rustic Trails Cable Knit Water Bottle Cozy: A Free Beginner-Friendly Pattern
There's something deeply satisfying about wrapping your everyday essentials in handcrafted warmth. This Rustic Trails Cable Knit Water Bottle Cozy is more than just a practical accessory—it's a small piece of mountain-inspired artistry that keeps your drink insulated while adding a touch of rugged charm to your daily hikes, commutes, or desk-side hydration. The chunky wool blend and intricate braided cables evoke the texture of forest bark and winding trails, making every sip feel like a moment of outdoor escape.
Whether you're a seasoned knitter looking for a quick weekend project or a brave beginner ready to tackle your first cable pattern, this free pattern is designed to guide you through every step with clarity and confidence. The result? A cozy that fits a standard 16.9 oz (500 ml) water bottle with a gentle, stretchy embrace—and a handmade treasure you'll reach for again and again.
Why You'll Love This Pattern
- Perfect for Beginners: Despite the beautiful cable work, the pattern uses only basic stitches and simple cable techniques (C4F and C4B) that are easy to master.
- Eco-Friendly & Sustainable: By knitting your own cozy, you're reducing single-use plastic bottle insulation and creating a reusable, natural alternative.
- Quick Project: With just 120 yards of worsted weight yarn, this cozy can be completed in a single relaxing afternoon.
- Customizable: The earthy two-tone design (Moss Green and Cream) can easily be swapped for your favorite colors to match your style or outdoor gear.
Materials Needed
Before you begin, gather these simple supplies. All items are readily available at your local craft store or online.
- Yarn: Worsted weight wool blend yarn (approx. 120 yards) in earthy tones: 'Moss Green' (MC) and 'Cream' (CC). A wool blend offers warmth, durability, and excellent stitch definition for cables.
- Knitting Needles: US 7 (4.5 mm) knitting needles. You'll also need a cable needle (any short double-pointed needle works) and a tapestry needle for seaming and weaving in ends.
- Gauge: 20 stitches and 26 rows = 4 inches in stockinette stitch. Always check your gauge to ensure a proper fit!
Understanding the Abbreviations
Don't be intimidated by the abbreviations—they're simpler than they look. Here's a quick reference:
- CO: Cast on
- K: Knit
- P: Purl
- C4F: Slip 2 stitches to cable needle, hold in front, knit 2, knit 2 from cable needle
- C4B: Slip 2 stitches to cable needle, hold in back, knit 2, knit 2 from cable needle
- K2tog: Knit 2 stitches together (a right-leaning decrease)
- SSK: Slip, slip, knit (a left-leaning decrease)
- St(s): Stitch(es)
Step-by-Step Instructions
This cozy is worked flat from the bottom up, then seamed up the side. It fits a standard 16.9 oz (500 ml) water bottle with a slight stretch. Follow along carefully, and you'll have a beautiful, functional cozy in no time.
Part 1: The Bottom (Worked in the Round)
We'll start by creating a snug, ribbed circle that forms the base of your cozy.
- Cast On & Join: With MC, CO 40 sts. Join in the round, being careful not to twist. Place a stitch marker to indicate the beginning of the round.
- Rounds 1-8: *K2, P2* repeat around. This creates a classic ribbed edge that will hug the bottom of your bottle.
- Round 9 (Decrease): *K2tog, K2* repeat around (30 sts). This reduces the stitch count to shape the bottom.
- Round 10: *K1, P1* repeat around. This single rib adds a nice transition.
- Round 11 (Increase): *K1, M1 (increase by picking up the bar between stitches and knitting through the back loop), K1* repeat around (45 sts). This increase flares the bottom out to match the body width.
- Round 12: Knit all sts. This plain knit round prepares you for the cable pattern.
Part 2: The Body (Worked Flat in Rows)
Now we transition to working back and forth in rows to create the beautiful cable pattern. This is where the magic happens!
- Turn Your Work: After completing Round 12, turn your work so the wrong side (WS) is facing you. You will now work in rows.
- Row 1 (WS): Purl all sts. This purl row creates a clean base for the cables.
- Row 2 (RS - Right Side): K5, C4F, K4, C4B, K4, C4F, K4, C4B, K4, C4F, K5 (45 sts). Tip: The K5 at each edge forms a simple border, while the C4F and C4B create the twisting cables.
- Row 3 (WS): Purl all sts.
- Row 4 (RS): K5, K4, C4B, K4, C4F, K4, C4B, K4, C4F, K4, K5. Notice how the cables alternate direction—this creates the braided effect.
- Repeat Rows 1-4 until the piece measures 7 inches from the cast-on edge, ending with a WS row. This will give you a cozy that covers the main body of your bottle.
Part 3: The Top Ribbing
We'll finish the top with a stretchy, comfortable ribbed band that keeps your bottle secure.
- Row 1 (RS - Decrease): *K2tog, K1* repeat across (30 sts). This decreases back to the original stitch count for a snug fit.
- Row 2 (WS): *P1, K1* repeat across. This starts the ribbing pattern.
- Row 3 (RS): *K1, P1* repeat across. This completes one full rib repeat.
- Repeat Rows 2-3 for 1.5 inches. This creates a comfortable, stretchy band that won't slip off.
- Bind Off: Bind off loosely in pattern (knit the knits and purl the purls as you bind off). A loose bind-off ensures the top isn't too tight.
Part 4: Finishing Touches
Almost done! These final steps will transform your knitted piece into a polished, functional cozy.
- Seam the Side: Fold the bottom circle up to meet the body (the cast-on edge is now at the bottom). Sew the side seam using the mattress stitch for an invisible, professional finish. Leave the top ribbing open.
- Weave in Ends: Use your tapestry needle to weave in all loose yarn ends securely. This prevents unraveling and gives a clean look.
- Optional Drawstring: For extra security, add a braided drawstring through the top ribbing using CC yarn. Cut 3 strands of CC, each 24 inches long. Braid them together and thread through the ribbing, tying a knot at each end. This adds a charming, functional detail.
Pro Tips for a Perfect Finish
- Check Your Gauge: If your cozy is too tight or too loose, adjust your needle size. A proper gauge ensures the perfect stretchy fit.
- Use Stitch Markers: Place markers between the cable sections to keep track of your pattern repeats. This prevents mistakes and makes counting easier.
- Block Your Work: After seaming, gently block your cozy by wetting it and laying it flat to dry. This evens out the stitches and makes the cables pop beautifully.
- Customize the Length: For taller bottles, simply repeat Rows 1-4 more times before starting the top ribbing.
Care Instructions
To keep your Rustic Trails Cozy looking its best, hand wash in cold water with a gentle wool wash, then lay flat to dry. Avoid wringing or hanging, as this can stretch the cables. With proper care, this cozy will be a beloved companion on many adventures to come.
We hope you enjoy knitting this pattern as much as we enjoyed designing it. There's a special kind of joy in creating something beautiful and useful with your own hands—and this cozy is the perfect project to remind you of that. Happy knitting, and may your trails always be scenic!



