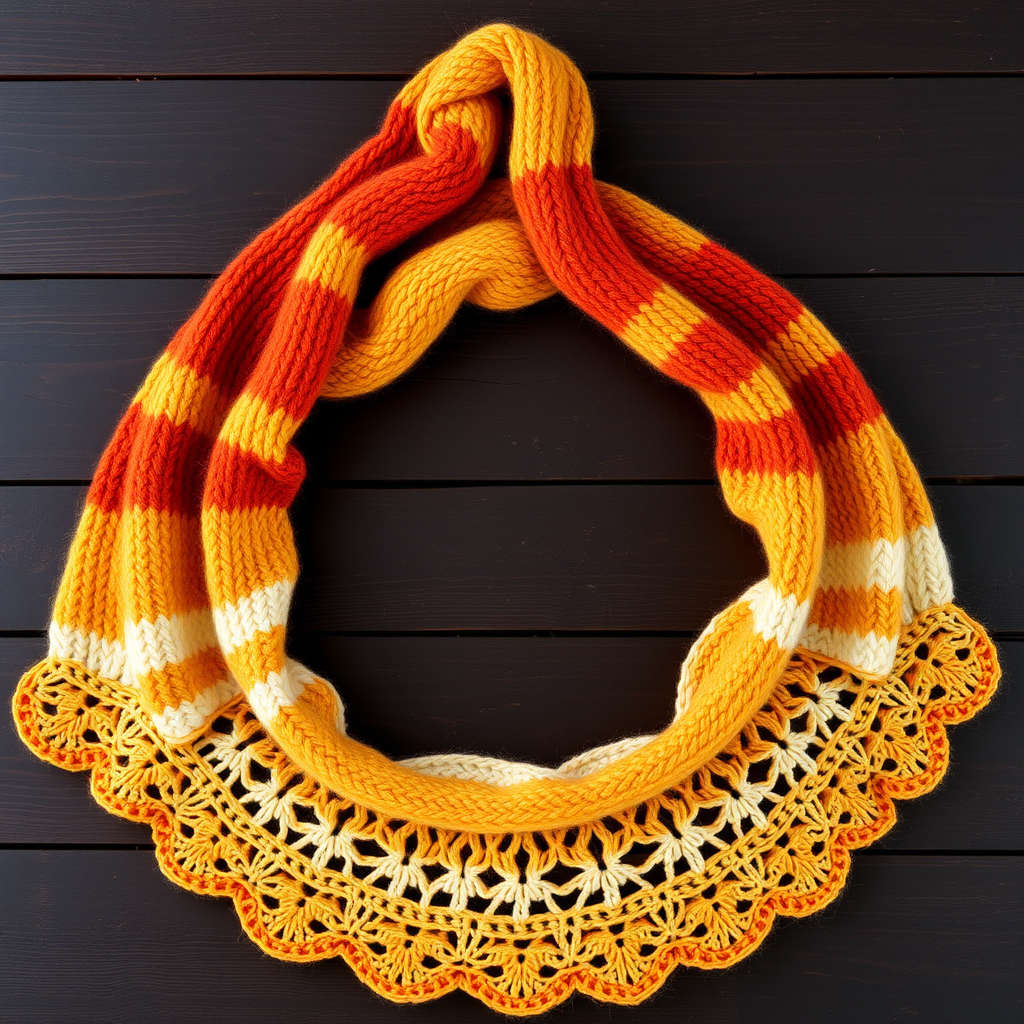
The Aurora Bloom Mosaic Shawl Free Pattern – A Knitted Gradient Wrap with Woven Petal Accents

The Aurora Bloom Mosaic Shawl: A Free Knitted Gradient Wrap with Woven Petal Accents
Wrap yourself in the ethereal beauty of the Aurora Bloom, a knitted shawl that masterfully blends a soft gradient of twilight hues with delicate, woven petal accents. This pattern offers a meditative, rhythmic knit that culminates in a stunning, one-of-a-kind accessory. Whether you're a seasoned knitter looking for a new technique or a confident beginner ready for a rewarding challenge, the Aurora Bloom is designed to be your new favorite project. The combination of smooth stockinette, bumpy garter, and intricate mosaic knitting creates a rich texture that feels as luxurious as it looks. Let's dive into creating this breathtaking piece together.
Materials Needed
Before you begin, gather the following materials to ensure a smooth and enjoyable knitting experience. The quality of your materials will directly impact the final drape and feel of your shawl.
- Yarn: Fingering weight yarn in 3 colors (approx. 400g total):
- Color A: Deep Teal (approx. 150g)
- Color B: Soft Lavender (approx. 150g)
- Color C: Pale Blush (approx. 100g)
- Needles: US 6 (4.0 mm) circular knitting needle with a 32-inch cable (or longer). A long cable is essential to accommodate the increasing number of stitches.
- Crochet Hook: A small crochet hook (size E/3.5mm or F/3.75mm) for the woven petal accents.
- Notions: Tapestry needle for weaving in ends, stitch markers (optional but helpful), and blocking pins/mats.
Gauge: 22 stitches and 30 rows = 4 inches in stockinette stitch (blocked). While gauge is important for sizing, the shawl's triangular shape is forgiving. Focus on consistent tension for the best result.
Step-by-Step Instructions
This shawl is knit from the top center down, using a combination of stockinette, garter, and mosaic knitting techniques. The woven petals are added at the end using a crochet hook. Follow these detailed instructions carefully, and you'll be amazed at what you create.
Abbreviations
- k = knit
- p = purl
- yo = yarn over
- k2tog = knit two together
- sl1 = slip one stitch purlwise
- m1 = make one (increase)
- st(s) = stitch(es)
- RS = Right Side
- WS = Wrong Side
Setup and Top Increases
We'll begin by creating the top point of the shawl and establishing the central increase line.
- Cast On: With Color A, cast on 3 stitches.
- Row 1 (RS): k1, yo, k1, yo, k1. (You now have 5 sts)
- Row 2 (WS): k2, p1, k2.
- Row 3 (RS): k2, yo, k1, yo, k2. (You now have 7 sts)
- Row 4 (WS): k2, p3, k2.
- Continue Increasing: Repeat the increase pattern, working 2 stitches in garter (knit) at the beginning and end of every row. On RS rows, work as follows: k2, yo, knit to the last 2 sts, yo, k2. On WS rows, knit the first 2 and last 2 stitches, and purl all stitches in between. Continue this until you have 51 stitches on your needle, ending with a WS row.
The Mosaic Section
This is where the magic happens. Mosaic knitting creates geometric patterns using slipped stitches and color changes. You will only work with one color per row, making it deceptively simple.
Note: Always maintain the 2-stitch garter border on each edge. This means you will always knit the first and last 2 stitches of every row.
- Row 1 (RS, Color A): k2, *sl1, k1* repeat from * to * until 3 sts remain, sl1, k2.
- Row 2 (WS, Color A): k2, *sl1, k1* repeat from * to * until 3 sts remain, sl1, k2. (Remember: When slipping on the WS, keep the yarn in front of your work to create the float.)
- Row 3 (RS, Color B): k2, *k1, sl1* repeat from * to * until 3 sts remain, k1, k2.
- Row 4 (WS, Color B): k2, *k1, sl1* repeat from * to * until 3 sts remain, k1, k2.
- Repeat: Repeat these 4 rows, alternating colors in this order: A, B, C, B. This completes one full 16-row mosaic pattern repeat.
- Garter Transition: After completing the 16 mosaic rows, work 4 rows in garter stitch (knit all stitches) with Color C.
The Increase Section
Now we'll switch to stockinette and add more increases to widen the shawl dramatically, creating the beautiful triangular drape.
- Switch to Color A.
- Row 1 (RS): k2, yo, knit to 2 sts before the center stitch, yo, k1 (center stitch), yo, knit to last 2 sts, yo, k2. (This increases 4 stitches: one at each edge and one on each side of the center.)
- Row 2 (WS): k2, purl to last 2 sts, k2. (Remember to keep the 2-stitch garter border.)
- Repeat: Repeat these two rows until you have 151 stitches on your needle, ending with a WS row.
Final Garter Border
This border frames the shawl and provides a clean, finished edge before adding the petals.
- Switch to Color B.
- Knit 6 rows in garter stitch (knit every stitch) across all stitches. Important: Continue to work the increases on every RS row exactly as you did in the previous section (k2, yo, knit to 2 sts before center, yo, k1, yo, knit to last 2 sts, yo, k2). This keeps the edge from curling and maintains the shape.
- Bind Off: On the final RS row, bind off all stitches loosely. A loose bind-off is crucial for a stretchy, elegant edge. You can use a larger needle or a yarn-over bind-off method.
Woven Petal Accents
Now for the signature finish! These crocheted petals add a whimsical, three-dimensional touch to the bottom edge.
- Attach Yarn: With your crochet hook and Color C, attach the yarn to the bottom edge of the shawl at one corner.
- Create a Petal: For each petal, follow these steps:
- Chain 10.
- Work 5 double crochet (dc) into the 4th chain from the hook.
- Chain 5.
- Slip stitch into the same base stitch on the shawl's edge where you started.
- Space Evenly: Create a total of 5 petals along the bottom edge of the shawl, spacing them evenly apart. You can use stitch markers to plan their placement before you begin.
- Finish: Weave in all loose ends with your tapestry needle.
Blocking
Blocking is the final, transformative step. It opens up the lace, evens out the mosaic stitches, and gives the shawl its beautiful drape.
- Soak the shawl in lukewarm water with a gentle wool wash for 20-30 minutes.
- Gently squeeze out excess water (do not wring).
- Lay the shawl on a blocking mat and pin it out to its final dimensions, gently stretching to open the mosaic and lace patterns. Focus on the points and edges to create a clean triangle.
- Allow it to dry completely before unpinning.
Congratulations! You've completed the Aurora Bloom Mosaic Shawl. This piece is a true labor of love, and its unique gradient and petal accents make it a stunning addition to any wardrobe. Wear it with pride, knowing you've created something truly special. Happy knitting!