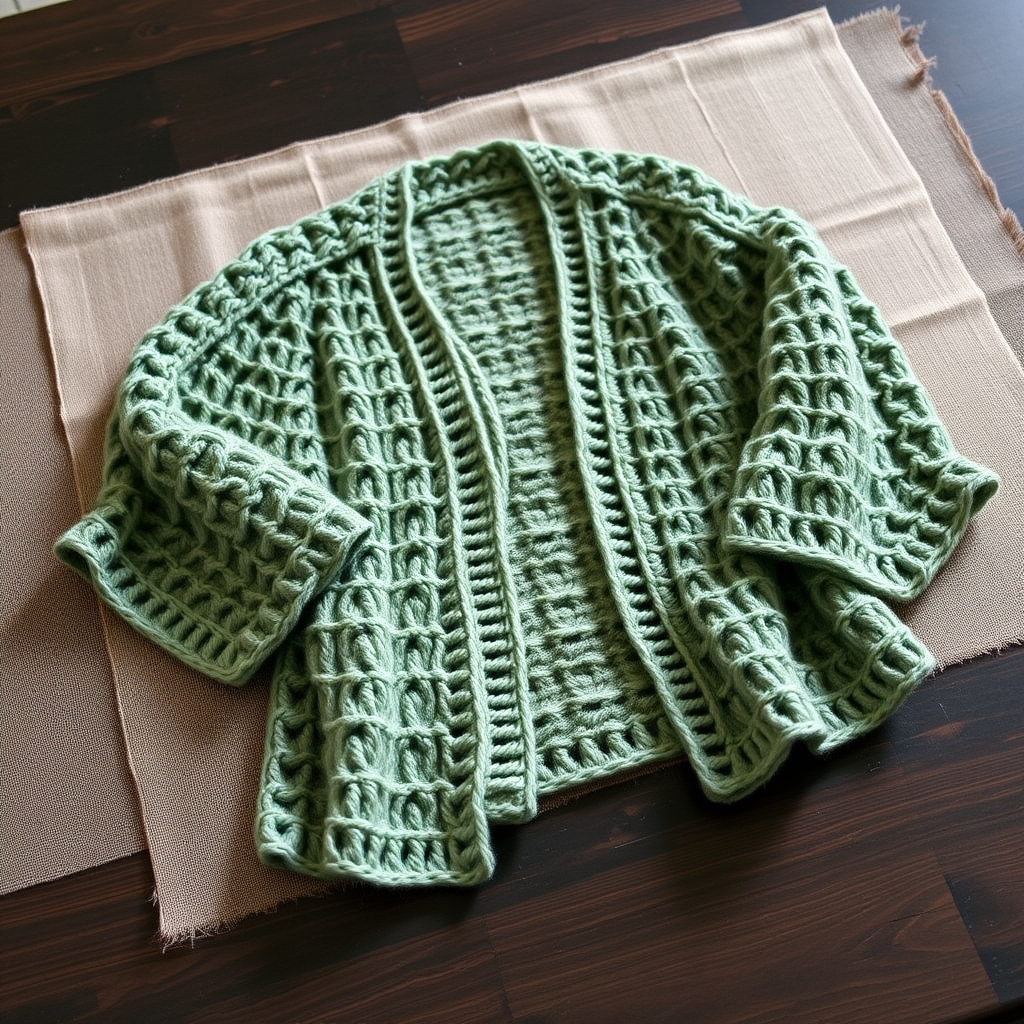
The Driftwood Drape Cardigan: A Free Knitting Pattern for a Textured, Asymmetrical Cocoon Coat

Wrap Yourself in Texture: Introducing the Driftwood Drape Cardigan
There’s something magical about a cardigan that feels like a warm hug on a chilly day. The Driftwood Drape Cardigan is exactly that—a cozy, oversized cocoon coat with a modern, asymmetrical edge. This free knitting pattern combines a rich, textured stitch pattern with a dramatic drape, making it the perfect layering piece for fall and winter. Whether you’re curling up with a book or heading out for a walk, this cardigan adds a touch of sophisticated, handcrafted charm to any outfit. Designed with beginners in mind, this pattern is clear, detailed, and easy to follow, so you can create a stunning, one-of-a-kind garment you’ll be proud to wear.
Materials Needed
Before you begin, gather the following supplies. All measurements are based on the Size M sample shown, with adjustments for S, L, and XL in parentheses.
Yarn
- Weight: Worsted weight (Category 4) yarn
- Amount: Approximately 1200 (1350, 1500, 1650) yards
- Sample Yarn: Lion Brand Wool-Ease Thick & Quick in 'Fisherman' (heathered cream) and 'Charcoal' (deep, soft gray)
Needles & Notions
- Circular Needle: US Size 10 (6.0 mm), 32-inch or longer cord (for working flat and in the round)
- Double-Pointed Needles (DPNs): US Size 10 (6.0 mm) – optional for sleeves if not using magic loop
- Stitch markers (optional, for sleeve increases)
- Tapestry needle for weaving in ends and seaming
- Scissors
Gauge
- Stockinette stitch (after blocking): 14 stitches and 20 rows = 4 inches
- Driftwood Stitch pattern (after blocking): 16 stitches and 24 rows = 4 inches
Tip: Always knit a gauge swatch and block it before measuring. Adjust needle size if necessary to match gauge.
Sizes & Finished Measurements
- Sizes: S (M, L, XL) – shown in size M
- Bust: 44 (48, 52, 56) inches – oversized fit
- Length from shoulder: 28 (29, 30, 31) inches
Step-by-Step Instructions
Follow these detailed steps carefully. The cardigan is worked in pieces and seamed together. The asymmetrical front panels create the signature draped, open-front look.
Stitch Pattern: Driftwood Stitch (multiple of 4 + 2)
This textured pattern alternates between ribbing and smooth stockinette, creating a woven, driftwood-like effect. Practice on a small swatch first.
- Row 1 (RS): *K2, p2; repeat from * to last 2 sts, k2.
- Row 2 (WS): *P2, k2; repeat from * to last 2 sts, p2.
- Row 3: Knit all stitches.
- Row 4: Purl all stitches.
- Repeat Rows 1-4 for pattern.
Back Panel
- Cast on: Using the long-tail method, cast on 78 (86, 94, 102) stitches.
- Work Driftwood Stitch: Begin with Row 1 (RS) of the Driftwood Stitch pattern. Continue working in pattern until the piece measures 26 (27, 28, 29) inches from the cast-on edge, ending after a WS row (Row 2 or 4).
- Bind off: Bind off all stitches loosely (use a larger needle or a stretchy bind-off method if needed). Cut yarn, leaving a 6-inch tail.
Left Front Panel (Longer Side – Drapes Over Right)
- Cast on: Cast on 50 (54, 58, 62) stitches.
- Work Driftwood Stitch: Work in pattern until the piece measures 28 (29, 30, 31) inches from the cast-on edge, ending after a WS row.
- Bind off: Bind off all stitches loosely. Cut yarn, leaving a 6-inch tail.
Right Front Panel (Shorter Side)
- Cast on: Cast on 38 (42, 46, 50) stitches.
- Work Driftwood Stitch: Work in pattern until the piece measures 24 (25, 26, 27) inches from the cast-on edge, ending after a WS row.
- Bind off: Bind off all stitches loosely. Cut yarn, leaving a 6-inch tail.
Sleeves (Make 2)
Sleeves are worked in the round from the cuff up. You can use DPNs or the magic loop method on your circular needle.
- Cast on: Cast on 34 (38, 42, 46) stitches. Distribute evenly on DPNs or prepare for magic loop. Join in the round, being careful not to twist.
- Work cuff: Work in Driftwood Stitch in the round (knit every round – this creates the stockinette texture) for 2 inches.
- Increase Round: K1, M1L (make 1 left), knit to the last stitch, M1R (make 1 right), k1. (2 stitches increased)
- Repeat increases: Repeat the increase round every 6 (6, 5, 5) rounds until you have 54 (58, 62, 66) stitches on your needles.
- Continue even: Work even (no increases) until the sleeve measures 18 (19, 20, 21) inches from the cast-on edge.
- Bind off: Bind off all stitches loosely. Cut yarn, leaving a 6-inch tail.
Finishing & Assembly
- Block all pieces: Soak each piece in lukewarm water with a drop of wool wash, gently squeeze out excess water (do not wring), and lay flat on towels to dry. Pin to the finished measurements listed above. This step is crucial for the drape and texture.
- Sew shoulder seams:
- Place the back and left front with right sides together.
- Sew the top 8 (9, 10, 11) inches of the left front to the back shoulder edge. Use a mattress stitch or backstitch for a secure seam.
- Repeat for the right front, sewing the top 6 (7, 8, 9) inches of the right front to the back shoulder edge.
- The remaining length of the front pieces will drape over the back, creating the asymmetrical silhouette.
- Attach sleeves:
- Fold each sleeve in half lengthwise to find the center of the bind-off edge. Pin this center to the shoulder seam.
- Sew the sleeve cap into the armhole, easing in any fullness. The asymmetrical front pieces will naturally create a draped, open front.
- Sew side and sleeve seams:
- With right sides together, sew the side seams from the underarm to the hem.
- Sew the sleeve seams from the underarm to the cuff.
- Weave in all ends: Use a tapestry needle to weave in all yarn tails securely on the wrong side.
Optional Collar
Add a cozy, ribbed collar for extra warmth and style.
- Pick up stitches: With the right side facing, use your circular needle to pick up and knit approximately 80 (88, 96, 104) stitches evenly around the neckline. Start at the center front edge and work around the entire neck opening.
- Work ribbing: Work in k2, p2 ribbing for 4 inches. This creates a folded or rolled collar effect.
- Bind off: Bind off loosely in pattern (knit the knits and purl the purls). Cut yarn and weave in ends.
Your Driftwood Drape Cardigan is now complete! Enjoy the cozy, textured elegance of your handmade creation. Share your finished project with the hashtag #DriftwoodDrapeCardigan – we’d love to see it!