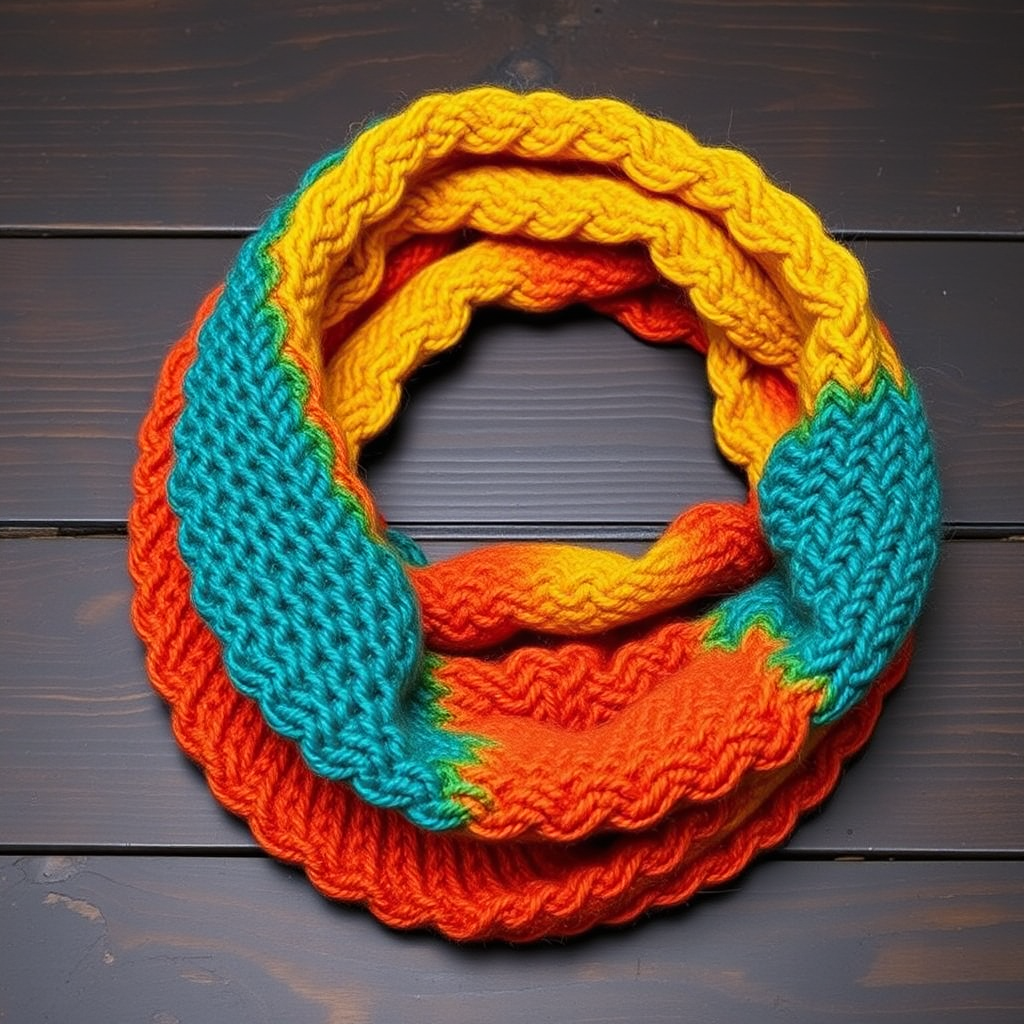
The Emberfall Asymmetrical Cowl Wrap Free Pattern

The Emberfall Asymmetrical Cowl Wrap: A Free Knitting Pattern for Cozy Autumn Style
As the leaves begin to turn and the air carries that familiar crispness, there's nothing quite like wrapping yourself in something handmade, warm, and undeniably stylish. Today, I'm thrilled to share a pattern that has completely captured my heart: the Emberfall Asymmetrical Cowl Wrap. This isn't just another rectangular scarf—it's a modern, dramatic piece with a unique twisted stitch texture and rich autumnal color blocking that catches the light beautifully. Whether you're a seasoned knitter looking for a quick weekend project or a confident beginner ready for a stylish challenge, this cowl wrap is the perfect addition to your fall wardrobe. Let's dive into this free knitting pattern and create something truly special together.
Why You'll Love This Pattern
This cowl wrap is designed to be both accessible and impressive. The asymmetrical drape creates a sophisticated, crescent-like shape when worn, with one side elegantly longer than the other. The twisted stockinette stitch is simple to master but produces a rich, textured fabric that looks far more complex than it is. Plus, the color blocking—deep charcoal, rich cranberry, and warm goldenrod—makes this a statement piece that pairs beautifully with everything from jeans to dresses.
Materials Needed
Before we begin, let's gather our supplies. This project uses super bulky yarn, so it works up quickly—perfect for a satisfying weekend knit.
- Yarn: Lion Brand Wool-Ease Thick & Quick (super bulky weight, 106 yds/97 m per 170g skein) - 1 skein each of:
- Color A: 'Charcoal'
- Color B: 'Cranberry'
- Color C: 'Goldenrod'
- Needle: US 13 (9 mm) 24-inch circular knitting needle (used for flat knitting, so the circular needle just gives you room for all those stitches)
- Other: Tapestry needle for weaving in ends, scissors, stitch markers (optional but helpful)
Gauge: 10 sts x 14 rows = 4 inches in Twisted Stockinette Stitch (after blocking). Getting the gauge right ensures your cowl drapes perfectly, so take a moment to check it before diving in.
Step-by-Step Instructions
This cowl is worked flat in one piece, then seamed at the ends to create the asymmetrical wrap. The twisted stitch pattern is simple but creates a rich, textured fabric. Let's break it down into manageable sections.
Understanding the Twisted Stockinette Stitch
Before we cast on, let's master the stitch pattern. It's a simple two-row repeat that creates a beautiful, twisted texture.
Stitch Pattern: Twisted Stockinette Stitch (worked flat)
- Row 1 (RS): *K1 through back loop (k1tbl), p1; repeat from * to end.
- Row 2 (WS): *K1, p1tbl; repeat from * to end.
Repeat Rows 1-2 for the pattern. The key is remembering that on the right side, you knit through the back loop, and on the wrong side, you purl through the back loop. This twists the stitches and gives that gorgeous, subtle diagonal ribbing effect.
Section 1: Color A (Charcoal) - The Foundation
Let's start building our wrap. This first section forms the long, straight edge of your cowl.
- With Color A (Charcoal), cast on 40 stitches using your preferred method. I recommend a long-tail cast on for a nice, stretchy edge.
- Work in Twisted Stockinette Stitch for 12 inches, ending with a wrong-side row. This gives you a substantial base that will wrap comfortably around your shoulders.
Section 2: Color B (Cranberry) - Adding Richness
Time to introduce our first pop of color. The cranberry adds a deep, warm richness that's perfect for autumn.
- Switch to Color B (Cranberry). Simply drop Color A and pick up Color B, leaving a tail of about 6 inches to weave in later.
- Continue in Twisted Stockinette Stitch for 8 inches, ending with a wrong-side row. You'll see the beautiful color transition taking shape.
Section 3: Color C (Goldenrod) - A Warm Glow
Now for the goldenrod—a warm, sunny yellow that catches the light and adds that "ember" feel to the design.
- Switch to Color C (Goldenrod) in the same manner as before.
- Continue in Twisted Stockinette Stitch for 6 inches, ending with a wrong-side row. Your piece is really taking shape now!
Shaping the Asymmetry: The Magic Trick
This is where the cowl transforms from a simple rectangle into a dramatic, angled wrap. We'll be decreasing stitches on both edges to create the tapered, crescent shape.
- Row 1 (RS): K1tbl, k2tog (through back loops), work in pattern to last 3 sts, p2tog, p1. (This decreases 2 stitches—one at each end)
- Row 2 (WS): Work in pattern across all stitches.
Repeat these 2 rows until 20 stitches remain, ending with a wrong-side row. You'll notice the piece naturally begins to angle, creating that beautiful asymmetrical drape. The decreases should be worked in pattern, so the twisted ribbing continues seamlessly.
Final Section: Color A (Charcoal) - The Finishing Touch
We're bringing it home with another charcoal section to balance the design and create a cohesive loop.
- Switch back to Color A (Charcoal).
- Work even in Twisted Stockinette Stitch for 4 inches, ending with a wrong-side row. No decreases here—just straight knitting to finish.
- Bind off loosely in pattern. I recommend using a stretchy bind-off, like the "Jeny's Surprisingly Stretchy Bind-Off," to ensure the edge doesn't pull or pucker.
Finishing: Seaming and Blocking
Almost done! This final step brings your cowl to life.
- Fold and Sew: Fold the piece in half lengthwise, with the short angled edge meeting the long straight edge. This creates the loop shape. Using your tapestry needle and a length of Color A yarn, sew the cast-on edge to the bind-off edge. Use a mattress stitch or whip stitch—whichever you're comfortable with—to create a secure, invisible seam.
- Weave in Ends: Weave in all loose ends from your color changes and cast-on/bind-off. Take your time here; a clean finish makes all the difference.
- Block Gently: Block the cowl to shape. Since this is a super bulky yarn, you don't need to stretch it aggressively. Simply wet or steam block gently, allowing the asymmetrical drape to fall naturally. Pin it out if needed to help the edges lie flat, but let the fabric relax into its intended shape.
Wearing Your Emberfall Cowl
Once your cowl is dry and finished, the fun begins! Drape it around your neck with the longer side hanging down the front for a dramatic, modern look. Or, twist it once before putting it on for a more secure, snug fit. The asymmetrical design means it looks different from every angle, making it a truly unique addition to your wardrobe.
I hope you love knitting this Emberfall Asymmetrical Cowl Wrap as much as I loved designing it. It's a perfect project for using those beautiful chunky yarns and creating something that feels both luxurious and practical. Happy knitting, and may your autumn be filled with warmth and creativity!