The Hearthstone Brick Warmer Free Pattern – A Knitted Cozy for Chilly Evenings
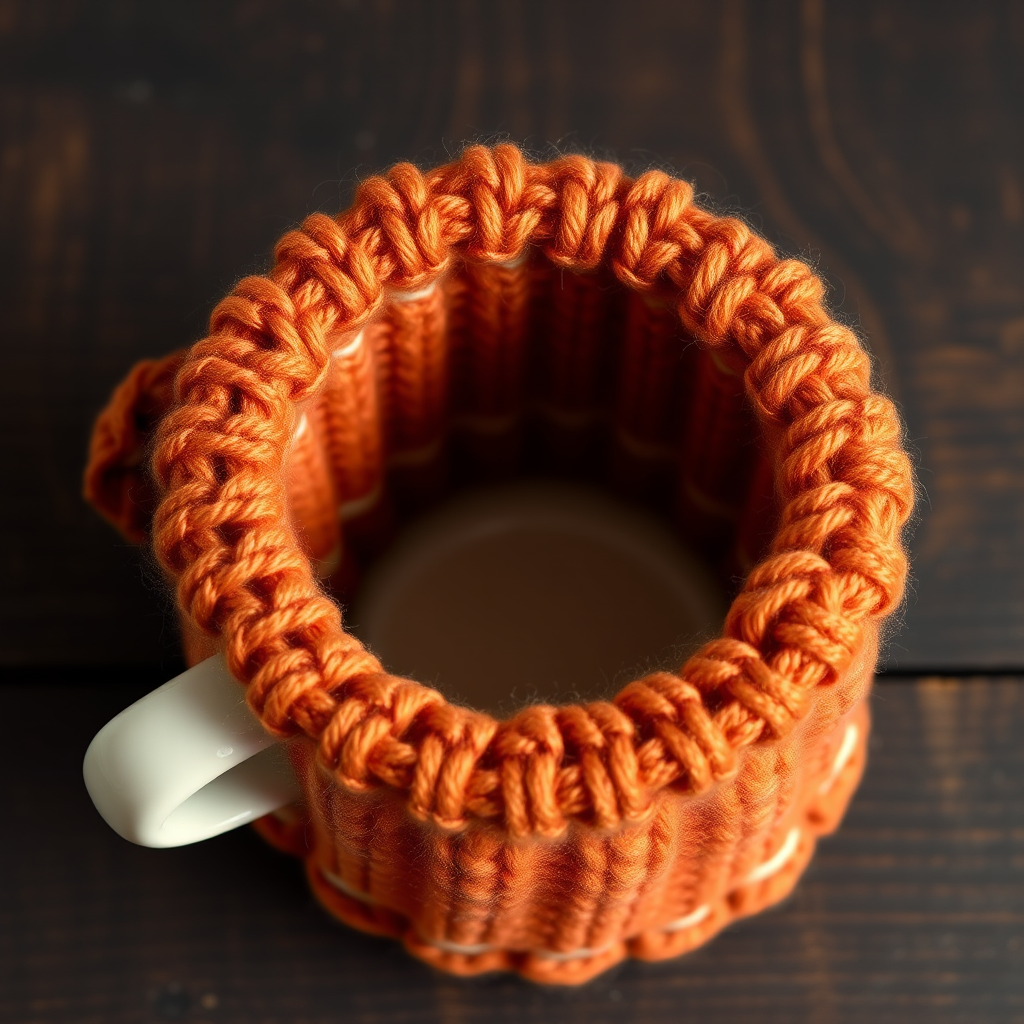
The Hearthstone Brick Warmer Free Pattern – A Knitted Cozy for Chilly Evenings
There’s something deeply comforting about wrapping your hands around a warm mug on a cold evening. Now imagine that mug wrapped in a chunky, textured brick-patterned cozy that feels like a miniature fireplace for your hands. This free knitting pattern transforms simple worsted-weight wool into a rustic, handcrafted treasure that turns every sip into a snug ritual. Whether you're curling up with tea, coffee, or hot cocoa, this mug cozy adds warmth, charm, and a touch of cabin coziness to your daily routine. Plus, it makes a thoughtful handmade gift for friends and family who appreciate the simple joys of slow living.
This pattern is perfect for beginner knitters who have mastered basic knit and purl stitches and are ready to explore slipped stitches and working in the round. The result is a beautifully textured wrap that hugs your favorite stoneware mug, with a visible seam on one side and a handle opening on the other. The interlocking brick pattern is created with simple slipped stitches, giving the cozy a raised, dimensional look reminiscent of a rustic brick wall. Let’s get started!
Materials Needed
Before you begin, gather the following supplies. All items are readily available at your local yarn shop or online.
- Yarn: Worsted weight wool yarn in two colors – Terracotta (MC) and Cream (CC), approximately 50g of each. The wool’s natural heat-retaining properties make it ideal for keeping your drink warm longer.
- Needles: US 7 (4.5mm) knitting needles. You’ll also need a set of double-pointed needles (DPNs) or a circular needle of the same size for working in the round.
- Notions: Stitch marker, tapestry needle for weaving in ends, scissors.
- Optional: One button (if you choose the button closure option) and matching thread.
Gauge: 20 stitches and 26 rows = 4 inches in stockinette stitch. Always check your gauge to ensure a proper fit for a standard 12 oz mug (approximately 8 inches circumference, 3.5 inches tall).
Step-by-Step Instructions
Follow these detailed instructions carefully, and you’ll have a beautiful, functional mug cozy in no time. The pattern is divided into three sections: the base, the brick pattern, and the finishing touches.
Abbreviations
- K = knit
- P = purl
- K2tog = knit two together (decrease)
- Sl = slip stitch purlwise (insert needle as if to purl, slip the stitch to the right needle without knitting it)
- WYIF = with yarn in front (hold the working yarn to the front of the work while slipping the stitch)
Base (Worked Flat)
This section creates the bottom cuff of the cozy. It’s worked flat to give you a neat, stable edge before you join in the round.
- With MC (Terracotta), cast on 40 stitches using your preferred long-tail cast-on method.
- Row 1 (Right Side): Knit all stitches.
- Row 2 (Wrong Side): Purl all stitches.
- Repeat Rows 1 and 2 until the piece measures 3.5 inches from the cast-on edge. End with a wrong-side row (a purl row). This ensures you’re ready to join in the round on a right-side row.
Brick Pattern (Worked in the Round)
Now you’ll join the work in the round to create the seamless, textured brick pattern. This is where the magic happens!
- Join in the round: Carefully transfer your stitches to your DPNs or circular needle. Place a stitch marker at the beginning of the round. Ensure your work is not twisted – the cast-on edge should form a clean circle.
- Round 1: With MC, knit all stitches.
- Round 2: With MC, purl all stitches. (This creates a garter stitch ridge at the base of the brick pattern.)
- Round 3: Switch to CC (Cream). *Slip 1 stitch purlwise with yarn in front (Sl 1 WYIF), knit 3 stitches (K3); repeat from * to the end of the round.
- Round 4: With CC, repeat Round 3 exactly: *Sl 1 WYIF, K3; repeat from * to end.
- Round 5: Switch back to MC. Knit all stitches.
- Round 6: With MC, purl all stitches.
- Round 7: Switch to CC. *Knit 1 stitch (K1), Slip 1 stitch purlwise with yarn in front (Sl 1 WYIF), Knit 2 stitches (K2); repeat from * to the end of the round.
- Round 8: With CC, repeat Round 7 exactly: *K1, Sl 1 WYIF, K2; repeat from * to end.
- Repeat Rounds 1 through 8 until the piece measures 6 inches from the cast-on edge, or until it reaches your desired height to cover your mug. The slipped stitches will create the raised, interlocking brick pattern.
Top Edge
This simple finish gives the cozy a clean, rolled top edge that looks polished and professional.
- With MC, knit one round. This stabilizes the top edge.
- Bind off loosely with MC. To avoid a tight edge, use a needle one size larger for the bind-off, or bind off using the “knit two together” method: knit two stitches, then pass the first stitch over the second, knit one more, pass the previous over, and so on.
Finishing
Now it’s time to assemble your cozy and make it functional for your favorite mug.
- Weave in all ends using a tapestry needle. Be sure to weave them in securely on the inside of the cozy so they’re invisible from the outside.
- Decide on the cuff: You can fold the bottom edge up to create a neat cuff, or leave it straight. If you fold it, the garter stitch ridge will sit at the fold line, creating a lovely ribbed effect.
- Choose your closure method: There are two easy ways to secure the cozy around your mug:
- Option A – Button closure: Sew a button onto one end of the cozy. On the other end, create a small buttonhole by making a yarn-over and knitting two together (K2tog) on the bind-off edge, or simply use the space between stitches as the buttonhole. Overlap the ends and button it up.
- Option B – Sewn seam with handle gap: Fold the piece in half with the handle side open. Sew the bottom and top edges together on the opposite side, leaving a 2-inch opening in the middle for the mug handle. This creates a snug, custom fit.
- Final check: Slip the cozy over your mug, ensuring the handle fits through the opening. Adjust the fit as needed. If it’s too loose, you can sew a small seam on the inside to tighten it. If it’s too tight, simply re-block it gently by wetting and stretching it slightly.
And there you have it – your very own Hearthstone Brick Warmer! This cozy is not just a practical accessory; it’s a small piece of art that brings warmth and character to your kitchen or living room. The combination of terracotta and cream evokes the earthy tones of a rustic fireplace, making it a beautiful addition to any home decor.
This pattern is also a fantastic gift idea. Knit one in your friend’s favorite colors, pair it with a beautiful mug and a bag of gourmet coffee or tea, and you’ve got a heartfelt, handmade present that will be treasured for years. The chunky yarn and simple techniques make it a quick and satisfying project – perfect for a cozy evening in, just like the mug it’s designed to warm.
Happy knitting, and may your sips always be warm and your evenings snug!


