The Sunkissed Dune Tote: A Free Crochet Pattern for a Textured, Raffia Yarn Beach Bag
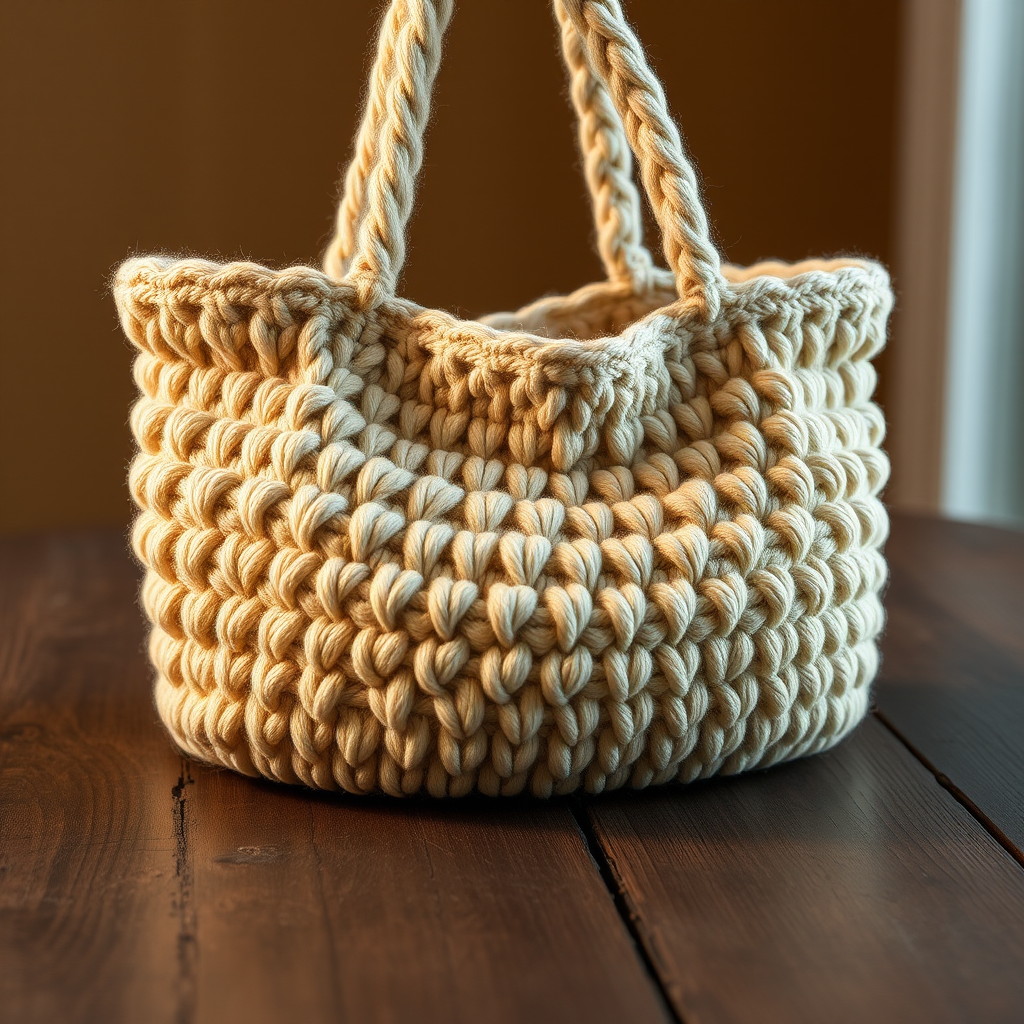
Escape to the Coast: Introducing the Sunkissed Dune Tote
Imagine the warm, sun-bleached sands of a secluded beach, the gentle rhythm of the waves, and the organic texture of woven raffia. That's the feeling captured in the Sunkissed Dune Tote. This free crochet pattern is designed to bring a piece of that coastal serenity into your everyday life. Worked in natural raffia yarn, this bag features a stunning, dimensional texture created by alternating spike and shell stitches. The result is a sturdy, beautiful, and artisan-crafted tote that's perfect for a day at the beach, a farmers' market run, or a stylish summer accessory. Whether you're a seasoned crocheter or a confident beginner looking for a rewarding project, this pattern will guide you through creating a truly unique and inspiring piece.
Materials Needed
To create your own Sunkissed Dune Tote, gather the following materials. Using the specified yarn and hook size is crucial for achieving the correct gauge and the desired sturdy, textured look.
- Yarn: Lion Brand Raffia (or a similar 100% paper raffia yarn) in two colors:
- Color A: 'Natural' – 3 skeins
- Color B: 'Sandy Beige' – 2 skeins
- Crochet Hook: US Size G/6 (4.0 mm) crochet hook
- Other: Yarn needle for weaving in ends and sewing, stitch markers (optional, but helpful for marking the beginning of rounds)
Gauge: 14 single crochet stitches x 16 rows = 4 inches (10 cm) in single crochet. Always check your gauge to ensure your finished bag matches the intended size and shape.
Step-by-Step Instructions
This pattern is worked from the bottom up. We'll start with a flat oval base, then work the sides in a continuous spiral. The straps are made separately and sewn on at the end. Follow these detailed instructions carefully for a flawless result.
Part 1: The Base (Worked in Color A - Natural)
The base is a simple oval that forms the foundation of your tote. Work back and forth in rows.
- Foundation Chain: Chain 26.
- Row 1: Single crochet (sc) in the 2nd chain from your hook and in each chain across. You will have 25 sc. Chain 1, then turn your work. (25 stitches)
- Row 2: Work 2 sc in the first sc (an increase), then sc in each sc across until you reach the last sc. Work 2 sc in the last sc (another increase). Chain 1, turn. (27 stitches)
- Row 3 and beyond: Repeat Row 2. Continue increasing by 2 stitches each row (one at the beginning, one at the end) until you have a total of 35 sc in your row. This will take several rows. Fasten off Color A. Your base is now complete.
Part 2: The Sides (Worked in Continuous Rounds, Alternating Colors)
Now we'll work the sides of the bag in a spiral, creating the beautiful textured pattern. Do not join rounds; use a stitch marker to keep track of the beginning of each round.
- Round 1 (Color B - Sandy Beige): Join Color B with a slip stitch (sl st) in any single crochet of the base. Chain 1, then sc in the same stitch and in each sc around the entire base (35 sc). Do not join. Place a stitch marker in the first stitch of this round to mark the beginning. (35 stitches)
- Rounds 2-3 (Color B): Work 2 more rounds of sc in Color B. You will have 35 sc in each round. (35 stitches each round)
- Round 4 (Color A - Natural): Switch to Color A. Work 1 round of sc. (35 stitches)
- Round 5 (Color A - Spike Stitch Round): This round creates the "dune" texture. *Sc in the next stitch. Then, insert your hook into the stitch that is 2 rows below (the sc from Round 3), yarn over and pull up a long loop to the height of the current row, then complete it as a single crochet (this is a spike stitch). Repeat from * around. You will have 35 sc and 35 spike stitches, alternating. (70 stitches total, but the pattern is 35 sc and 35 spike sts)
- Rounds 6-7 (Color A): Work 2 rounds of sc in Color A. (35 stitches each round)
- Round 8 (Color B - Sandy Beige): Switch to Color B. Work 1 round of sc. (35 stitches)
- Round 9 (Color B - Shell Stitch Round): This round creates the scalloped "wave" texture. *Skip 2 stitches, then work 5 double crochet (dc) in the next stitch. Skip 2 stitches, then sc in the next stitch. Repeat from * around. You will create 7 shells in this round. (7 shells)
- Rounds 10-11 (Color B): Work 2 rounds of sc in Color B. (35 stitches each round)
- Repeat the Pattern: Repeat Rounds 4 through 11 (the sequence of Color A and Color B rounds) until your tote measures approximately 10 inches (25 cm) from the base. This will create several repeats of the spike and shell stitch patterns.
- Final Round (Color A - Natural): Once you've reached the desired height, work one final round in Color A: Chain 1, then sc in each stitch around. Fasten off Color A and weave in the end.
Part 3: The Straps (Make 2, in Color A - Natural)
The straps are worked flat in rows and then folded and sewn to create sturdy, comfortable handles.
- Foundation Chain: Chain 6.
- Row 1: Sc in the 2nd chain from your hook and in each chain across. You will have 5 sc. Chain 1, turn. (5 stitches)
- Row 2 and beyond: Repeat Row 1 (sc in each sc across, chain 1, turn) until the strap measures 24 inches (61 cm) long. Fasten off, leaving a long tail (about 12 inches) for sewing.
Part 4: Assembly
Now we'll put all the pieces together to finish your beautiful tote.
- Create Sturdy Straps: For each strap, fold it in half lengthwise (so the long edges meet). Using the long tail you left, sew the long edges together to create a sturdy tube. This will make the handles strong and comfortable to carry.
- Position the Straps: Pin the ends of one strap to the inside of the tote, about 3 inches (7.5 cm) from one side seam. Repeat for the other strap on the opposite side. Make sure the straps are evenly spaced and not twisted.
- Sew the Straps: Using a yarn needle and the long tails, sew the strap ends securely to the inside of the tote. Sew through both layers of the strap and into the bag fabric. Make several passes to ensure a strong, durable attachment.
- Weave in All Ends: Use your yarn needle to weave in any remaining yarn tails on the inside of the bag. Trim any excess yarn.
Your Sunkissed Dune Tote is now complete! Enjoy your beautiful, handcrafted piece that brings the texture and warmth of the coast wherever you go.


