The Thimble Beanie Free Pattern – Knit a Cozy Textured Crown

The Thimble Beanie Free Pattern – Knit a Cozy Textured Crown
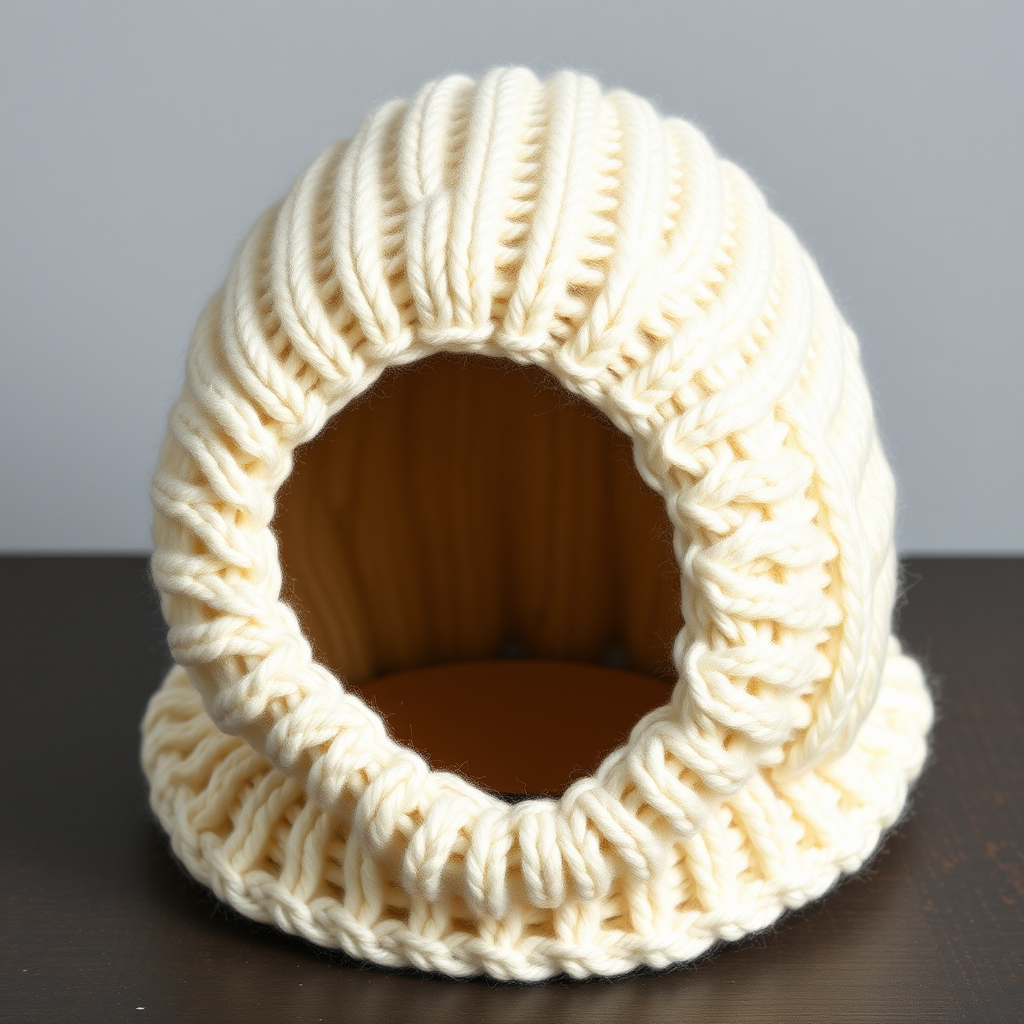
Wrap your head in the plush, tactile embrace of the Thimble Beanie, a knitted crown of soft bobbles and ribbed warmth. This pattern crafts a modern, sculptural accessory that feels like a gentle hug on chilly days. The repeating diamond motif of raised, rounded bobbles—reminiscent of thimbles—creates a dense, three-dimensional texture that is as delightful to touch as it is to wear. Whether you're a seasoned knitter looking for a quick, satisfying project or a confident beginner ready to learn the bobble stitch, this free pattern will guide you through every step to create a cozy, handcrafted hat you'll be proud to wear or gift.
This classic, slouchy beanie is worked from the brim up in the round, making it a seamless and portable project. The worsted-weight yarn ensures it knits up quickly, while the textured bobble pattern adds visual interest and warmth. Let's dive into the materials and instructions to bring this charming accessory to life.
Materials Needed
Before you begin, gather the following supplies. Having everything ready will make your knitting experience smooth and enjoyable.
- Yarn: Worsted weight yarn (approx 220 yards). The pattern suggests Lion Brand Wool-Ease in 'Oatmeal' for a warm, oatmeal cream color that beautifully showcases the texture. However, any worsted-weight yarn of your choice will work perfectly.
- Needles: US 7 (4.5 mm) 16-inch circular needle and a set of double-pointed needles (DPNs) in the same size for the crown decreases. Alternatively, you can use a long circular needle for the magic loop method.
- Other Notions: Stitch marker to mark the beginning of the round, a tapestry needle for weaving in ends, and scissors.
- Gauge: 20 stitches and 28 rows = 4 inches in stockinette stitch. Always knit a gauge swatch to ensure your hat fits as intended.
Step-by-Step Instructions
This pattern is written for two sizes: Adult S/M (M/L). The finished circumference is 20 (22) inches, and the height is 9 (10) inches. The instructions are provided for both sizes, with the numbers for the larger size in parentheses. Follow the numbers that correspond to your chosen size throughout the pattern.
Abbreviations
- k = knit
- p = purl
- k2tog = knit two together (decrease)
- p2tog = purl two together (decrease)
- MB = make bobble (detailed instructions below)
- st(s) = stitch(es)
- rnd = round
Pattern Notes
- The beanie is worked in the round from the brim up, creating a seamless tube.
- The bobble pattern creates a thimble-like texture, with clusters of bobbles arranged in a diamond motif. The bobbles are worked on the right side (outside) of the hat.
- Take your time with the bobbles; they are the star of this pattern and are easier than they look!
How to Make a Bobble (MB)
This pattern uses a 5-stitch bobble. Here's the step-by-step breakdown:
- Increase: Knit into the front and back of the same stitch (k1, p1, k1, p1, k1) – you will now have 5 stitches on your right needle from that one original stitch.
- Turn: Turn your work around (so the wrong side is facing you).
- Purl: Purl all 5 stitches.
- Turn: Turn your work back to the right side.
- Knit: Knit all 5 stitches.
- Turn: Turn your work again.
- Decrease: Purl 2 together, purl 1, purl 2 together (you now have 3 stitches).
- Turn: Turn your work one last time.
- Finish: Knit 3 stitches together (k3tog). Your bobble is complete, and you are back to the original stitch count.
This creates a tight, rounded bobble that pops beautifully from the fabric.
Instructions
Brim
- Cast on 96 (108) stitches. Place a stitch marker and join in the round, being extremely careful not to twist your stitches.
- Work K1, P1 ribbing for 2 inches. This creates a stretchy, snug brim that will hold the hat comfortably in place.
Body
Now you'll begin the textured bobble pattern. Follow the rounds below, knitting the plain rounds to create a smooth background for the bobbles.
- Rnd 1: Knit all stitches.
- Rnd 2: *K6, MB, K5*; repeat from * to * around (8 (9) bobbles made).
- Rnd 3: Knit all stitches.
- Rnd 4: *K3, MB, K3, MB, K3*; repeat from * to * around (16 (18) bobbles made).
- Rnd 5: Knit all stitches.
- Rnd 6: *K1, MB, K3, MB, K3, MB, K1*; repeat from * to * around (24 (27) bobbles made).
- Rnd 7: Knit all stitches.
- Rnd 8: *K3, MB, K3, MB, K3*; repeat from * to * around (16 (18) bobbles made).
- Rnd 9: Knit all stitches.
- Rnd 10: *K6, MB, K5*; repeat from * to * around (8 (9) bobbles made).
- Rnds 11-14: Knit all stitches. This completes one full diamond motif.
- Repeat Rnds 2-14 once more for a longer beanie, or continue to shaping if your desired length is reached. To check, try the hat on – the body should cover your ears and reach the top of your head comfortably.
Shaping (Crown)
Once your beanie reaches the desired length, it's time to shape the crown. You'll be working a series of decrease rounds, alternating with plain knit rounds. Switch to double-pointed needles when the stitches become too tight to fit comfortably on the circular needle.
- Rnd 1: *K10, k2tog*; repeat from * to * around (88 (99) sts).
- Rnd 2: Knit all stitches.
- Rnd 3: *K9, k2tog*; repeat from * to * around (80 (90) sts).
- Rnd 4: Knit all stitches.
- Rnd 5: *K8, k2tog*; repeat from * to * around (72 (81) sts).
- Rnd 6: Knit all stitches.
- Rnd 7: *K7, k2tog*; repeat from * to * around (64 (72) sts).
- Rnd 8: *K6, k2tog*; repeat from * to * around (56 (63) sts).
- Rnd 9: *K5, k2tog*; repeat from * to * around (48 (54) sts).
- Rnd 10: *K4, k2tog*; repeat from * to * around (40 (45) sts).
- Rnd 11: *K3, k2tog*; repeat from * to * around (32 (36) sts).
- Rnd 12: *K2, k2tog*; repeat from * to * around (24 (27) sts).
- Rnd 13: *K1, k2tog*; repeat from * to * around (16 (18) sts).
- Rnd 14: *K2tog*; repeat from * to * around (8 (9) sts).
- Cut the yarn, leaving a 10-inch tail. Thread the tail through a tapestry needle, then pass it through the remaining stitches on your knitting needle. Slip the stitches off the needle, pull the tail tight to cinch the top of the hat closed, and secure with a few stitches.
Finishing
- Weave in all loose ends neatly on the inside of the hat using your tapestry needle.
- Optionally, add a faux fur pom-pom or a knitted bobble on top for extra flair.
- Block gently to shape. To do this, lightly wet the hat, squeeze out excess water (do not wring), and lay it flat to dry on a towel, shaping it to your desired dimensions. This will even out the stitches and enhance the bobble texture.
Congratulations! You've just completed your very own Thimble Beanie. The dense, plush texture and sculptural bobbles make this a standout piece in any winter wardrobe. Whether you keep it for yourself or gift it to a loved one, this handcrafted hat is sure to provide warmth and style for many seasons to come. Happy knitting!